Landscaping
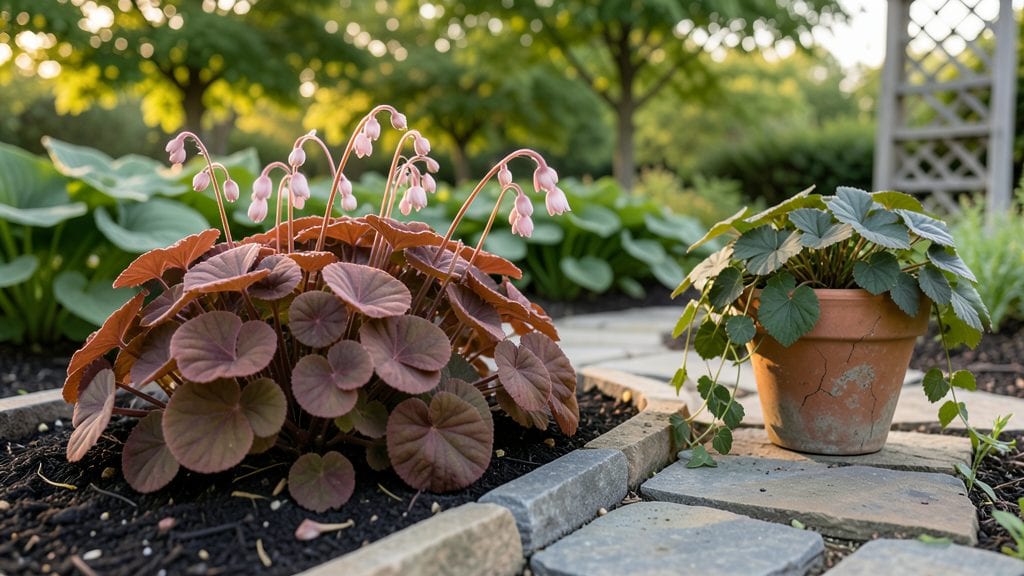
Even the most creative small garden landscaping begins with a blank slate—my first was a concrete slab with one wilted bush, until I turned the fence into a living wall and stacked containers on the patio. The results? More plants, more color, and zero wasted space.
Vertical gardening does the heavy lifting here. You’ll need lightweight planters, sturdy trellises, and plants that thrive in tight spots—think trailing nasturtiums, compact herbs, or dwarf fruit trees. Even a 4-foot wall can hold 50 square feet of growing space, and containers on shelves or hanging pockets multiply that further.
By summer’s end, you’ll have a garden that feels twice as big as it actually is. The key is layering: tall plants back, mid-height in the middle, and spillers at the edges. Add solar-powered lights or a small water feature, and suddenly that postage-stamp yard feels like a secret garden.
Works for apartments, urban backyards, or suburban lots with limited real estate. The best part? Every inch becomes intentional, not just empty space. Let’s make that small yard work harder for you.
📚 In This Guide
- What you need
- Instructions
- Tips and common mistakes
- Wrapping up and next steps
What you need
- ● Soil & Growing Medium: High-quality potting mix (2–5 bags, depending on project size)
- ● Compost or organic fertilizer (1–2 bags for nutrient boost)
- ● Perlite or vermiculite (1 small bag for drainage)
- ● Plants & Greenery: Compact or trailing plants (e.g., ferns, succulents, herbs, or ivy)
- ● Small shrubs or dwarf trees (if adding height)
- ● Vertical-friendly flowers (e.g., petunias, nasturtiums, or creeping thyme)
- ● Structural Elements: Vertical planters or wall-mounted pockets (quantity based on space)
- ● Trellises, cages, or wire mesh (for climbing plants)
- ● Pallets or wooden crates (for DIY vertical gardens)
- ● Hanging planters (macramé or metal, 2–4 units)
- ● Decorative & Functional Add-Ons: Mulch (1–2 bags for moisture retention)
- ● Gravel or pebbles (for drainage layers)
- ● Small pebbles or decorative stones (for aesthetics)
- ○ Watering can or drip irrigation kit (optional but handy!)
- ● Basic Tools: Gloves (1 pair for protection)
- ● Trowel or small shovel (for planting)
- ● Pruners or shears (for trimming)
- ● Measuring tape (1–2 feet long)
- ● Fastening & Assembly: Screws, nails, or brackets (if mounting structures)
- ● Drill or hammer (for securing trellises/planters)
- ● Level (to ensure even placement)
- ○ Optional Extras: Spray bottle (for delicate seedlings)
- ● Landscape fabric (to suppress weeds)
- ● Solar-powered lights (for ambiance)
- ● ✅ Sunlight Assessment: Know your garden’s light conditions (full sun, partial shade, etc.) to pick the right plants.
- ● ✅ Space Planning: Sketch a rough layout—measure walls, fences, or available vertical space.
- ● ✅ Drainage Check: Ensure containers or mounted planters have drainage holes to avoid root rot.
- ● 💡 Pro Tip: Start small! Test a few vertical planters before committing to large structures.
Instructions for small garden landscaping: maximizing vertical space
Transforming a compact yard into a lush, functional space starts with smart vertical planning.
Assess Your Space and Sunlight Patterns
Before buying anything, walk through your yard at different times of day. Note where sunlight hits walls, fences, and trellises—this determines what you can grow vertically. I like to sketch a rough layout marking 6+ hours of direct sun areas in red and partial shade areas in blue. This ensures you place sun-loving plants like ivy or morning glories where they’ll thrive, while shade-tolerant ferns or creeping figs get their ideal conditions.
Measure vertical surfaces like walls, fences, or existing structures. A 6-foot-tall fence can support climbing roses, while a 4-foot wall might work better for trailing petunias. If your space has limited vertical real estate, consider freestanding trellises or tiered plant stands. I’ve found that even small yards can gain 30-50% more growing space by going vertical.
Install Vertical Structures and Supports
Start with sturdy frames for climbing plants. For wooden trellises, use 2x4s or cedar lattice panels (rot-resistant) screwed into walls or buried in the ground. I always pre-drill holes to avoid splitting wood, especially if mounting to brick or stone. For metal or wire cages, ensure they’re coated to prevent rust—galvanized steel lasts years in damp climates.
If you’re working with a fence or chain-link, attach plastic-coated wire mesh or pre-made climbing grids with heavy-duty zip ties or screws. For lightweight options, bamboo stakes or obelisks work well for annuals like nasturtiums or sweet peas. The key is securing supports before planting—digging holes later risks damaging roots or shifting structures.
Layer Plants by Height and Growth Habit
Begin with tall climbers like clematis or honeysuckle at the back of your vertical design. These need strong support and room to grow upward. Next, add mid-height plants such as fuchsias or lobelia in hanging baskets or wall pockets. Finally, fill the bottom with spiller plants like sweet potato vine or creeping thyme to soften edges and prevent soil erosion.
I always group plants by water needs to simplify care. For example, place drought-tolerant succulents like sedum in wall-mounted planters near the top where they get more sun and less moisture loss. Meanwhile, moisture-loving plants like impatiens go in shaded, bottom-tier pockets. This zoning cuts maintenance time in half.
Integrate Functional Vertical Elements
Beyond plants, add practical vertical features to maximize utility. Install wall-mounted planters at varying heights to create visual interest while keeping soil contained. For herbs, I use stackable ceramic pots with built-in drainage—they’re easy to rotate for even light exposure. If space is ultra-limited, hanging gutters or window boxes can double as planters for trailing plants like strawberries or aloe.
Consider adding vertical storage like a pegboard for gardening tools or a trellis with built-in seating (like a bench with lattice backrests). These dual-purpose elements save space while making your garden more inviting. I’ve seen small patios transformed by a simple vertical herb garden that also holds pots of basil, thyme, and mint—now I can harvest fresh herbs without stepping outside.
Maintain and Adjust Over Time
Check supports seasonally for stability, especially after heavy rains or winds. Tighten screws, replace rotted wood, and prune plants to prevent overgrowth from weighing down structures. I prune once in early spring to encourage bushier growth and again in late summer to control height. For climbers, pinch back new growth to 3-4 leaves to promote branching.
Rotate hanging baskets quarter-turn weekly so plants grow evenly toward the light. If you notice yellowing leaves on trailing plants, it’s usually a sign of overwatering—let the top inch of soil dry out before watering again. In winter, protect tender vertical plants with burlap wraps or move potted climbers to a sheltered spot. A little seasonal prep keeps your vertical garden looking vibrant year-round.
Tips & tricks for perfect small garden landscaping
Transforming a small yard into a vibrant vertical garden takes thoughtful planning—and these practical tips will help you avoid common pitfalls while maximizing every inch of space.
Sunlight Mapping: In Step 1, when you're sketching your sunlight layout, I recommend using a small mirror to check for hidden sun pockets behind structures. These often get overlooked but can be perfect for shade-loving plants. Also, take notes at different times of day—morning sun behaves differently than afternoon sun, especially for plants like morning glories that live up to their name. This extra step ensures you're not wasting your best vertical real estate on plants that won't thrive there.
Material Selection: For Step 2's vertical structures, I've found that cedar lattice panels outlast regular wood by years in damp climates. If you're working with chain-link fences, opt for galvanized wire mesh instead of plastic-coated—it handles heavier climbers like clematis better. Don't forget to check local building codes before permanently mounting anything to walls or fences, especially in rental properties where landlord approval might be required.
Plant Layering Strategy: When implementing Step 3's height layering, I suggest starting with your tallest climbers first, then working downward. This prevents smaller plants from getting shaded out before they establish. For example, place your clematis at the back of a 6-foot fence before adding mid-height fuchsias. Also, consider adding a few inches of landscape fabric behind wall-mounted planters to prevent soil from leaking through cracks—this simple step saves you from messy cleanup later.
Maintenance Shortcuts: For Step 5's ongoing care, I've developed a simple system: color-code your pruning tools by plant type. Use red scissors for spring pruning (encouraging growth), green for summer maintenance (controlling height), and blue for fall cleanup (removing dead growth). This visual cue makes seasonal pruning feel less overwhelming. Also, keep a small spray bottle of diluted dish soap (1 tsp per gallon of water) handy—it's perfect for quickly cleaning tools between uses without needing a full scrub.
Pro Tips for Small Garden Landscaping
- Transforming a small yard into a vibrant vertical garden takes thoughtful planning—and these practical tips will help you avoid common pitfalls while maximizing every inch of space.
- Sunlight Mapping: In Step 1, when you're sketching your sunlight layout, I recommend using a small mirror to check for hidden sun pockets behind structures.
- Material Selection: For Step 2's vertical structures, I've found that cedar lattice panels outlast regular wood by years in damp climates.
Frequently asked questions
What are the best plants for vertical gardening in small spaces?
Opt for compact, fast-growing, and low-maintenance plants like succulents, herbs (basil, thyme, mint), ferns, or trailing vines (pothos, ivy). These thrive in vertical planters, trellises, or hanging pots while adding greenery without sprawling. Just ensure they match your sunlight exposure!
How can I make my small garden look bigger than it is?
Use light colors for walls and pathways, mirrors or reflective surfaces, and unified plant styles (e.g., all Mediterranean or tropical). Avoid clutter—keep furniture and decor minimal. Vertical elements like shelves or trellises also draw the eye upward, creating an illusion of more space.
When is the best time to start a small garden landscaping project?
Spring (after the last frost) is ideal for planting, but you can prep year-round! Start with soil prep in early spring or fall, install structures (like trellises) anytime, and add mulch or decor in mild weather. Container gardening lets you plant almost anytime—just adjust watering!
Are there affordable alternatives to expensive vertical garden systems?
Use DIY pallet planters, hanging shoe organizers, or repurposed crates for herbs and flowers. Check thrift stores for old ladders, shelves, or gutters to rig up vertical space. Even wall-mounted hooks with pockets work for small pots. Creativity beats cost!
How do I keep pests away in a small vertical garden?
Prevent pests with neem oil or companion planting (e.g., marigolds with veggies). Ensure good airflow by spacing plants properly, and prune regularly to reduce hiding spots. Beneficial insects like ladybugs can also help—just avoid chemical sprays near edibles!
Wrapping up and next steps
Transforming a small garden into a lush, functional space is all about creativity and smart planning! By leveraging vertical gardening, maximizing every inch, and choosing the right plants and materials, you’ve got everything you need to turn your compact yard into a thriving oasis. 🌿✨
Ready to dive in? Start small—pick one corner or wall to experiment with vertical space, then expand as you gain confidence. Whether it’s a cozy herb garden, a vibrant flower wall, or a stylish trellis, your small garden’s potential is limitless! Grab your tools and get growing!