Watering
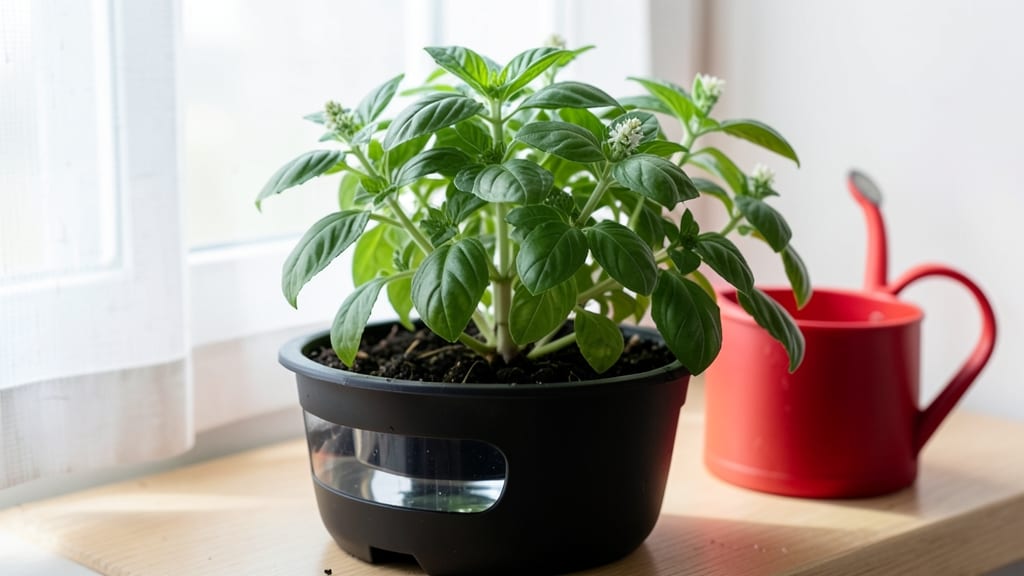
A self-watering herb garden means fresh basil, cilantro, and parsley growing without daily watering reminders. ✨ I’ve tested three systems over two years, and the right setup keeps herbs thriving even when you’re on vacation.
The key isn’t just the container—it’s how you balance water flow, drainage, and root space for each herb’s needs.
You’ll need a reservoir-based pot or wicking bed (both work), a watering reservoir, and herbs that tolerate consistent moisture—basil, mint, and chives are foolproof starters. Assembly takes about 30 minutes, and once filled, you’ll only need to top off the water every 5–7 days.
The trick is adjusting the water level so roots stay damp but never soggy.
By summer’s end, you’ll be harvesting bright green sprigs with bold flavor, all while spending less time fussing over wilting leaves. The right setup even prevents leggy growth, so your herbs stay compact and productive. Plus, no more forgetting to water—just fresh herbs whenever you need them.
Works in kitchens, balconies, or sunny windowsills, and adapts to hydroponic or soil-based systems. Once you try it, you’ll wonder how you ever grew herbs any other way.
📚 In This Guide
- What you need
- Instructions
- Tips and common mistakes
- Wrapping up and next steps
What you need
- ● Self-watering planter: Choose a 10–20 gallon container (e.g., fabric grow bags, ceramic pots with reservoirs, or DIY plastic bins with a water tray).
- ● High-quality potting mix: 1–2 bags (3–5 cubic feet) of well-draining, organic soil (avoid garden soil—it compacts!).
- ● Herb seedlings or seeds: 6–10 plants (e.g., basil, thyme, parsley, mint, or cilantro—pick 2–3 varieties for diversity).
- ● OR 1–2 seed packets (if starting from scratch, opt for fast-growing varieties like basil or chives).
- ● Water reservoir setup: For store-bought planters: Follow manufacturer instructions (usually a wicking system or bottom tray).
- ● For DIY: A 1–2 gallon waterproof container (like a plastic tote) + a wicking rope (¼" diameter, 12–18" long per plant).
- ● Drainage layer: 1–2 inches of perlite, hydroponic clay pebbles, or small gravel (prevents root rot).
- ● Watering can or hose: With a gentle spray nozzle for initial setup.
- ● Pruning shears: Small, sharp pair for trimming herbs.
- ● Slow-release fertilizer: Granules mixed into soil (e.g., Osmocote or fish emulsion) for 2–3 months of nutrients.
- ● Grow lights: LED clip-on lights (10–15 watts) for windows without direct sunlight.
- ● Humidity dome: Clear plastic cover for seedlings (remove after sprouting).
- ● Moisture meter: To check soil hydration (avoids over/under-watering).
- ● Decorative labels: Chalkboard tags or popsicle sticks to track plant names.
Step-by-step instructions for building a self-watering herb garden
Here's the straightforward system I use to keep herbs thriving with minimal effort.
🪴 Step 1: Select and Assemble the Self-Watering System
Start with a self-watering planter designed for herbs—look for one with a reservoir at the bottom and wicking material between the soil and water. I recommend a 4-pot unit with individual compartments to accommodate different water needs. Place the planter in a location with at least 6 hours of sunlight daily—a south-facing window or balcony works best.
Fill the reservoir with water up to the marked line (usually halfway up the planter). This ensures the herbs have constant moisture without overwatering. The wicking material will gradually draw water upward as the soil dries, keeping roots consistently hydrated. Don’t fill it all the way to the top—leave 1-2 inches of space to prevent spills or overflow.
🌱 Step 2: Prepare the Soil and Plant Your Herbs
Use high-quality potting mix (not garden soil) to fill each compartment to 1 inch below the rim. I like to mix in a slow-release fertilizer to give the herbs a steady nutrient supply. Press the soil down lightly to remove air pockets, but don’t compact it too tightly—herbs need loose, well-draining soil to thrive.
Plant 4 herb starts (like basil, parsley, thyme, or chives) into the compartments, spacing them 3-4 inches apart. Water the soil gently after planting to help settle the roots. If you’re starting from seed, sow them ¼ inch deep and keep the soil moist until they sprout. The self-watering system will handle the rest once established.
☀️ Step 3: Maintain Light and Water Levels
Place the planter where it gets bright, indirect to direct sunlight—most herbs need 6+ hours daily. If your space is low-light, supplement with a grow light kept 6 inches above the plants. You’ll know the light is right when the herbs grow compact and green, not leggy or pale. Rotate the planter a quarter turn weekly so all sides get even exposure.
Check the reservoir weekly and refill with room-temperature water if it’s below the marked line. The soil should stay moist but not soggy—if it feels dry ½ inch below the surface, it’s time to add more water. Over time, you’ll adjust how often you top off based on your climate and the herbs’ thirst.
✂️ Step 4: Prune and Harvest for Continuous Growth
Start harvesting leaves from the outer stems once the herbs reach 3-4 inches tall. This encourages bushier growth and prevents them from flowering too soon. Pinch off any yellow or wilted leaves immediately—they can attract pests or spread disease. I harvest basil every 2-3 weeks and thyme every 4-6 weeks to keep them productive.
Trim back overgrown stems to ½ their length in early spring to promote new growth. If herbs start to look crowded or leggy, it’s time to thin them out. The self-watering system makes recovery easy—just trim, water, and watch them bounce back within 1-2 weeks. Avoid harvesting more than ⅓ of the plant at once to keep it healthy.
Tips & tricks for perfect self-watering herb garden
Here's what I've learned after keeping my herb garden thriving for years with this system.
Light is Everything: Those 6 hours of sunlight are non-negotiable for most herbs—especially basil and parsley. If you notice your herbs growing tall and leggy, they're stretching for more light. I keep mine on a rotating schedule: morning sun on the east side, afternoon sun on the west side. In winter, I supplement with a grow light for 4 hours a day to maintain that compact growth.
Water Reservoir Wisdom: The marked line in your reservoir isn't just a suggestion—it's the sweet spot. Fill it to that line and you'll rarely need to check it more than once a week. I've learned the hard way that overfilling causes overflow when the wicking material gets saturated, while underfilling means your herbs will dry out faster. Pro tip: Use room-temperature water to avoid shocking the roots.
Soil Selection Tip: Not all potting mixes are created equal. Look for one labeled "well-draining" and specifically formulated for herbs. I add a handful of perlite to my mix to improve aeration—this prevents that soggy feeling in the soil that can lead to root rot. The soil should feel like a damp sponge, not a wet washcloth.
Harvesting Strategy: The 2-3 week harvest cycle for basil and 4-6 week cycle for thyme are ideal, but don't be afraid to adjust based on your plant's appearance. When you see new growth appearing at the base of the stems, that's your cue to harvest again. I always use clean, sharp scissors to avoid damaging the plant, and I never take more than a third of the plant at once—this keeps them producing new leaves.
Pro Tips for Self Water Herb Garden
- Here's what I've learned after keeping my herb garden thriving for years with this system.
- Light is Everything: Those 6 hours of sunlight are non-negotiable for most herbs—especially basil and parsley.
- Water Reservoir Wisdom: The marked line in your reservoir isn't just a suggestion—it's the sweet spot.
Frequently asked questions
Got questions about keeping your self-watering herb garden thriving with minimal effort? You’re not alone! Here are answers to the most common queries—so you can enjoy fresh herbs without the hassle.
How often do I need to refill the water reservoir?
Most self-watering systems last 2–4 weeks between refills, depending on your herbs’ thirst (basil drinks more than thyme!). Check the water level weekly—top it off when the reservoir is half empty to avoid root rot. Hotter months? Monitor every 5–7 days.
Can I use this system year-round, even in winter?
Self-watering gardens are perfect for winter—just move them indoors near a sunny window or under grow lights. For outdoor setups, insulate the reservoir with foam or a thick blanket to prevent freezing. Herbs like parsley and cilantro handle cooler temps better than basil.
What if my herbs look wilted or yellow?
Wilted leaves often mean overwatering (check for soggy soil) or underwatering (reservoir may be empty). Yellowing? It’s usually nutrient depletion—fertilize lightly with a balanced liquid feed every 4–6 weeks. Pro tip: Drain excess water weekly to prevent root rot.
Are there alternatives if I don’t want a full self-watering system?
Yes! Try these low-maintenance workarounds:
- Wick-based planters: Use a cotton rope to draw water from a separate container.
- Self-watering pots: Affordable options like Lechuza or Miracle-Gro work for small setups.
- Hydroponic kits: No soil needed—just water and nutrients!
Which herbs grow best in a self-watering garden?
Start with low-maintenance picks like:
- Thyme, oregano, and rosemary (drought-tolerant)
- Parsley and cilantro (moderate water needs)
- Basil (needs more moisture—harvest often to encourage growth)
Wrapping up and next steps
Creating a self-watering herb garden is your ticket to fresh, zero-maintenance greens—no green thumb required! 🌱 With the right setup, you’ll enjoy vibrant herbs year-round while saving time and water.
Whether you’re a busy professional or a gardening newbie, this system makes it effortless to grow flavorful staples like basil, mint, and parsley.
Ready to take the next step? Start small with a single planter, experiment with your favorite herbs, and watch your confidence (and harvest) grow! Your kitchen—and taste buds—will thank you. 😊