Picking
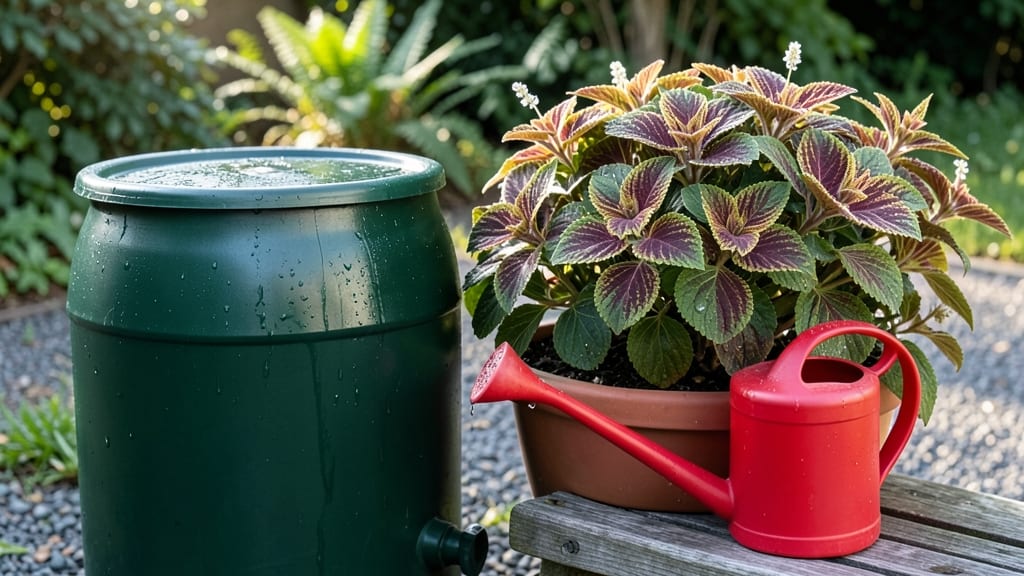
Transforming your garden into a drought-resistant oasis with rainwater harvesting isn’t just eco-friendly—it’s a game-changer for your water bill and plant health. I’ve designed my backyard to collect every drop, turning what would be wasted into a thriving ecosystem that needs no extra irrigation once established.
The key? Matching the right plants to your system and arranging them so water flows naturally where it’s needed most.
You’ll need just a few basics: a rain barrel or cistern, some flexible tubing, and a way to direct downspouts. My setup cost under $200 and took a weekend to install—no fancy plumbing required.
The real magic happens when you pair water-smart plants like lavender, succulents, and native grasses with your collection system. These thrive on less, so you stretch every gallon of harvested rain into maximum growth.
By summer’s end, you’ll have a garden that stays lush even during dry spells, with soil that holds moisture like a sponge. The air smells richer, the birds visit more often, and you’ll spend less time hauling hoses.
Plus, every gallon saved is money back in your pocket—no more paying for water that should be free. Let’s get your design sketched out so you can start collecting that rain before the next storm.
This works for any yard size—from a tiny balcony setup to a full-acre landscape. Urban gardeners can use stacked barrels, while rural plots might need larger tanks buried underground.
The principles stay the same: collect, direct, and let nature do the rest. Your garden will thank you, and so will your wallet.
📚 In This Guide
- What you need
- Instructions
- Tips and common mistakes
- Wrapping up and next steps
What you need
- ● Rainwater collection system: 1–2 55-gallon rain barrels (with diverter spigots) (or a larger cistern for bigger gardens)
- ● 1 first-flush diverter (to filter debris from the first heavy downpour)
- ○ Gutters & downspouts: Gutter guards (optional but highly recommended to reduce maintenance)
- ● Extended downspout (to direct water into barrels)
- ● Storage & filtration: 1 water filter or mesh screen (for sediment removal)
- ● 1 overflow pipe (to prevent spillage)
- ● Garden infrastructure: Drip irrigation kit (with emitters for drought-resistant plants)
- ● Swales or berms (for natural water redistribution)
- ● Solar-powered pump (for elevated gardens)
- ● pH testing kit (to monitor water quality for plants)
- ● Mulch (straw, wood chips, or compost to retain moisture)
- ● Native/drought-resistant plants (e.g., succulents, lavender, or ornamental grasses)
Step-by-Step instructions for designing a rainwater harvesting garden
Creating a self-sustaining garden that thrives on collected rainwater is simpler than you think.
Select the Right Location and Layout
Choose a site with natural drainage and partial shade to minimize evaporation. I always look for areas near existing downspouts or rooflines—this is where rainwater naturally collects. A gentle slope helps guide water flow toward your collection points without pooling. Mark your garden area with stakes and string to visualize the space before digging.
Designate zones based on plant needs: drought-tolerant natives near the collection source and thirstier plants toward the edges. This ensures water reaches where it's needed first. For a 4-plant setup, plan a 10-foot by 10-foot area—enough space for collection barrels, planting beds, and pathways. Sketch a rough layout to map out where barrels, mulch, and plants will go.
Install Collection Barrels and Filtration System
Position your 55-gallon rain barrels under downspouts, ensuring the spout connects directly to the barrel's inlet. Use a first-flush diverter to skip the first dirty runoff—this keeps your water clean. I like to elevate barrels slightly on cinder blocks to prevent backflow into the gutters during heavy rains.
Attach a fine mesh screen over the barrel's opening to block leaves and debris. For a zero-waste system, add a berm or swale around the base to direct overflow into planting beds. This doubles as irrigation and prevents runoff waste. Test the setup during a light rain to confirm water flows smoothly into the barrels.
Prepare Soil and Plant Drought-Resistant Species
Amend your garden soil with 2 inches of compost to improve water retention. Dig in the compost lightly—just enough to loosen the top 6 inches of soil. Avoid deep tilling, which disrupts natural moisture pathways. For a 4-plant system, focus on native species like lavender, sedum, or yucca—they thrive with minimal water.
Plant in clusters based on water needs, with the most drought-tolerant species closest to the barrels. Space plants 18-24 inches apart to allow airflow and reduce evaporation. Water deeply after planting to settle the soil and encourage root growth. Mulch with 3 inches of straw or wood chips to lock in moisture and suppress weeds.
Set Up Irrigation and Water Distribution
Connect a drip irrigation system to your barrels using ¼-inch tubing. Run lines along planting beds, placing emitters near the base of each plant. Adjust flow rates so water drips slowly—about ½ gallon per hour—to avoid runoff. For a 4-plant setup, a single barrel can supply enough water if used efficiently.
Install a manual valve near the barrel to control flow and prevent overwatering. Test the system by filling the barrel and running water through the lines. Watch for leaks or uneven distribution—fix any issues before your plants rely on it. I like to run the system for 10 minutes every 2-3 days during dry spells to keep roots hydrated without drowning them.
Monitor and Maintain the System
Check your barrels weekly to ensure they’re free of mosquitoes (use Bti dunks if needed) and debris. Top off with rainwater whenever levels drop below 20% capacity—this keeps the system ready for dry spells. I also inspect the drip lines monthly for clogs or damaged tubing, especially after heavy rains.
Adjust watering based on plant response: wilting leaves mean it’s time to water, while yellowing suggests overwatering. In winter, reduce irrigation to once every 10 days unless your plants are evergreens. Keep a log of rainfall and water usage to fine-tune the system over time. With this setup, you’ll never waste a drop again.
Tips & tricks for perfect rainwater harvesting garden design
Here’s how to avoid common pitfalls and maximize your drought-resistant garden’s efficiency from the start.
Location and Layout: When selecting your 10-foot by 10-foot area in Step 1, prioritize south-facing slopes for maximum sunlight without overheating. I’ve found that positioning the barrels on the north side of the garden creates natural shade for plants while keeping them accessible. Also, avoid low spots where water might pool—even slight elevation changes can prevent stagnation and mosquito breeding.
Filtration System: In Step 2, don’t overlook the first-flush diverter—this simple addition can cut sediment buildup by 80% over time. For extra protection, wrap the fine mesh screen with a layer of mosquito netting to prevent even small insects from entering. Test the system during a light rain to ensure water flows smoothly into the barrels; any hesitation suggests clogged screens or improper connections.
Soil Preparation: The 2 inches of compost in Step 3 should be mixed just until the top 6 inches of soil are loosened—no need to till deeply. I’ve learned that over-tilling disrupts the natural soil structure, making it harder for roots to establish. For a 4-plant system, consider adding a layer of gravel beneath the planting beds to improve drainage, especially in clay-heavy soils.
Irrigation Timing: Running your drip system for 10 minutes every 2-3 days in Step 4 works perfectly for most drought-resistant plants, but adjust based on rainfall. I’ve found that adding a simple rain gauge near the barrels helps track precipitation—if you’ve had over 1 inch of rain in a week, you can skip the scheduled watering entirely.
Pro Tips for Rainwater Harvesting Garden
- Here’s how to avoid common pitfalls and maximize your drought-resistant garden’s efficiency from the start.
- Location and Layout: When selecting your 10-foot by 10-foot area in Step 1, prioritize south-facing slopes for maximu...
- Filtration System: In Step 2, don’t overlook the first-flush diverter—this simple addition can cut sediment buildup b...
Frequently asked questions
Got questions about rainwater harvesting in your garden?
You’re not alone! Here are some of the most common concerns—and straightforward answers—to help you get started with confidence.
What’s the best time of year to set up a rainwater harvesting system?
Ideally, install your system before the rainy season begins—spring or early summer works best in most climates. This gives you time to test for leaks, acclimate plants, and ensure everything’s ready for the first downpours. If you’re retrofitting, aim for a dry spell so you can troubleshoot without wasting stored water.
How do I keep mosquitoes from breeding in harvested rainwater?
Mosquitoes love stagnant water, so never let rainwater sit uncovered for more than 48 hours. Use a fine mesh screen (like window screen) on all collection points, and consider adding a few mosquito dunks (natural larvicides) to barrels. Stirring stored water occasionally also disrupts larvae development.
Is rainwater harvesting legal in my area? Do I need permits?
Laws vary by state/country—some places require permits for large systems (e.g., over 1,000 gallons), while others only regulate potable water use. Check with your local water utility or environmental agency to avoid fines. Most small-scale garden systems (barrels, cisterns) are exempt, but always confirm!
Can I use harvested rainwater for all my plants, or are some unsafe?
Rainwater is safe for most plants, but avoid using it on edible crops grown directly in soil with the water (e.g., root vegetables like carrots or potatoes). For leafy greens/herbs, rinse them with filtered water post-harvest. Never use untreated rainwater for drinking or cooking—always filter/boil first if needed.
What should I do if my harvested water smells bad or looks murky?
Murky water usually means sediment or algae—stir it gently to redistribute particles, then let it settle for 24 hours before using. A foul odor suggests bacterial growth (common in stagnant water). Drain and clean your system with a vinegar-water mix (1:3 ratio), then refill. For persistent issues, add a UV clarifier or consult a local water expert.
Pro Tip: Start small!
Don’t overcomplicate your first system. A 55-gallon barrel with a screen and a few drought-resistant plants (like succulents or native species) is a great low-maintenance test run. Scale up as you learn what works best for your climate!
Wrapping up and next steps
Creating a rainwater harvesting garden isn’t just about sustainability—it’s about crafting a resilient, zero-waste oasis that thrives even in drought conditions. By repurposing rainwater, you’re reducing waste, cutting costs, and nurturing a garden that’s as eco-friendly as it is beautiful. 🌱💧
Ready to take the next step? Start small—whether it’s installing a simple barrel system or designing a full-scale irrigation setup. Every drop saved is a victory for your plants (and the planet)! Roll up your sleeves and grow something extraordinary.