Pests
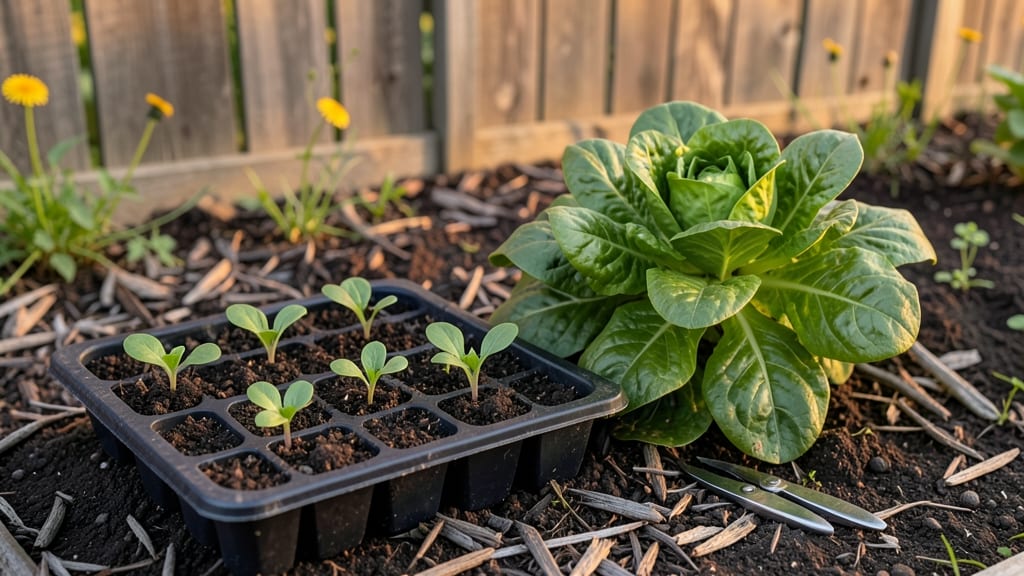
Getting into gardening starts with a single seed—or even just a pot and some soil. 🌱 I remember standing in my first garden center, overwhelmed by choices, until I realized the secret isn’t complexity, but confidence.
The right plants, a few basic tools, and a sunny spot are all you need to begin.
You don’t need a backyard or deep pockets to start. A small container on a balcony, a windowsill herb garden, or even just a few easy-to-grow seeds in a pot will work.
Focus on plants like lettuce, marigolds, or basil—they’re forgiving, fast-growing, and perfect for beginners. The goal isn’t perfection; it’s progress.
Within weeks, you’ll see those first green shoots pushing through the soil, and that’s when the real magic happens. The air smells different, your hands get dirtier, and you’ll understand why gardeners never stop smiling.
Every garden has its challenges, but the joy of watching something grow from nothing is unmatched.
Start small, keep it simple, and remember: every expert gardener was once a beginner. The only mistake is not starting at all. Let’s get those hands dirty!
📚 In This Guide
- What you need
- Instructions
- Tips and common mistakes
- Wrapping up and next steps
What you need
- ● Garden Space: A small plot (4’x4’ minimum) or containers (5-gallon buckets, raised beds, or window boxes).
- ● Pro tip: 💡 If space is tight, try vertical gardening with trellises or hanging planters!
- ● Soil: 1–2 bags of high-quality potting mix (avoid garden soil—it’s too dense!).
- ○ Optional: Compost (1–2 cups per plant) for extra nutrients.
- ● Seeds or Seedlings: Start with 5–10 easy-to-grow seeds (e.g., lettuce, basil, marigolds, or sunflowers).
- ● Pro tip: 🌡️ Check your USDA Plant Hardiness Zone for best seed choices!
- ● Basic Tools: 1 hand trowel (for digging small holes).
- ● 1 pruning shears (for trimming plants).
- ● 1 watering can (or a gentle hose nozzle).
- ● 1 gloves (to protect your hands from dirt and thorns).
- ● Pest Control: Neem oil spray or insecticidal soap (for aphids, caterpillars).
- ● Row covers (lightweight fabric to protect plants from pests).
- ● Comfort & Organization: A wheelbarrow (for moving soil or compost).
- ● Labels (to track what you planted!).
- ● Knee pads (trust us, your knees will thank you!).
Step-by-step instructions for starting your first garden
Gardening doesn’t require a green thumb—just a willingness to learn and a little patience.
🌱 Step 1: Choose Your First Plants
Start with easy, fast-growing plants that forgive mistakes. I always recommend lettuce, radishes, or herbs like basil or mint—they grow quickly, tolerate imperfect care, and give visible results in weeks. Avoid fussy plants like tomatoes or peppers until you’ve gained confidence.
Check your local climate zone to pick varieties that thrive in your area. Seed packets list maturity times, so choose ones labeled "30-60 days" for your first try. This ensures you’ll see growth before losing interest. Skip the garden center’s "premium" seedlings—cheap seed packets are your best friend here.
🪴 Step 2: Set Up a Simple Growing Space
You don’t need a backyard—a sunny windowsill, balcony, or even a sunny spot on a patio works perfectly. Most plants need at least 6 hours of sunlight daily, so face your containers south or west if possible. If natural light is limited, a small grow light (like a 10-inch LED clip light) can save your plants.
For soil, grab store-bought potting mix—it’s sterile and drains well, unlike garden soil that can harbor diseases. Fill small pots (6-8 inches deep) with about 2-3 inches of soil per plant. Use the same mix for all containers to avoid confusing your plants with different growing conditions.
💧 Step 3: Plant and Water Consistently
Follow the seed packet’s depth instructions—usually twice the seed’s width—and space seeds 1-2 inches apart. Press them gently into the soil so they make good contact. Water lightly right after planting, just enough to moisten the soil without soaking it. Overwatering now will drown your seeds before they sprout.
Once sprouts appear, water when the top inch of soil feels dry—about every 2-3 days in warm weather, less often in cool conditions. Use a watering can with a gentle spray to avoid disturbing seedlings. You’ll know you’re doing it right when the soil looks evenly damp but not soggy.
☀️ Step 4: Monitor and Adjust Care
Watch for yellow leaves—this usually means overwatering or too little light. If leaves look pale and stretched, your plants need more sunlight or a stronger light source. Rotate pots a quarter turn every few days so plants grow straight instead of leaning toward the light.
Fertilizer isn’t needed for the first few weeks, but if you notice slow growth after 3 weeks, add a balanced, water-soluble fertilizer (like 10-10-10) at half strength. Follow the package instructions—more isn’t better. Harvest outer leaves first (for lettuce) or snip herbs just above a leaf pair to encourage bushier growth.
⏰ Step 5: Troubleshoot and Learn
Pests like aphids or slugs might visit—blast them off with water or pick them by hand. Don’t panic; even experienced gardeners deal with them. If a plant looks sick, pull it out immediately to prevent spreading to others. Healthy soil and proper watering keep most problems at bay.
Keep a simple journal noting what you plant, when, and how it grows. Jot down mistakes (like overwatering) and successes (like fast radish growth). After your first harvest, celebrate—you’ve just earned your green thumb! Next time, try something slightly harder, like green beans or marigolds.
Tips & tricks for starting your first garden
A few simple strategies that'll help you avoid common pitfalls and build confidence as a beginner gardener.
Selection Tip: When choosing your starter plants, look for seed packets labeled "fast-growing" or "beginner-friendly." Radishes mature in just 30 days, while lettuce and basil take about 45-60 days—these timelines give you quick rewards that keep motivation high. I always check the back of seed packets for "days to maturity" to set realistic expectations.
Lighting Strategy: If your space gets less than 6 hours of sunlight daily, supplement with a 10-inch LED grow light placed just a few inches above your plants. Position it on a timer for 12-14 hours per day to mimic natural daylight cycles. I keep mine running from 6 AM to 8 PM for consistent growth—this makes all the difference for indoor windowsill gardens.
Watering Wisdom: The key to watering is consistency, not quantity. Use your finger to check soil moisture—if the top inch feels dry, it's time to water. In warm weather, this usually means every 2-3 days, but adjust based on your specific conditions. I've learned the hard way that overwatering is more dangerous than underwatering for beginners. Always use a gentle spray to avoid disturbing delicate seedlings.
Harvesting Hack: For leafy greens like lettuce, always harvest the outer leaves first. This encourages new growth from the center and gives you a continuous supply. When harvesting basil, snip just above a leaf pair—this stimulates bushier growth. I've found that regular harvesting actually makes plants more productive, not less. Just don't take more than one-third of the plant at a time.
Pro Tips for Get Into Gardening
- A few simple strategies that'll help you avoid common pitfalls and build confidence as a beginner gardener.
- Selection Tip: When choosing your starter plants, look for seed packets labeled "fast-growing" or "beginner-friendly."
- Lighting Strategy: If your space gets less than 6 hours of sunlight daily, supplement with a 10-inch LED grow light placed just a few inches above your plants.
Frequently asked questions
Got questions? You’re not alone—gardening can feel overwhelming at first! Here are answers to the most common concerns from beginners like you.
Do I need a big yard or garden to start?
Not at all! Even a small balcony, windowsill, or patio can grow herbs, lettuce, or microgreens. Containers and vertical gardens make it easy to grow food in tight spaces. Start with one plant to test the waters.
What’s the best time of year to begin gardening?
Spring and early summer are ideal for most regions, but you can garden year-round with the right crops. Check your frost dates (local last frost date) and plant cool-season veggies like spinach in early spring or fall. Winter? Try cold-hardy greens or indoor herbs!
How do I deal with pests if I’m a beginner?
Start with prevention: healthy soil, proper spacing, and companion planting (like basil with tomatoes) deter pests. For mild issues, try neem oil or insecticidal soap. Avoid chemicals—many harm beneficial bugs too. Pull weeds early to reduce hiding spots for pests!
Is gardening expensive? What’s the cheapest way to start?
Not necessarily! Skip pricey starter kits—save seeds from store-bought veggies (like tomatoes), reuse containers (yogurt cups, buckets), and compost kitchen scraps. Dollar stores often sell seeds, soil, and tools affordably. Patience pays off—your first harvest will feel like a victory!
What if my plants don’t grow well? How do I troubleshoot?
Most failures come from overwatering, poor soil, or too much shade. Check your plant’s needs (e.g., sun vs. shade) and adjust. Yellow leaves? Often means overwatering. Brown edges? Could be underwatering or salt buildup. Keep a plant journal to track progress and learn!
Still stuck? Drop your question in the comments—we’ve all been there!
Wrapping up and next steps
You’ve got everything you need to start your gardening journey—no experience required! 🌱 Remember, the key is to start small, stay curious, and embrace the learning process.
Whether you’re growing herbs on a windowsill or tending a full garden bed, every seed you plant is a step toward a greener, more rewarding life.
Ready to dive in? Pick one plant or project from this guide and take action today! Your future self—and your future garden—will thank you. Happy growing! 🌿