
Landscaping
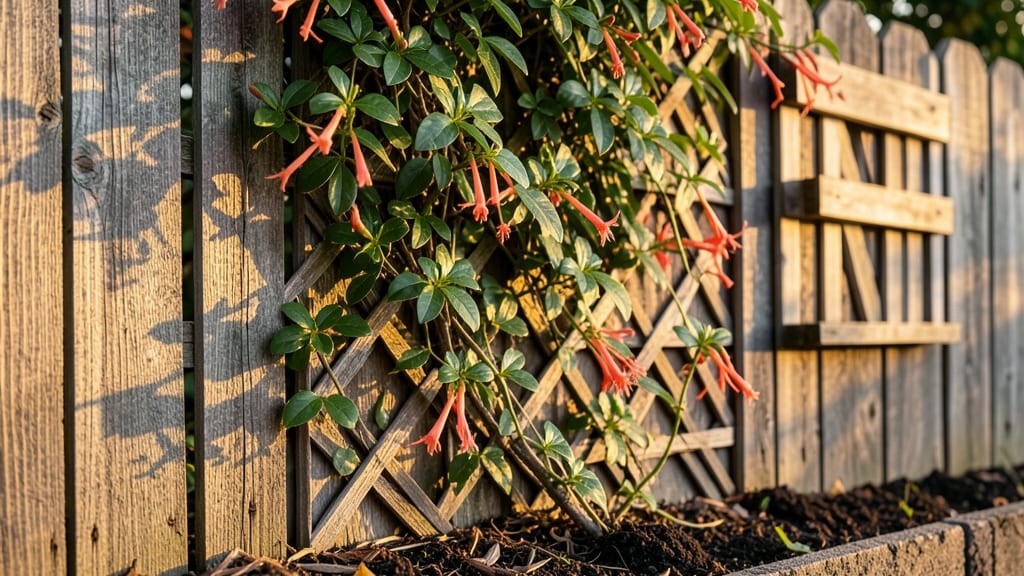
A vertical garden fence turns dead space into a thriving green wall that blocks noise and eyes while adding beauty. 🌿 I built mine along my driveway, and now neighbors comment on the "living privacy screen" instead of the chain-link fence it replaced.
The best part? It grows edible plants, flowers, and vines that stay lush all year—even in partial shade.
You don’t need fancy materials to start. Trellis panels, wooden slats, or even repurposed pallets work as the base. Fast-growing climbers like ivy, clematis, or morning glories give instant coverage, while succulents and herbs thrive in shallow pockets. My setup cost under $150 and took a weekend to assemble.
By summer, you’ll have a vibrant curtain of foliage that softens harsh lines and improves air quality. The fence stays green through winter with evergreens like boxwood or holly, and the vertical space hides clutter while adding value to your home. Plus, it’s easier to maintain than a traditional hedge.
Works for balconies, patios, or large yards—just adjust plant choices to your light levels. Ready to turn that blank wall into a living masterpiece? Let’s get growing!
📚 In This Guide
- What you need
- Instructions
- Tips and common mistakes
- Wrapping up and next steps
What you need
- ● Fencing panels: 6–10 pre-drilled wooden, metal, or PVC panels (4’ x 8’ or custom size; ensure they’re weather-resistant).
- ● Garden fabric: 1 roll (4’ wide x 50’ long) to prevent weeds and retain moisture.
- ● Garden grid or trellis system: 1–2 rolls (adjustable or modular, depending on plant depth needs).
- ● Potting soil: 5–10 bags (lightweight, well-draining mix like cactus or succulent soil for most vertical gardens).
- ● Plants: 20–50 small plants (succulents, herbs, ferns, or shallow-rooted flowers—choose based on sunlight exposure).
- ● Hardware: Galvanized screws (1.5”–2” long, 50–100 pieces).
- ● Heavy-duty zip ties (20–30 pieces) for securing grid to panels.
- ● L-brackets or post caps (4–6 pieces) for stability.
- ○ Watering system (optional but recommended): Drip irrigation kit with soaker hoses (10’–20’ length).
- ● Or a self-watering reservoir (5–10 gallons).
- ● Drill with driver bit set.
- ● Level (2’–4’ bubble level).
- ● Measuring tape.
- ● Scissors or utility knife (for cutting garden fabric/grid).
- ○ Staple gun (for securing fabric, optional).
- ● Safety gloves and goggles.
- ● Location: Ensure your fence has a sturdy post or wall anchor (check local building codes for height/weight limits).
- ● Sunlight: Research your plants’ needs—most vertical gardens thrive in partial sun (4–6 hours/day).
- ● Drainage: Add a 1” layer of gravel or perlite at the bottom of each panel to prevent root rot. 💡 Pro tip: Test your soil’s drainage by filling a bucket with water—if it drains in
- ● Maintenance: Plan for seasonal plant swaps (e.g., winter-hardy options like ivy or sedum).
Step-by-Step instructions for building a vertical garden fence
Here's how to transform a plain fence into a thriving vertical garden that adds privacy and beauty.
🪴 Step 1: Gather Materials and Assess Your Space
Start by measuring your fence's height and length to determine how much greenery you can fit. I like to plan for 12-18 inches of vertical spacing between plant pockets—this gives roots room to spread while keeping maintenance manageable. Gather your supplies: a sturdy wooden or metal fence (existing or new), 1-2 inch thick cork slabs or plastic plant pockets, a drill with ½-inch bit, outdoor-rated screws, and a level.
Real talk: If your fence is already installed, skip the measuring step and focus on the pocket placement. For new fences, pre-drill holes every 12 inches vertically and 18 inches horizontally to create a grid. This ensures even distribution and prevents overcrowding as plants mature. Use the level to mark straight lines—crooked pockets will make watering and planting a nightmare later.
💧 Step 2: Install Plant Pockets or Attach Cork Slabs
For plastic pockets, follow the manufacturer's instructions to attach them to your fence grid. Most use ¼-inch outdoor screws spaced every 6 inches along the pocket's edge. If using cork slabs, screw them directly into the fence, leaving ½-inch gaps between slabs for drainage and root access. I prefer cork because it's lightweight, breathable, and blends naturally with any fence style.
Don't skip the drainage check! Poke a small hole in the bottom of each pocket or slab if it doesn't have one. Water should drain freely within 10-15 minutes after watering—if it pools, roots will rot faster than your plants can grow. Once installed, give everything a gentle tug to ensure pockets are securely fastened. You don't want them swaying in the wind and popping off mid-season.
☀️ Step 3: Select and Plant Drought-Tolerant Climbers
Choose plants that thrive in vertical spaces and match your light conditions. For full sun, try ivy, clematis, or morning glories; for partial shade, opt for ferns, creeping fig, or sweet potato vine. I always start with 3-4 plants per square foot of fence space—this creates a lush look without smothering each other. Water the soil mix thoroughly before planting to help roots settle quickly.
Planting is simple: slide young plants into pockets or tuck them into cork slabs, then secure with a small staple or twist tie. Space them 6-12 inches apart depending on mature size. Watch for the first 2-3 weeks as plants establish roots—you'll see new growth within that time if everything's right. If leaves yellow or wilt, you're either overwatering or the pockets aren't draining properly.
🌿 Step 4: Water and Maintain for Year-Round Growth
Water deeply 2-3 times per week during the first month, then taper to once weekly once plants are established. I use a gentle spray nozzle to avoid dislodging plants from pockets. Check soil moisture by sticking your finger 1 inch deep—if it's dry, water; if damp, wait another day. Mulch the top of pockets with ½-inch of shredded bark to retain moisture and suppress weeds.
Prune leggy growth in early spring and late summer to encourage bushier plants. Trim back ⅓ of the longest stems to redirect energy to new shoots. This keeps your vertical garden looking full and controlled. Fertilize lightly every 6 weeks with a balanced, slow-release fertilizer—too much will burn roots and cause more harm than good.
⏰ Step 5: Seasonal Care for Long-Term Success
In fall, cut back dead or dying foliage but leave some stems for winter interest. Wrap tender plants in burlap if your winters drop below 20°F. Most vertical garden plants are hardy, but a little protection goes a long way. In spring, remove any remaining winter wraps and refresh mulch. You'll see new growth within 2-3 weeks as temperatures rise.
Here's the thing—vertical gardens need regular attention, but the payoff is worth it. A well-maintained fence will provide 3-5 feet of privacy within a year, plus the joy of watching vines climb and flowers bloom. Adjust watering as seasons change, and you'll have a thriving green wall that outshines any plain fence.
Tips & tricks for perfect vertical garden fences
Transforming your fence into a lush vertical garden is easier than you think—here are the tricks that'll make all the difference between a decent start and a stunning green wall.
Drainage is Everything: That 10-15 minute drainage test after watering is non-negotiable. I've seen too many vertical gardens fail because water pooled at the bottom. If your pockets or slabs don't have drainage holes, drill them yourself—just use a small bit to avoid damaging the material. Trust me on this: roots need oxygen as much as water, and proper drainage prevents that dreaded mushy soil smell.
Plant Spacing Matters: The 6-12 inch spacing between plants in Step 3 might seem generous, but it's crucial. Crowded plants compete for nutrients and light, leading to leggy growth and weak stems. Start with 3-4 plants per square foot as recommended, but if you're using fast-growing vines like morning glories, give them that full 12 inches. You'll thank yourself when you're not constantly pruning back overgrown stems.
Seasonal Prep Saves Time: Before winter hits and those temperatures drop below 20°F, take 10 minutes to gather burlap and twine. Wrapping tender plants now means you won't have to scramble when the first frost arrives. I like to bundle plants loosely—tight wraps can trap moisture and cause rot. In spring, remove the wraps gradually over 2-3 weeks to avoid shocking the plants with sudden temperature changes.
Watering Wisdom: Those first 2-3 weeks after planting are critical—water deeply every other day if your area isn't getting rain. The key is to soak the soil mix thoroughly until water runs out the drainage holes. After that, let the top inch dry between waterings. Overwatering is the #1 killer of vertical gardens, and it's easy to do when you're excited about your new green wall. A gentle spray nozzle helps prevent dislodging plants while watering.
Pro Tips for Vertical Garden Fence
- Transforming your fence into a lush vertical garden is easier than you think—here are the tricks that'll make all the difference between a decent start and a stunning green wall.
- Drainage is Everything: That 10-15 minute drainage test after watering is non-negotiable.
- Plant Spacing Matters: The 6-12 inch spacing between plants in Step 3 might seem generous, but it's crucial.
Frequently asked questions
Got questions about transforming your space with a vertical garden fence?
You’re not alone! Here are some of the most common queries—and their straightforward answers—to help you get started with confidence.
What’s the best time of year to install a vertical garden fence?
For most climates, spring or early fall is ideal—soil is workable, temperatures are mild, and plants have time to establish roots before extreme weather. Avoid winter (frost risk) or peak summer (drought stress). If you’re in a warm zone, late winter can work too! Pro tip: Start with hardy plants like ivy or succulents if installing outside optimal seasons.
How much does a DIY vertical garden fence cost compared to pre-made options?
DIY kits typically range from $50–$200 for basic wooden or metal frames with fabric pockets, depending on size. Pre-made panels (like Living Wall Systems) can cost $100–$500+, but they’re ready to install. Cost-saver tip: Repurpose pallets, trellises, or even old gutters for a budget-friendly look!
Do vertical garden fences need special irrigation?
Yes! Self-watering systems (like drip irrigation or reservoir pockets) are a game-changer for consistent moisture. For smaller setups, a spray nozzle on a timer works well. Troubleshooting tip: If leaves brown, check for overwatering (root rot risk) or underwatering (dry edges). Adjust based on your plant types!
Can I use a vertical fence for edible plants, or is it just for ornamentals?
Herbs (basil, mint), strawberries, cherry tomatoes, and leafy greens thrive in vertical gardens. Just ensure your design supports weight and drainage. Bonus: Edible fences double as privacy and a harvest—win-win! Start with shallow-rooted plants for beginners.
What’s the best way to keep pests away from my vertical garden fence?
Prevention is key: Neem oil or insecticidal soap sprays deter common pests like aphids. Physical barriers (fine mesh over pockets) work for crawling critters. Pro tip: Encourage predator insects (ladybugs!) by planting companion flowers like marigolds nearby. Rotate plants seasonally to disrupt pest cycles.
Will a vertical garden fence block noise effectively?
While it won’t match a solid brick wall, a dense, multi-layered design (e.g., ivy + bamboo + succulents) can reduce noise by 10–20 dB. For better results, add a second layer (like lattice or privacy screen) behind the greenery. Test placement near your noise source!
Wrapping up and next steps
A vertical garden fence isn’t just a stylish upgrade—it’s a game-changer for small spaces, offering privacy, beauty, and year-round greenery without sacrificing square footage. 🌿 Whether you’re a seasoned gardener or a beginner, this project is adaptable, budget-friendly, and packed with creative potential.
With the right materials and a little planning, you can transform your outdoor space into a thriving, eco-friendly oasis.
Ready to get growing? Start small—pick a section of your fence, gather your supplies, and let your green thumb shine! Your future self (and your neighbors) will thank you.