
Tools
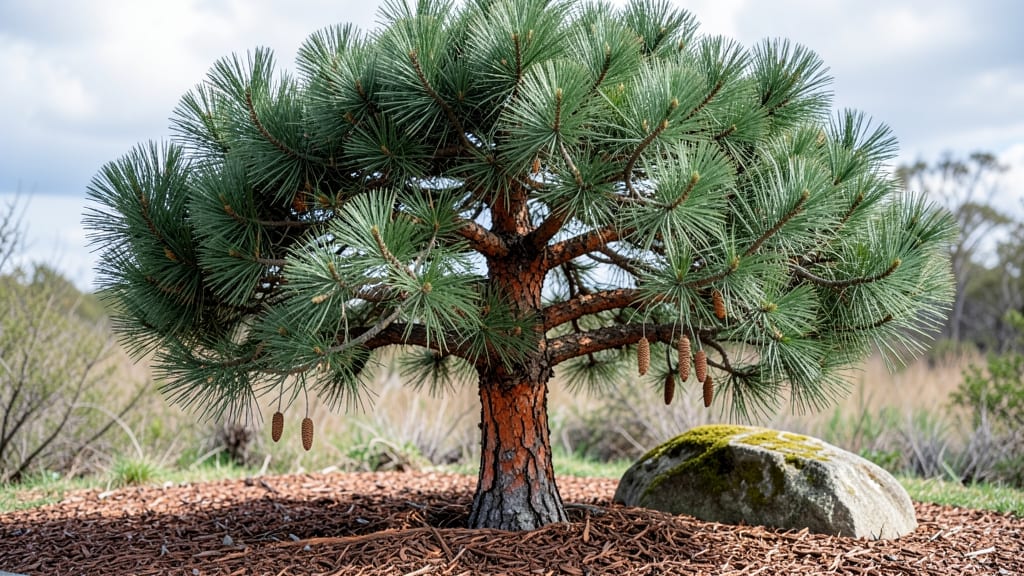
A pine garden bed transforms your yard into a fragrant, textured retreat that thrives year-round with minimal fuss. 🌿 I built mine last autumn using reclaimed pine logs and pine straw mulch, and it’s become the quietest corner of my garden—where the scent of resin lingers even in winter and the vertical layers create natural privacy.
The best part? It’s easier to maintain than traditional beds because pine needles suppress weeds and retain moisture better than regular mulch.
This design works for any space, from a cozy backyard nook to a sprawling landscape. You’ll need pine logs or branches (fresh or weathered), pine straw, a few pine-friendly plants like lavender, sedum, or ferns, and basic tools like gloves and shears.
The rustic look pairs perfectly with stone pathways or modern planters, making it versatile for any aesthetic. Plus, the vertical structure adds height without taking up extra ground space.
By summer, your bed will be a lush tapestry of greens and soft blues, with the occasional pinecone adding texture. In fall, the needles turn golden, and in winter, the evergreen branches keep the space feeling alive.
It’s the kind of garden feature that makes neighbors pause and ask, “What’s that amazing smell?”—and the answer is simple: pine.
Whether you’re working with a small patio or a large yard, this bed adapts to your needs. For shady spots, opt for ferns and moss; for sunny areas, add drought-tolerant shrubs.
The key is letting the pine’s natural beauty shine while keeping maintenance light. Ready to create your own fragrant, low-effort sanctuary?
📚 In This Guide
- What you need
- Instructions
- Tips and common mistakes
- Wrapping up and next steps
What you need
- ● Pine lumber: 2x4s or 2x6s (quantity depends on size; ~10–15 pieces for a small-to-medium bed, 20+ for larger designs). Use untreated or cedar-treated wood for longevity.
- ● Wood screws: 2.5–3 inch deck screws (20–30 screws for a standard bed). Opt for stainless steel or galvanized to prevent rust.
- ● Exterior wood glue: For extra reinforcement (1 tube).
- ● Landscape fabric: To line the bed and prevent weeds (1 roll, ~3–4 feet wide).
- ● Drainage material: Gravel or small rocks (5–10 lbs for a small bed).
- ● Potting soil: Well-draining mix (2–3 cubic feet, depending on bed size).
- ○ Optional: Wood stain or paint (for weatherproofing), corner braces (for extra stability), or pre-drilled holes for screws.
- ● Measuring tape and pencil for marking cuts.
- ● Circular saw or miter saw for precise cuts.
- ● Drill/driver with screw attachment.
- ● Safety gear: Gloves, goggles, and ear protection.
- ○ Optional: Clamps (to hold pieces together while assembling), level (to ensure even placement), or a sander (for smooth edges).
- ● A level outdoor space (patio, deck, or ground) with access to electricity (if using power tools).
- ● Basic woodworking knowledge or a willingness to follow step-by-step instructions.
- ● Sunlight considerations: Choose a spot with partial shade to full sun, depending on your plants.
- ● Weather-appropriate timing: Build on a dry, calm day to avoid rain or wind interference.
Step-by-Step instructions for building a pine garden bed
This rustic wooden planter brings vertical charm to any garden—here’s how to construct it with simple tools and natural materials.
🪴 Step 1: Gather and Prepare Pine Materials
Start by selecting 4 untreated pine boards (each 8 feet long, 6 inches wide, and 1.5 inches thick) for the frame. I like to use 2×6 pine lumber because it’s sturdy yet lightweight enough to move if needed. Sand all edges and surfaces with 80-grit sandpaper to remove splinters and create smooth surfaces for planting.
Cut two boards to 4 feet for the shorter sides and two boards to 6 feet for the longer sides. This creates a 4×6-foot rectangular bed—perfect for small perennials, herbs, or seasonal flowers. Mark measurements with a pencil before cutting to avoid mistakes. If you don’t have a saw, borrow one from a local hardware store; they often rent tools for small projects.
☀️ Step 2: Assemble the Frame with Outdoor Screws
Lay the 6-foot boards parallel on a flat surface, spacing them 4 feet apart. Place the 4-foot boards at each end to form a rectangle. Secure the corners with 3-inch exterior wood screws (galvanized or stainless steel to resist rust). Pre-drill 1/8-inch holes at each corner to prevent splitting—this is especially important for pine, which can crack if screws are driven directly in.
Double-check the square corners by measuring diagonally from one corner to the opposite. If both diagonals measure 7.2 feet, your frame is perfectly rectangular. Stand the frame upright and brace it with temporary supports (like cinder blocks or sawhorses) to keep it stable while you attach the bottom.
🌱 Step 3: Add the Bottom and Reinforce Stability
Cut two additional pine boards to 4 feet long for the bottom frame. Attach them 1 inch from the bottom of the sides using 2.5-inch exterior screws, leaving a 1-inch gap at the bottom for drainage. This gap prevents waterlogging while keeping soil in place. Line the inside of the bed with landscape fabric to block weeds and retain moisture.
For extra durability, add corner braces (L-shaped metal brackets) to reinforce the structure. These are optional but highly recommended if your bed will be exposed to wind or heavy plants. Fill the bed with 3 cubic feet of potting mix (or garden soil amended with compost) to create a 4-inch-deep planting layer. Press the soil lightly to eliminate air pockets.
✂️ Step 4: Finish and Plant for Year-Round Appeal
Apply a water-based polyurethane sealant to protect the pine from moisture and insects. I use a semi-transparent stain in a natural tone to preserve the wood’s rustic look while extending its lifespan. Let the sealant dry completely (24 hours) before planting. Avoid oil-based stains—they can harm plants and attract pests.
Plant drought-tolerant perennials like lavender, sedum, or ornamental grasses along the edges for vertical interest. Add evergreen shrubs like boxwood or dwarf juniper for winter structure. Water deeply after planting, then once weekly during dry spells. The pine bed’s natural texture pairs beautifully with stone mulch or gravel for a cohesive look.
💧 Step 5: Maintain and Refresh Seasonally
Check the bed’s stability annually, tightening screws if the frame shifts. Replace landscape fabric every 2-3 years to prevent decomposition. In late winter, refresh the mulch and trim overgrown plants to maintain the bed’s clean lines. Pine beds age gracefully—over time, the wood silvers naturally, adding to the garden’s rustic charm.
Here’s the thing—pine beds require minimal upkeep compared to plastic or metal planters. The key is consistent drainage and seasonal pruning. With proper care, your pine garden bed will stay beautiful for 5-10 years, becoming a focal point in your outdoor space.
Tips & tricks for perfect pine garden bed construction
Building a pine garden bed is all about balancing rustic charm with sturdy construction—here are the key details that make all the difference.
Precision Cutting Tip: When cutting your pine boards in Step 1, use a straightedge guide along your pencil markings to ensure clean, accurate cuts. I've learned the hard way that even a slight angle can throw off your 4×6-foot dimensions. A simple carpenter's square clamped to your work surface works wonders for keeping cuts perfectly straight.
Screw Placement Strategy: In Step 2, when pre-drilling those 1/8-inch holes, angle your drill slightly (about 15 degrees) toward the center of the board. This creates a tiny pilot hole that prevents the wood from splitting when you drive in the 3-inch exterior screws. Trust me on this—it's the difference between a sturdy frame and one that wobbles after the first rain.
Drainage Design: The 1-inch gap at the bottom in Step 3 is non-negotiable for long-term success. If you're concerned about soil washing out, consider adding a layer of hardware cloth (cut to fit) just above the gap. This creates a barrier while still allowing water to drain freely—no more muddy messes when you water your plants.
Sealant Application: Don't rush the 24-hour drying time for your water-based polyurethane sealant in Step 4. I've seen people skip this and end up with sticky residue that attracts pests. Work in thin, even coats using a high-quality brush, and avoid planting until you can no longer smell the sealant. The extra patience pays off with a bed that lasts for years.
Pro Tips for Pine Garden Bed
- Building a pine garden bed is all about balancing rustic charm with sturdy construction—here are the key details that make all the difference.
- Precision Cutting Tip: When cutting your pine boards in Step 1, use a straightedge guide along your pencil markings to ensure clean, accurate cuts.
- Screw Placement Strategy: In Step 2, when pre-drilling those 1/8-inch holes, angle your drill slightly (about 15 degrees) toward the center of the board.
Frequently asked questions
Got questions about creating or maintaining a pine garden bed?
Here are answers to the most common ones to help you craft the perfect rustic planter!
What’s the best type of pine wood to use for a garden bed?
Choose rot-resistant pine varieties like eastern white pine, ponderosa pine, or cedar (though not true pine, it’s a great alternative). Avoid softwoods like lodgepole pine—they rot faster. Pressure-treated wood is another durable option, but opt for ACQ-treated lumber (not CCA) to avoid toxic chemicals.
How long does a pine garden bed last before needing replacement?
With proper sealing and maintenance, a pine garden bed can last 5–10 years. Sun, rain, and soil acidity speed up decay. Extend its life by resealing every 1–2 years with a non-toxic wood preservative and elevating it slightly off the ground to prevent moisture buildup.
Can I use a pine garden bed for edible plants or herbs?
Yes, but only if untreated or ACQ-treated. Avoid CCA-treated wood (pre-2004) near veggies—it contains arsenic. For herbs, opt for cedar or redwood, which naturally repel pests. Always line the bed with landscape fabric to block soil-borne contaminants.
How do I prevent pine wood from turning gray or moldy?
Graying is natural, but mold thrives in damp wood. Sand and seal the bed before planting, then reapply sealant annually. Improve airflow by spacing plants properly and avoiding overwatering. For extra protection, paint with a breathable, outdoor-safe stain in shades that reflect heat.
What’s a good alternative if pine isn’t available?
Try these long-lasting, rustic materials:
- Cedar: Naturally rot-resistant and aromatic (great for herbs!).
- Redwood: Weather-resistant and splinter-free.
- Composite wood: Won’t rot but lacks pine’s charm.
- Stone or brick: Heavy and permanent, but requires mortar.
Wrapping up and next steps
Creating a pine garden bed is a fantastic way to add rustic charm and vertical greenery to your outdoor space—no matter the season! 🌲 With just a few materials and a little creativity, you’ve got a stunning, low-maintenance planter that elevates your garden’s aesthetic.
Whether you’re a seasoned gardener or a beginner, this project is rewarding and customizable to fit your style.
Ready to take the next step? Gather your tools, pick your pinewood, and start building! Your future garden bed is waiting—let’s make it happen. 🌿✨