Tools
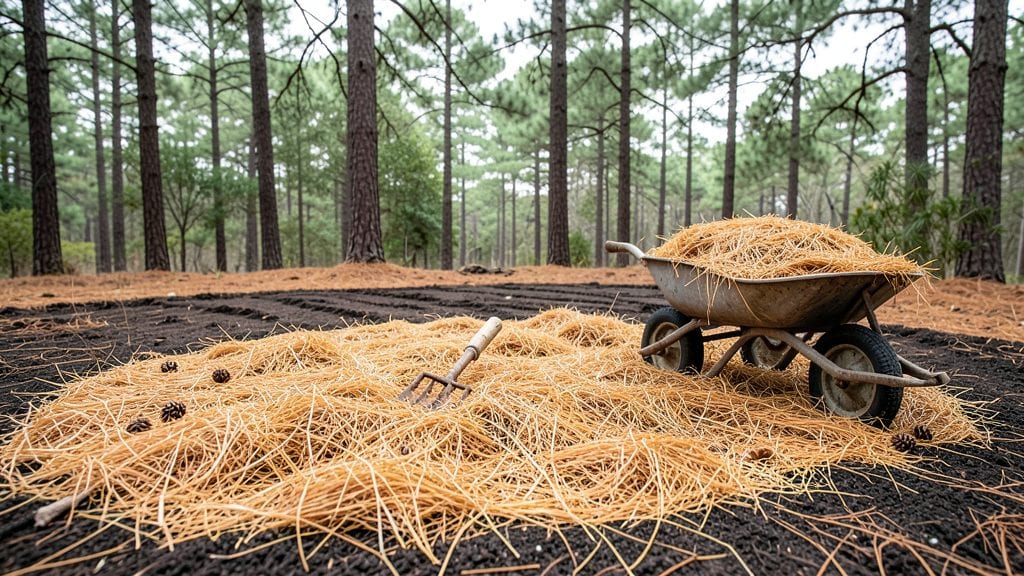
Transforming your garden beds into lush, low-maintenance havens starts with garden pine straw—nature’s golden ticket for keeping soil healthy and weeds at bay. I’ve used it for years to cut down on watering, suppress weeds, and keep my garden looking tidy with almost no effort.
The first time I spread it, I was amazed at how much easier my garden became to manage, and how much healthier my plants looked by summer’s end.
Pine straw isn’t just mulch—it’s a game-changer for moisture retention, especially in hot climates where soil dries out fast. A 2- to 4-inch layer keeps roots cool, locks in moisture, and slowly releases nutrients as it breaks down.
You can find it at garden centers, home improvement stores, or even harvest it yourself from pine trees (though store-bought is more consistent). It’s lightweight, easy to spread, and won’t compact like wood chips, making it perfect for flower beds, around trees, or even in raised beds.
By the end of the season, you’ll notice fewer weeds, less watering, and plants that thrive without the stress of dry soil. The golden needles also add a natural, rustic look that many gardeners love.
Plus, it’s a breeze to refresh—just fluff and top up as needed. Whether you’re a beginner or a seasoned gardener, this mulch makes your garden work with you, not against you.
Works in most climates, though it’s especially great in warm, dry regions. Just avoid using it under acidic-loving plants like blueberries if your soil’s already acidic—test first! For cooler climates, pair it with a heavier mulch like wood chips to retain heat. Ready to give your garden this easy upgrade?
📚 In This Guide
- What you need
- Instructions
- Tips and common mistakes
- Wrapping up and next steps
What you need
- ● Pine straw mulch: 3–5 bales (depending on garden size; 2’ x 4’ bales typically cover ~100 sq. ft.). Choose aged straw (not fresh needles) to avoid acidity spikes.
- ● Garden gloves: A pair to protect hands from splinters and prickly needles.
- ● Rake or garden fork: A bypass pruner rake (for spreading) or a sturdy garden fork (for breaking up bales).
- ● Watering can or hose: With a gentle spray nozzle to moisten the mulch post-application.
- ○ Pruners (optional but helpful): For trimming weeds or plants before mulching.
- ● Wheelbarrow or tarp: For hauling heavy bales (especially if your garden is large or sloped).
- ● Mulch spreader: Saves time for big areas—look for a hand-crank or push-style model.
- ● Soil pH tester: To check your garden’s acidity (pine straw thrives in pH 4.5–6.0; amend if needed).
- ● Compost or fertilizer: A light layer of compost (1–2 inches) beneath pine straw boosts soil health.
- ● Edging tool: To create clean borders and keep mulch contained.
Step-by-Step instructions for applying garden pine straw
Here's how to transform your garden beds with this natural, low-maintenance mulch.
Prepare Your Garden Beds
Start by clearing the area of any weeds, rocks, or debris using the garden rake. I like to work when the soil is slightly damp—it makes pulling weeds easier and prevents disturbing the soil too much. For established beds, simply rake away the old mulch, being careful not to tear up any plants. If you're starting fresh, loosen the top 2-3 inches of soil with a garden fork to improve aeration before adding pine straw.
Pay attention to the bed's slope. If water tends to pool in certain spots, create gentle mounds with the soil to encourage proper drainage. This prevents soggy roots and keeps your pine straw from turning into a muddy mess during rain. A well-prepared bed ensures the pine straw will stay in place and work its magic for months.
Apply a Thin Layer of Soil Conditioner
Spread a ¼-inch layer of the soil conditioner evenly over the prepared bed using the garden rake. This step is key because it helps the pine straw break down more slowly and improves soil structure over time. Focus on areas where plants will be planted or where existing plants are growing—avoid piling it too thickly in one spot.
Work the soil conditioner into the top ½ inch of soil by lightly raking it in. You don’t need to till deeply, just enough to blend it with the existing soil. This creates a smooth surface for the pine straw to rest on, which helps it spread evenly and prevents clumping. Think of it like laying a foundation—it keeps everything stable and functional.
Spread Pine Straw Evenly
Using the garden rake, spread the pine straw over the bed in a 2-3 inch layer. Avoid piling it too thickly, as this can suffocate plants and slow down decomposition. I like to spread it in one direction first, then rake it again perpendicular to create an even, uniform layer. This ensures every plant gets the benefits without blocking sunlight or air.
Leave a 1-2 inch gap around the base of plants, especially young or delicate ones. This prevents moisture from pooling directly against stems, which can lead to rot. For larger plants or shrubs, you can let the pine straw touch the base, but avoid burying the trunk or crown. Watch for bare spots—if any areas look uneven, add a little more pine straw until the bed looks fully covered.
Fluff and Settle the Mulch
Once the pine straw is spread, gently rake it again to fluff it up and remove any clumps. This helps the mulch settle naturally and ensures it doesn’t mat down too quickly. A light raking also allows water to penetrate more easily, which is crucial for keeping roots hydrated. Take your time here—rushing can leave gaps or create uneven patches.
After raking, step back and inspect the bed. The pine straw should look evenly distributed with no thick piles or thin spots. If you notice areas where the mulch is too thin, add a little more to maintain the 2-3 inch depth. This step is all about creating a neat, professional finish that will protect your soil and plants for the long term. A well-applied layer will keep weeds at bay and retain moisture beautifully.
Maintain and Refresh as Needed
Check the pine straw every 3-4 months to see how it’s holding up. Over time, it will break down and thin out, especially in rainy or warm climates. When you notice gaps or a reduction in thickness, simply rake the remaining mulch aside, add a fresh 1-inch layer, and fluff it back in. This keeps the protective benefits going year-round without overwhelming your plants.
In late fall, after the first frost, give the bed a final refresh by raking away any decomposed mulch and adding a new layer. This prepares the soil for winter and ensures a strong start in spring. Pine straw is low-maintenance, but this occasional touch-up keeps it working its best. You’ll love how it transforms your garden into a lush, weed-free oasis with minimal effort.
Tips & tricks for perfect garden pine straw application
These simple yet powerful tips will help you get the most out of your pine straw and keep your garden looking its best all season long.
Soil Preparation Matters: In Step 1, when loosening the top 2-3 inches of soil, focus on breaking up any compacted areas without disturbing the roots too much. I like to use a garden fork to gently aerate the soil while leaving the root structure intact. This creates ideal conditions for the pine straw to work its magic while preventing soil erosion during watering or rain. Think of it as creating a soft, welcoming bed for your plants to thrive in.
Layering Technique for Even Coverage: When spreading the 2-3 inch layer of pine straw in Step 3, work in sections if your garden bed is large. Start at one end and spread the straw in one direction, then rake perpendicular to create an even, uniform layer. This method prevents gaps and ensures every plant gets consistent protection. I've found that using a straight edge like a board can help you maintain that perfect 2-3 inch depth across the entire bed.
Plant Protection Strategy: The 1-2 inch gap around plant bases in Step 3 is more important than you might think. For young plants, this gap prevents stem rot from excess moisture. For established plants, it allows air circulation to the base while still providing root protection. Pro tip: Use a small ruler or measuring tape to verify these gaps after spreading the pine straw—it makes all the difference in plant health.
Maintenance Made Easy: When refreshing your pine straw every 3-4 months in Step 5, set aside about 15 minutes to complete this task. I like to work in small sections, raking away the decomposed mulch and adding a fresh 1-inch layer. This approach keeps your garden looking neat while preventing soil exposure. In late fall, this final refresh becomes even more important as it protects your soil from winter freeze-thaw cycles.
Pro Tips for Garden Pine Straw
- These simple yet powerful tips will help you get the most out of your pine straw and keep your garden looking its best all season long.
- Soil Preparation Matters: In Step 1, when loosening the top 2-3 inches of soil, focus on breaking up any compacted areas without disturbing the roots too much.
- Layering Technique for Even Coverage: When spreading the 2-3 inch layer of pine straw in Step 3, work in sections if your garden bed is large.
Frequently asked questions
Got questions about using garden pine straw? You’re not alone! Here are some of the most common queries—plus straightforward answers to help you mulch like a pro.
What is garden pine straw, and how is it different from regular mulch?
Garden pine straw
is made from the dried needles of longleaf or slash pine trees, offering a lightweight, slow-release mulch that resists clumping and compacts less than wood chips or bark. Unlike heavier mulches, it improves soil aeration, retains moisture efficiently, and adds a natural, rustic look to gardens. Plus, it’s highly acidic (pH ~5.0–5.5), making it ideal for acid-loving plants like azaleas, blueberries, and hydrangeas.
When is the best time to apply pine straw mulch?
The golden rule? Spring or fall—when soil is workable but not frozen. For new beds, spread a 2–3 inch layer after planting (but keep it away from stems/trunks to prevent rot). In warm climates, you can apply it year-round, but avoid heavy rains or extreme heat right after installation. Pro tip: Refresh every 6–12 months for best results!
Is pine straw mulch more expensive than other mulches?
Cost varies by region, but pine straw is often mid-range—typically $3–$6 per bale (covering ~10 sq ft). While it may seem pricier than wood chips upfront, its longevity (lasts 2–3 years vs. 1 year for bark) and low maintenance make it a cost-effective choice. Budget hack: Buy in bulk or check local tree services for free/cheap pine straw bales!
Will pine straw attract pests like termites or ants?
Pine straw is termite-resistant (unlike wood mulch), but ants or roaches might nest in it—especially if it’s thick or damp. To deter pests:
- Keep mulch 2–3 inches deep (not piled high).
- Store bales off the ground in a dry place.
- Use a light layer of diatomaceous earth around plant bases if needed.
Can I use pine straw for vegetables or herbs instead of flowers?
Yes! Pine straw is safe for edible gardens—just avoid direct contact with leafy greens (like lettuce) to prevent needle irritation. It’s great for:
- Perennial herbs (rosemary, thyme).
- Root veggies (carrots, potatoes).
- Fruit bushes (blueberries, raspberries).
What do I do if pine straw smells bad or molds after rain?
A funky odor or mold usually means the mulch is too thick, compacted, or waterlogged. Fix it by:
- Fluffing the layer with a rake to improve airflow.
- Removing excess mulch (aim for 2–3 inches max).
- Ensuring proper drainage (amend heavy clay soil with compost).
Wrapping up and next steps
Transforming your garden with pine straw mulch is a game-changer—it’s easy, eco-friendly, and keeps your soil thriving all year long! 🌱 Whether you’re a seasoned gardener or just starting out, this natural mulch offers low-maintenance beauty while protecting your plants and conserving water.
Ready to see the difference? Grab a bale, follow the simple steps, and watch your garden flourish with minimal effort.
Next up: Try a small section of your yard first, observe how the pine straw performs, and adjust as needed. Before you know it, you’ll have a lush, low-stress garden that’s the envy of the neighborhood! 🌿✨