Shrubs
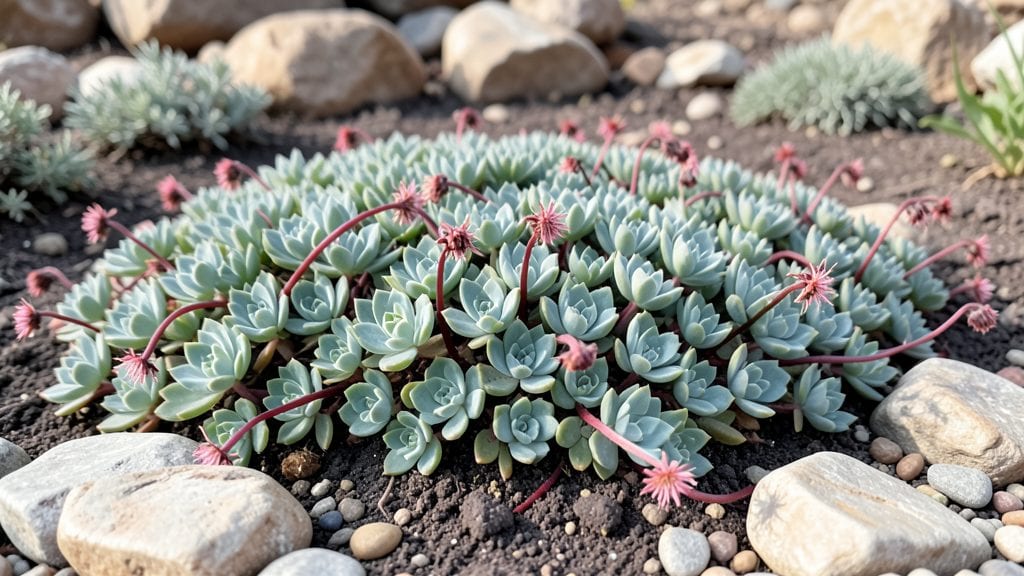
Browse through these pictures of small rock gardens for inspiration before crafting your own—my 2-foot-wide balcony sanctuary now feels like a tranquil retreat, all thanks to moss, stones, and tiny plants. 🌿 I stumbled upon this idea after realizing my balcony was just big enough for a rock garden that now feels like a secret alpine retreat.
The key isn’t size—it’s the way smooth river rocks, delicate sedum, and a single mossy corner create instant harmony.
You don’t need fancy materials to start—just a shallow container, some flat stones, and drought-tolerant plants like creeping thyme or miniature ferns. My first garden used thrifted stones and a secondhand tray, proving this works anywhere.
The magic happens when you group rocks by size and let plants spill naturally between them. Even in full sun, these designs stay lush with minimal watering.
Imagine stepping outside to find a Zen-inspired corner with smooth pebbles and a single hosta, or a succulent garden where every plant feels intentional. These spaces thrive on neglect—no mowing, no weeding, just occasional misting for moss.
The best part? You can create one in a window box, hanging planter, or even a repurposed wheelbarrow. Let’s explore how to make yours stand out.
Whether you’re drawn to alpine plants, bold succulents, or soft moss textures, the possibilities are endless. Urban balconies, patio edges, and sunny windowsills all welcome these tiny landscapes. Start small—your first rock garden could be just 1 square foot—and watch how it grows into something unexpectedly special.
📚 In This Guide
- What you need
- Instructions
- Tips and common mistakes
- Wrapping up and next steps
What you need
- ● Container: A shallow tray, ceramic pot, or wooden box (6"–12" wide, with drainage holes).
- ● Gravel or Pebbles: 1–2 lbs of varied-sized stones (smooth river rocks, quartz, or slate).
- ● Soil: 1–2 bags of well-draining cactus/succulent mix (or regular potting soil + perlite).
- ○ Moss (Optional): Sheet moss or reindeer moss for texture (1–2 small bundles).
- ● Mini Plants: 3–5 small succulents, ferns, or air plants (e.g., hens & chicks, sedum, or moss phlox).
- ● Garden Trowel: Small hand trowel for precision planting.
- ● Spray Bottle: For misting moss or delicate plants.
- ○ Decorative Elements (Optional): Miniature figurines (fairies, gnomes, or animals).
- ● Twigs, pinecones, or driftwood for structure.
- ● Sand or kinetic sand for a beachy vibe.
- ○ Watering Can (Optional): A tiny one for controlled hydration.
- ● A sunny or partially shaded spot (depending on plant choices).
- ● Patience! Layering rocks and plants takes time—think art, not rush.
- ● Basic knowledge of drainage (no soggy soil—rock gardens hate wet feet!).
How to design a stunning small rock garden
Here's how to create a charming miniature landscape that brings texture and tranquility to any space.
🪴 Step 1: Choose Your Base Materials
Start with a shallow container or in-ground spot that's at least 6-12 inches deep—deeper for larger rocks. I like to use a mix of flat stones for paths and rounded ones for natural-looking hills. Collect or purchase stones in varying sizes, from 1-3 inches up to 6-8 inches for focal points.
Lay out your stones first to visualize the design. Group similar sizes together and leave gaps for plants and moss. This is where the magic happens—play with shapes and colors to create natural-looking clusters. If using a container, place a layer of landscape fabric at the bottom to prevent soil from washing out through drainage holes.
🌿 Step 2: Build the Foundation Layer
Add a 2-3 inch layer of coarse gravel or small crushed stone at the bottom for drainage. This prevents water from pooling and keeps roots healthy. Next, fill the container or garden bed with well-draining potting mix—avoid regular garden soil, which compacts easily.
For in-ground gardens, mix the native soil with 20-30% perlite or coarse sand to improve drainage. Press the soil down lightly but don't compact it too much. You want it loose enough for roots to spread easily. This layer will support your stones and plants while keeping everything stable.
☀️ Step 3: Arrange Stones for Natural Flow
Place your largest stones first—they serve as anchors for the design. Arrange them in odd numbers (3, 5, or 7) for a balanced look. Smaller stones can fill gaps or create paths between larger rocks. Tilt some stones slightly for a more natural, wind-blown appearance.
Leave some open spaces for plants—aim for about 20-30% of the surface area uncovered. This creates visual breathing room and allows light to reach any ground cover. Step back frequently to check the overall balance. If one area feels too crowded, remove a few stones or adjust their placement.
🌱 Step 4: Add Plants and Moss
Select small, slow-growing plants like creeping thyme, miniature sedum, or dwarf ferns. These thrive in rocky conditions and add vibrant color. Plant them in the gaps between stones, pressing soil gently around the roots. For containers, use plants that stay under 6 inches tall to maintain the miniature scale.
Sprinkle moss over bare soil areas to create a lush, natural carpet. Keep it thin—just enough to fill gaps without smothering plants. Water thoroughly after planting to help everything settle. In the first few weeks, mist plants daily to encourage root establishment, but avoid soaking the stones.
⏰ Step 5: Maintain and Refine Over Time
Water lightly but frequently—rock gardens dry out faster than traditional gardens. Aim for 1-2 inches of water per week, delivered through misting or drip irrigation. Check soil moisture by feeling it; if the top ½ inch feels dry, it's time to water.
Remove any weeds immediately—they'll compete with your delicate plants. Every few months, add a light layer of small gravel to refresh the look and prevent soil erosion. With time, your rock garden will develop a mature, harmonious appearance that feels like a tiny natural landscape.
Tips & tricks for perfect small rock gardens
Creating a stunning miniature rock garden takes a little planning—and a few pro tricks to make it look effortlessly natural. Here's what I've learned after designing several myself.
Rock Selection is Everything: Don't just grab any stones! Look for smooth, rounded river rocks for hills and flat, irregular slabs for paths. The key is to mix textures—some rough, some polished—and colors. I like to collect stones from different sources: a local creek, a garden center, or even thrift stores where they often sell decorative rocks. For focal points, choose stones with interesting shapes or natural holes that add character. Pro tip: Rinse all stones before using to remove dirt and debris.
The 20-30% Rule for Plant Placement: In Step 3, when you're arranging stones, remember this critical ratio: leave about 20-30% of the surface area uncovered for plants. This isn't just about aesthetics—it's about creating microclimates where moisture can collect and roots can establish. I've seen beginners overcrowd with stones, which makes the garden look artificial and prevents plants from thriving. Step back often and squint—if it looks too busy, you've probably gone overboard.
Moss Maintenance Secret: That thin moss layer in Step 4 might seem delicate, but it's actually quite resilient once established. The trick is to keep it consistently moist but not soggy during the first few weeks. I use a spray bottle to mist lightly every other day, which mimics natural rainfall. After about 6 weeks, your moss will start to spread on its own—just give it a little help by gently brushing new moss growth into bare spots. For containers, you can even press moss into small crevices between stones to create natural-looking accents.
Drainage Hack for Containers: If you're using a container, here's a game-changer: drill a few extra drainage holes along the sides near the bottom, not just at the bottom. This creates a more natural water flow pattern and prevents soil from compacting in one area. I also recommend adding a layer of landscape fabric over the drainage holes before adding your gravel layer—this keeps soil from washing out while still allowing water to escape freely.
Pro Tips for Pictures Of Small Rock Gardens
- Creating a stunning miniature rock garden takes a little planning—and a few pro tricks to make it look effortlessly natural.
- Rock Selection is Everything: Don't just grab any stones!
- The 20-30% Rule for Plant Placement: In Step 3, when you're arranging stones, remember this critical ratio: leave about 20-30% of the surface area uncovered for plants.
Frequently asked questions
Got questions about creating or maintaining your small rock garden? You’re not alone! Here are some of the most common queries answered in a flash.
What’s the best time of year to start a small rock garden?
Spring or early fall is ideal—soil is workable, and temperatures are mild. Avoid extreme heat or frost, which can stress plants. If you’re in a warm climate, winter planting is fine as long as you choose drought-tolerant species like sedum or succulents.
Do I need special soil for a rock garden?
Yes! Use a well-draining mix like cactus/succulent soil or amend regular soil with perlite, sand, or gravel. Avoid heavy clay, which traps moisture and can rot roots. A 50/50 blend of potting soil and coarse sand works for most small rock gardens.
How often should I water a small rock garden?
Water deeply but infrequently—usually once a week, depending on your climate. Rocks help retain moisture, but overwatering can cause erosion or fungal issues. Check soil moisture 1–2 inches down; if dry, it’s time to water.
Can I use regular garden plants in a rock garden?
Not all plants thrive in rocky conditions! Stick to drought-resistant, shallow-rooted species like moss, thyme, or alpine plants. Avoid heavy feeders like hostas or ferns—they’ll struggle in poor soil and compete for nutrients.
How do I keep pests out of my small rock garden?
Prevention is key! Use mulch (like gravel or small stones) to deter burrowing pests. Neem oil or insecticidal soap can treat aphids or spider mites. Avoid overwatering, which attracts slugs and snails—handpick them at night with a flashlight!
What’s the easiest way to arrange rocks for a beginner?
Start with a base layer of smaller rocks or gravel, then add larger stones in odd numbers (3, 5, or 7) for balance. Group them by size/color and leave gaps for plants. Use a string or spray paint to outline designs before placing rocks permanently.
Wrapping up and next steps
Creating a small rock garden is a rewarding way to bring nature’s beauty into your space—whether it’s a sunny windowsill, a cozy balcony, or a quiet corner of your yard. 🌿 From selecting the right stones and moss to nurturing tiny plants, every step lets you craft a miniature masterpiece that’s uniquely yours.
The best part? You don’t need a green thumb or a sprawling yard to start!
Now that you’re inspired, why not sketch your dream design or gather a few supplies this weekend? Take the first step today—your tiny garden oasis is waiting! 🌟