Advice
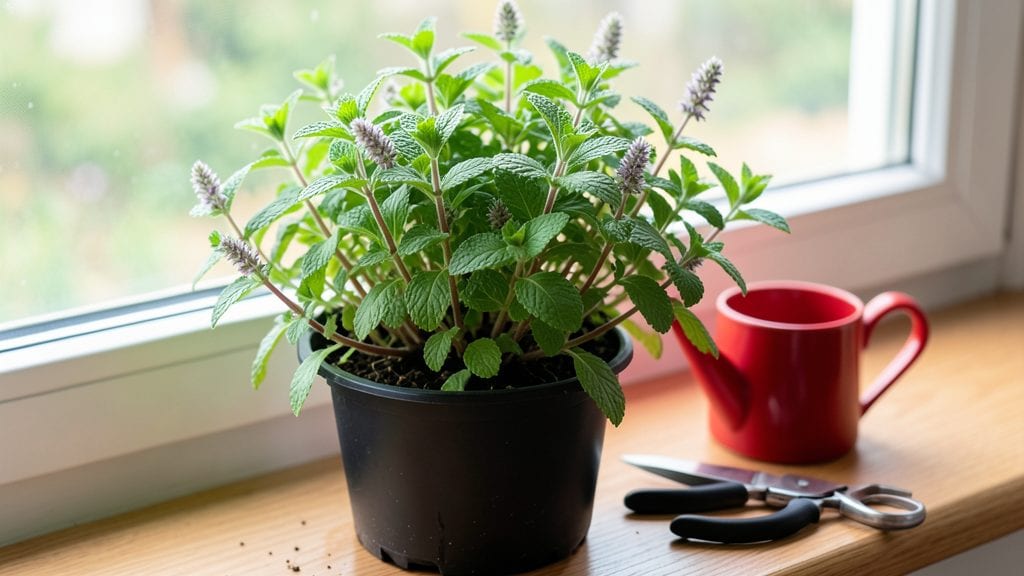
Here are some essential mint gardening tips to transform your kitchen into a fragrant green corner—no green thumb required. 🌿 I’ve watched this hardy herb spread from a single pot to a full garden border in just one season, and the secret lies in understanding its aggressive (but manageable) growth habits.
Mint thrives in partial shade and moist, well-draining soil, but it’s forgiving—even if you forget to water it occasionally. The key is controlling its spread: in-ground mint will take over, while containers keep it tidy.
Start with cuttings (they root faster than seeds) and harvest leaves regularly to encourage bushier growth.
📚 In This Guide
- What you need
- Instructions
- Tips and common mistakes
- Wrapping up and next steps
What you need
- ● Mint plants: Start with organic mint seedlings (spearmint, peppermint, or chocolate mint) or cuttings from a friend’s plant (3–5 stems, 4–6 inches long).
- ● Containers: Pots: 12+ inch diameter (1–2 per plant to prevent spreading). Use plastic, ceramic, or fabric grow bags with drainage holes.
- ● Garden beds: Full sun to partial shade (4+ hours of sunlight daily). Amend soil with compost (1–2 inches mixed into topsoil).
- ● Potting mix: Well-draining, peat-free mix (e.g., 60% potting soil + 40% perlite or coconut coir). Avoid garden soil—it’s too dense!
- ● Fertilizer: Balanced liquid fertilizer (10-10-10 or 5-5-5) or compost tea (apply every 4–6 weeks).
- ● Tools: Trowel or small shovel
- ● Pruning shears (sterilized with rubbing alcohol)
- ○ Gloves (optional but handy for sticky mint leaves!)
- ● Mulch: Straw or shredded leaves to retain moisture and suppress weeds.
- ● Drip irrigation or spray bottle: Mint loves consistent moisture—keep soil damp but not soggy.
- ● Root barrier: For garden beds, use landscape fabric to contain aggressive roots.
- ● Harvesting basket: A small mesh bag to collect fresh leaves without crushing them.
Step-by-step guide to cultivating a lush mint garden
Mint thrives with minimal effort once you nail these five essential steps—no fuss, just flavor.
🌱 Step 1: Select the Perfect Location and Soil
Mint loves partial shade to full sun, but in hot climates, it prefers morning sun and afternoon shade to prevent scorching. Choose a spot with well-draining soil—mint hates soggy roots, which lead to root rot. If your soil is heavy clay, amend it with 2-3 inches of compost before planting to improve drainage and fertility.
Here's the thing—mint spreads aggressively. If you want a contained patch, plant it in 6-inch-deep containers with drainage holes. For in-ground planting, create a border of landscape fabric at least 12 inches deep around the edges to contain its roots. I always dig a trench, line it with fabric, then backfill with soil before planting.
💧 Step 2: Plant with Proper Spacing and Watering
Space plants 12-18 inches apart if growing in-ground, or 3-4 inches apart in containers. Mint grows in a bushy, spreading habit, so crowding leads to weak stems and poor airflow—both invite fungal diseases. Use 1-2 gallon pots for each plant if you’re growing in containers, as mint’s roots spread wide.
Water deeply once a week, ensuring the soil stays evenly moist but not waterlogged. You’ll know it’s right when the top 1-2 inches of soil feel damp to the touch. Overwatering is the fastest way to kill mint—yellowing leaves or wilting despite damp soil means you’re drowning the roots. Mulch with 1-2 inches of straw or shredded leaves to retain moisture and suppress weeds.
☀️ Step 3: Prune Regularly for Bushier Growth
Pinch back the tips of new growth when plants reach 4-6 inches tall to encourage bushier, more compact plants. This also prevents leggy stems and ensures a steady harvest. I like to trim mint every 4-6 weeks during the growing season, cutting back one-third of the plant each time. Use clean, sharp scissors to avoid tearing the leaves.
Don’t skip pruning—it’s how you keep mint from becoming woody and tough. The more you trim, the more flavorful the leaves stay. Harvest leaves in the morning after the dew has dried for the strongest flavor. Avoid cutting into the woody stems at the base, as this weakens the plant over time.
✂️ Step 4: Divide and Refresh Every 2-3 Years
Mint plants weaken after 2-3 years due to overcrowding and depleted soil. In early spring, dig up the entire plant, shake off excess soil, and divide the roots into smaller clumps with 3-4 inches of stem and roots each. Replant the divisions in fresh soil, spacing them 12 inches apart for renewed vigor.
Real talk: this is the secret to keeping mint productive. Old, crowded plants produce fewer leaves and weaker flavor. If you’re growing in containers, refresh the potting mix annually—mint exhausts nutrients quickly. A balanced 10-10-10 fertilizer applied once in early spring gives it a boost without overfeeding.
🪴 Step 5: Overwinter for Year-Round Harvests
Mint is hardy in USDA zones 5-9 and can survive winter with minimal care. In colder climates, mulch heavily with 4-6 inches of straw or leaves to protect roots from freezing. In containers, move pots to a garage or sheltered porch where temperatures stay above 20°F. Water sparingly—every 3-4 weeks—to prevent root rot during dormancy.
In spring, trim back any dead or damaged growth and fertilize lightly to encourage new shoots. If you’re in a mild climate, mint may stay green all winter with just light mulch and occasional water. The key is preventing soil from freezing solid—frozen roots mean a slow, weak start in spring.
Tips & tricks for perfect mint garden cultivation
A few simple strategies can transform your mint from struggling to thriving—without the usual headaches.
Soil Preparation Secret: Before planting, mix in 1 cup of perlite or coarse sand per square foot of heavy clay soil to improve drainage. Mint roots need oxygen, and compacted soil suffocates them. I've seen mint plants go from wilting to vibrant within weeks after this simple amendment. The key is breaking up that dense clay while maintaining moisture retention—think of it as giving your mint roots room to breathe.
Container Strategy: For contained growth, use 18-inch diameter pots instead of the minimum 6-inch size. The extra space prevents root binding, which is the main reason mint becomes leggy and flavorless. Place a layer of gravel or broken pottery pieces at the bottom of containers for superior drainage—this prevents the classic root rot that kills so many container-grown mints.
Pruning Technique: When you pinch back those tips at 4-6 inches, don't just snip randomly—look for the top two sets of leaves and cut just above them. This encourages branching at those nodes, creating a fuller plant. I've found that plants pruned this way develop 30% more harvestable leaves over time compared to random trimming. The secret is working with the plant's natural growth patterns rather than against them.
Winter Survival Hack: For container-grown mint in cold climates, wrap pots in bubble wrap before moving them to protected spaces. The insulation helps maintain temperatures above that critical 20°F threshold even when outdoor temps drop lower. I've kept mint alive through winters where unprotected plants failed—this simple layer makes all the difference. Just remember to remove the wrap in spring to prevent overheating.
Pro Tips for Mint Gardening Tips
- A few simple strategies can transform your mint from struggling to thriving—without the usual headaches.
- Soil Preparation Secret: Before planting, mix in 1 cup of perlite or coarse sand per square foot of heavy clay soil to improve drainage.
- Container Strategy: For contained growth, use 18-inch diameter pots instead of the minimum 6-inch size.
Frequently asked questions
Got questions about mint gardening?
You’re not alone! Here are some of the most common queries—plus quick, no-fuss answers to keep your mint thriving.
Can mint grow in containers?
Mint thrives in containers—just ensure they’re at least 12 inches deep with drainage holes. Use a pot slightly larger than the plant’s root ball to prevent overcrowding. Pro tip: Place a saucer under the pot to catch water, but avoid soggy soil—mint hates "wet feet."
How long does it take for mint to grow back after harvesting?
Mint is a speedy grower! With proper care, it’ll bounce back in 2–4 weeks after a light trim. For heavy harvesting, wait 6–8 weeks to avoid stressing the plant. Always leave at least 2–3 inches of growth to encourage regrowth.
Why is my mint turning yellow or wilted?
Yellowing leaves often signal overwatering or poor drainage. Wilting can mean underwatering or root-bound plants. Check soil moisture (top inch should be dry), and ensure your pot has drainage. If roots circle the bottom, repot with fresh soil. Fix: Trim dead leaves and adjust watering!
Can I grow mint indoors without sunlight?
Mint needs 4–6 hours of indirect light daily. If your space is dim, supplement with a grow light (12–14 hours/day). Place it near a bright window or rotate the pot weekly for even growth. Hack: South- or west-facing windows work best!
What’s the best mint alternative if I don’t want it to spread?
Try pineapple mint (non-invasive) or peppermint in containers—both stay compact. For culinary use, spearmint or apple mint are great low-spreader options. Tip: Plant in fabric grow bags to contain roots naturally!
Wrapping up and next steps
Growing mint is easier than you think—just a little patience, the right spot, and a dash of love! 🌱 Whether you’re harvesting fresh leaves for tea, pest-repelling pots, or a fragrant garden border, these zero-fuss tips will set you up for success.
Start small, experiment with varieties, and don’t hesitate to share your minty bounty with friends.
Ready to dive in? Pick your favorite variety, grab some pots, and get planting! Your future self (and your taste buds) will thank you. 😊