Light Requirements
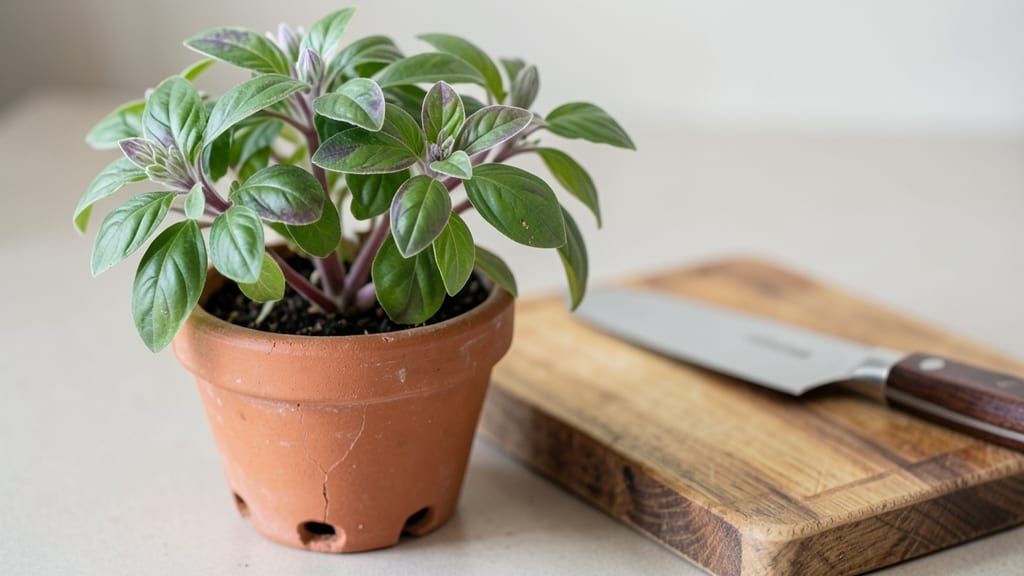
My indoor kitchen garden thrives with sunlight hacks that turn even dim corners into productive green spaces. 🌱 I used to think herbs needed a sunny window—until I discovered how to stretch light with reflective surfaces, grow lights, and the right plant choices that don’t demand full sun.
The secret isn’t expensive equipment—it’s smart placement and a few simple tools. A south-facing window or LED grow light (even a small one) gives you control, while reflective surfaces like aluminum foil or white paint bounce extra light onto plants.
Choose fast-growing herbs like basil, mint, or parsley—they’ll give you fresh flavors in just 3-4 weeks without fuss.
Imagine snipping fresh cilantro for tacos or basil for pasta, all grown steps from your stove. The air stays fragrant, your cooking becomes vibrant, and you’ll never buy wilted store herbs again. Plus, the setup keeps your kitchen looking lively with lush, velvety greens that double as decor.
Works for apartments, tiny kitchens, or even countertops—no yard required. Let’s turn your kitchen into a mini farm where sunlight isn’t the limiting factor anymore.
📚 In This Guide
- What you need
- Instructions
- Tips and common mistakes
- Wrapping up and next steps
What you need
- ● Containers: 4–6 small pots (4–6 inches deep) with drainage holes, or a single large tray (10x20 inches) for grouping plants.
- ● Growing Medium: 2–3 bags of high-quality potting mix (avoid garden soil—it’s too dense!).
- ● Seeds/Seedlings: Herbs: Basil, mint, parsley, chives, or cilantro (start with 2–3 seeds per pot).
- ● Greens: Lettuce, spinach, or arugula (sow 5–10 seeds per pot).
- ● Watering Can or Spray Bottle: A fine-mist sprayer works best for delicate seedlings.
- ○ Grow Lights (Optional but Recommended): LED full-spectrum grow lights (12–16 watts per plant) or a sunlight-reflecting mirror (DIY with aluminum foil!).
- ● Timers (for lights) to mimic 12–16 hours of "daylight."
- ● Trowel or Small Shovel: For transplanting seedlings.
- ● Fertilizer: Balanced liquid fertilizer (5-5-5 NPK) or compost tea (dilute 1 tbsp per gallon of water).
- ● Humidity Dome or Plastic Wrap: To retain moisture while seedlings sprout.
- ● Labels & Markers: Track plant varieties and watering schedules!
- ● Pruning Shears: For harvesting herbs and trimming leggy growth.
Step-by-step instructions for growing an indoor kitchen garden
Here’s how to transform any windowsill into a thriving herb and greens oasis—no greenhouse required.
🪴 Step 1: Select Containers and Optimize Drainage
Choose shallow, wide containers (at least 6 inches deep) with drainage holes—herbs and greens despise soggy roots. I prefer terracotta pots because they wick away excess moisture, but any container with holes works. If your pots lack drainage, drill ¼-inch holes in the bottom and line them with a mesh screen to prevent soil loss.
For 4 plants, use containers that are 4-6 inches wide—this gives roots room to spread without overcrowding. Place a small saucer beneath each pot to catch runoff, but empty it immediately after watering. Stagnant water in saucers breeds fungus gnats, which will attack your seedlings overnight.
☀️ Step 2: Position for Maximum Light Exposure
Herbs and greens need 4-6 hours of direct sunlight daily, but most kitchens can’t deliver that near windows. Start by placing containers on the southernmost windowsill—south-facing light is the most intense. If your space only gets north light, supplement with a grow light on a 14-hour timer positioned 6 inches above plants.
Rotate containers quarter-turn weekly so plants grow evenly. You’ll notice leaves bending toward the light? That’s your cue to move the container closer or adjust the grow light height. For leafy greens like spinach, a cool windowsill (55-65°F) slows bolting, while herbs like basil thrive in 70-75°F warmth.
💧 Step 3: Water with Precision and Monitor Soil
Use room-temperature water to avoid shocking roots—cold water can stunt growth. Water when the top inch of soil feels dry, but never let containers sit in standing water. I water from the bottom by placing pots in a tray of ½ inch of water for 10 minutes, then tipping out excess. This method ensures even moisture without over-saturating.
Herbs like thyme and rosemary are drought-tolerant, while greens like arugula wilt at the slightest dryness. Test moisture by sticking your finger 1 inch deep—if it comes out clean, water immediately. Overwatering is the #1 killer of indoor gardens, so when in doubt, wait another day.
🌱 Step 4: Fertilize Lightly and Harvest Strategically
Feed plants every 4-6 weeks with a balanced liquid fertilizer (10-10-10) diluted to half-strength. Too much fertilizer burns tender roots, and indoor plants absorb nutrients faster than outdoor ones. I mix fertilizer with water in a spray bottle for even distribution, avoiding leaf burn.
Harvest leaves by pinching off outer growth first—this encourages bushier regrowth. For basil, snip just above a set of leaves; for greens, cut ¼ of the plant at a time. You’ll see new shoots emerge within 3-5 days if the plant is healthy. Avoid harvesting more than ⅓ of the plant at once, or you’ll stunt its recovery.
✂️ Step 5: Prune and Revitalize Monthly
Trim yellow or damaged leaves immediately—they drain energy from the plant. Use clean, sharp scissors to cut ½ inch above a leaf node, which encourages branching. For leggy herbs, pinch back the tips to promote compact growth. This step keeps plants productive and prevents them from becoming woody or bitter.
Once a month, wipe leaves with a damp cloth to remove dust—dust blocks light absorption. If you notice pests (tiny white flies or aphids), spray with a mix of 1 part water, 1 part rubbing alcohol to dislodge them. Prevention is easier than treatment, so check undersides of leaves weekly.
Tips & tricks for perfect indoor kitchen gardens
Transforming your windowsill into a thriving herb and greens garden takes more than just sunlight—it requires strategic planning and a few insider tricks to prevent common pitfalls.
The Light Factor: If your kitchen only gets north-facing light, position your grow light 6 inches above plants and use a 14-hour timer to mimic natural daylight cycles. I’ve found that LED grow lights with full-spectrum bulbs work best—avoid cheap clip-on lights, which often emit too little red or blue light for optimal growth. For leafy greens like spinach, keep temperatures between 55-65°F to prevent bolting, while herbs like basil thrive in the 70-75°F range. A simple thermometer near your plants helps monitor these ranges without guesswork.
Container Intelligence: While terracotta pots excel at moisture control, they dry out faster in dry climates. For humidity-loving herbs like cilantro, place containers on a tray filled with ½ inch of water (without letting roots sit in water) to increase ambient moisture. Grouping pots together also creates a microclimate that retains humidity. And remember: the ¼-inch drainage holes are non-negotiable—even if your pots look cute without them, soggy roots will kill your plants faster than any other factor.
Harvesting Strategy: The 3-5 day regrowth window after harvesting is your plant’s way of telling you it’s ready for another trim. For basil, always snip just above a set of leaves to encourage branching, while with greens like arugula, cut ¼ of the plant at a time to maintain vigor. Pro tip: Harvest in the morning when oils and nutrients are at their peak—this gives your plants the whole day to recover before nightfall.
Pest Prevention: That 1:1 water and rubbing alcohol spray isn’t just for treating pests—it’s also a fantastic preventive measure. Spray the undersides of leaves weekly, even if you don’t see any pests. The alcohol disrupts the life cycle of fungus gnats before they become a problem. And if you notice whiteflies, don’t reach for chemical sprays immediately. A simple yellow sticky trap placed near your plants will catch them within days without harming your herbs.
Pro Tips for Indoor Kitchen Gardens
- Transforming your windowsill into a thriving herb and greens garden takes more than just sunlight—it requires strateg...
- The Light Factor: If your kitchen only gets north-facing light, position your grow light 6 inches above plants and us...
- Container Intelligence: While terracotta pots excel at moisture control, they dry out faster in dry climates. For hum...
Frequently asked questions
about indoor kitchen gardens—especially when it comes to sunlight—can make or break your success. Here are answers to the most common queries to help you grow confidently!What’s the best light source for herbs and greens indoors?
For most herbs and leafy greens, a south-facing window (in the Northern Hemisphere) or a grow light (LED or fluorescent) works best. Aim for 6–8 hours of bright, indirect light daily. If natural light is weak, supplement with a full-spectrum bulb 12–16 inches above plants.
How quickly can I expect to see growth with artificial light?
With proper LED grow lights (12–16 hours/day), you’ll see new growth in 1–2 weeks and harvest-ready herbs (like basil or cilantro) in 4–6 weeks. Leafy greens (spinach, kale) take slightly longer (6–8 weeks). Patience pays off—consistency is key!
Can I use regular household bulbs instead of grow lights?
While regular bulbs (like incandescent or halogen) can work in a pinch, they’re inefficient and may cause heat stress. Opt for cool-white LEDs or grow lights instead—they mimic sunlight better and use less energy. If you’re stuck with household bulbs, place them closer to plants (6–12 inches) and adjust the timer for 14–16 hours/day.
Why are my indoor herbs turning yellow or leggy?
Yellow leaves often mean overwatering or poor drainage, while leggy, weak stems signal lack of light. Fix it by:
- Adjusting water: Let soil dry slightly between waterings.
- Moving closer to light (or upgrading to a brighter bulb).
- Rotating plants weekly for even growth.
If pests are the issue, neem oil or insecticidal soap can help!
What’s the easiest low-light herb to grow indoors?
If your space is dimly lit, try mint, parsley, or chives—they tolerate lower light levels better than sun-lovers like basil or thyme. For greens, arugula or Swiss chard adapt well to indirect light. Just keep them within 1–2 feet of a window or under a basic LED bulb.
How often should I rotate or reposition my indoor garden?
Rotate plants every 5–7 days to ensure even light exposure and prevent them from leaning. If using a window, move them seasonally (e.g., switch from a south to an east window if sunlight shifts). For grow lights, adjust height as plants grow—maintain 6–12 inches for optimal results.
Wrapping up and next steps
An indoor kitchen garden is more than just a trend—it’s a rewarding way to bring freshness, flavor, and sustainability into your home! 🌱 With the right sunlight hacks and a little creativity, even small spaces can thrive with herbs and greens.
Whether you’re a seasoned gardener or just starting, the key is to experiment, stay consistent, and enjoy the process.
Ready to take the next step? Start small—pick one or two plants that excite you, set up your setup, and watch your green space grow! Share your progress or ask questions in the comments—we’d love to see (and help with!) your indoor gardening journey. Happy growing! 🌿