Fertilization
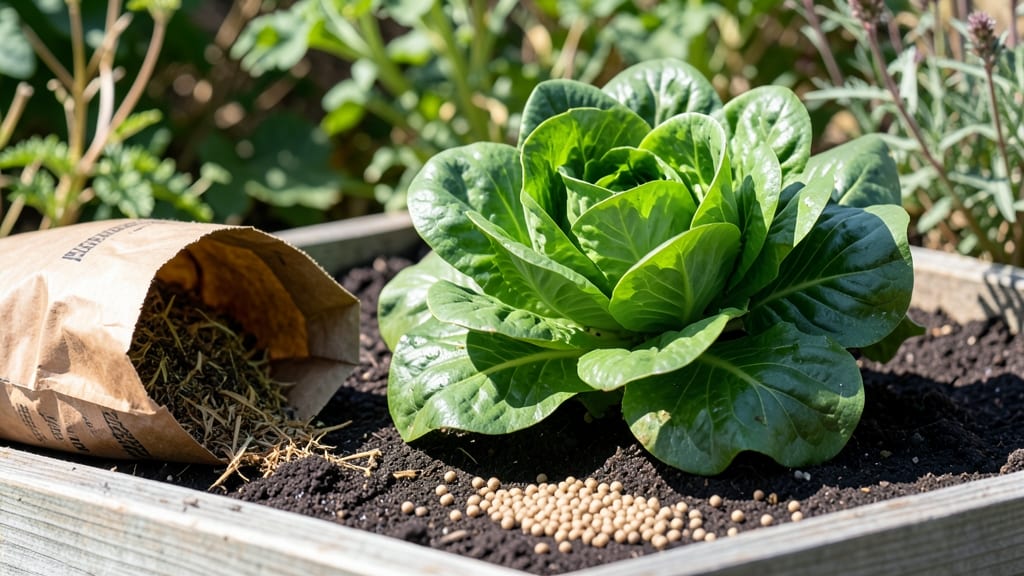
Fertilizing garden soil isn't just about dumping bags of chemicals—it's about feeding the life beneath your plants. 🌱 I learned the hard way that my tomatoes kept wilting because the soil was starving for phosphorus, even though I was watering daily.
The right mix of nutrients transforms struggling plants into thriving giants, and it starts with understanding what your soil actually needs.
You don’t need a PhD in horticulture to get this right. A simple soil test kit (under $20) reveals your soil’s hunger—whether it’s nitrogen for leafy greens, potassium for root strength, or organic matter for moisture retention.
Then it’s about balancing act: organic compost for long-term health and quick-release fertilizers for instant growth spurts. My zucchini went from sad to prolific after just one season of layered feeding.
What you’ll end up with is soil that smells rich, holds moisture like a sponge, and produces vegetables with bold color and sweet flavor. The key is patience—don’t overdo it.
Too much fertilizer burns roots, but the right amount turns your garden into a powerhouse. Think of it as slow cooking for plants: steady, nourishing, and rewarding.
Works for every type of garden, from raised beds to in-ground plots, and adapts to any climate. Whether you’re growing peppers in Arizona heat or herbs in Pacific Northwest rain, the principles stay the same—just tweak the timing. Let’s get that soil working for you.
📚 In This Guide
- What you need
- Instructions
- Tips and common mistakes
- Wrapping up and next steps
What you need
- ● Organic Matter: Compost (5-10 gallons per 100 sq. ft.) – homemade or store-bought
- ● Well-rotted manure (e.g., cow, horse, or chicken; 1-2 lbs per 10 sq. ft.) – avoid fresh manure
- ● Leaf mold or peat moss (1-2 inches spread) – for moisture retention
- ● Soil Amendments: Kelp meal (1-2 lbs per 100 sq. ft.) – rich in micronutrients
- ● Bone meal (1-2 lbs per 100 sq. ft.) – for phosphorus (root/flower growth)
- ○ Greensand or granite dust (optional; 1 lb per 100 sq. ft.) – for potassium
- ● Slow-Release Fertilizers: Balanced organic fertilizer (e.g., 5-5-5 or 10-10-10; follow label rates)
- ● Worm castings (1-2 cups per sq. ft.) – gentle, nutrient-packed
- ● Garden fork or tiller (for deep mixing, 8-12 inches down)
- ● Rake (for spreading amendments evenly)
- ● Garden gloves (to protect your hands!)
- ● Wheelbarrow or bucket (for hauling materials)
- ○ pH test kit (optional but highly recommended; soil pH should be 6.0-7.0 for most plants)
- ● Watering can or hose (for post-fertilization hydration)
- ● Test your soil: Conduct a soil test (DIY kits or lab services) to identify deficiencies before adding amendments.
- ● Clear debris: Remove weeds, rocks, and old plant matter from the garden bed.
- ● Choose the right time: Fertilize in early spring (before planting) or late fall (for winter soil prep).
- ● Work with dry soil: Avoid fertilizing soggy or waterlogged soil to prevent nutrient runoff.
Step-by-step guide to layering nutrients in garden soil
Here’s how to build a nutrient-rich foundation that keeps your garden thriving season after season.
🌱 Step 1: Test Your Soil’s Current Health
Before adding anything, grab a handful of moist soil and squeeze it—if it crumbles easily, it’s likely sandy and needs organic matter. If it stays in a tight ball, it’s too clay-heavy and needs loosening. A simple soil test kit (available at garden centers) reveals pH levels and nutrient deficiencies, so you can target what’s missing.
I always test in early spring because results take 2-3 weeks to arrive. If your soil tests acidic (below 6.0 pH), you’ll need lime to balance it before adding fertilizers. If it’s alkaline (above 7.5 pH), sulfur or peat moss will help. This step saves you from wasting expensive amendments.
🌿 Step 2: Add Organic Matter for Long-Term Nutrition
Spread a 2-3 inch layer of compost evenly across the garden bed. This isn’t just about nutrients—it improves soil structure, holds moisture, and encourages beneficial microbes. I like to mix in a 1 inch layer of well-rotted manure (like cow or chicken) for extra nitrogen, but avoid fresh manure—it burns plants.
Work the compost and manure into the top 6 inches of soil using a garden fork or tiller. You’ll feel the difference immediately: the soil will be darker, lighter, and easier to work. If your bed is small, a 5-gallon bucket of compost per 100 square feet is plenty. Skip this step, and your plants will struggle to access nutrients, no matter how much fertilizer you add later.
💧 Step 3: Apply a Balanced Fertilizer for Immediate Growth
After loosening the soil, sprinkle a 10-10-10 granular fertilizer (equal parts nitrogen, phosphorus, and potassium) over the bed. Use ½ pound per 100 square feet—too much burns roots, and too little won’t boost growth. Water the area lightly to help the granules settle into the soil.
For flowering plants or vegetables, switch to a 5-10-10 fertilizer to encourage root and bloom development. I always fertilize in early spring and again after harvesting to replenish nutrients. Avoid fertilizing in extreme heat or drought—plants can’t absorb nutrients when stressed. Instead, wait until soil is moist and temperatures are mild.
☀️ Step 4: Mulch to Lock in Moisture and Nutrients
Top the bed with a 2-3 inch layer of straw or wood chips to slow moisture evaporation and prevent weeds. Mulch also breaks down slowly, adding organic matter over time. I avoid dyed mulch—it can leach harmful chemicals into the soil. Leave a 1-inch gap between mulch and plant stems to prevent rot.
Replenish mulch every 3-4 months, especially in hot climates where it decomposes faster. You’ll notice healthier plants with fewer pests and less watering needed. Without mulch, soil dries out quickly, and nutrients wash away with rain—so this step is non-negotiable for long-term success.
⏰ Step 5: Monitor and Adjust Seasonally
Check soil moisture weekly by sticking your finger 1 inch deep. If it’s dry, water deeply until moisture reaches 6 inches down. Yellowing leaves often mean too much nitrogen, while slow growth signals a phosphorus deficiency. Adjust with targeted amendments: add blood meal for nitrogen, bone meal for phosphorus, or kelp meal for potassium.
I like to take a soil sample again in late summer to see how amendments performed. If your plants are thriving but the soil still feels tired, a half-inch layer of compost in fall will recharge it for next season. The goal is balance—soil that’s too rich burns plants, and soil that’s too lean leaves them weak.
Tips & tricks for perfectly fertilized garden soil
Building nutrient-rich soil doesn't have to be complicated—these practical tips will help you avoid common mistakes and maximize your garden's potential.
Soil Test Timing: Schedule your soil test in early spring when you can take action on the results before planting season. The 2-3 weeks wait time gives you plenty of time to adjust pH and prepare your soil before seeds go in the ground. I like to order my test kit online in late winter so it arrives just in time for testing. Remember that pH adjustments take time—don't wait until you're ready to plant to discover your soil is too acidic or alkaline.
Layering Strategy: When adding your 2-3 inch compost layer in Step 2, consider creating a "lasagna-style" soil profile. Start with a thin layer of coarse material like straw or leaves at the bottom, followed by compost, then your 1 inch manure layer—this creates better drainage while maximizing nutrient distribution. For small gardens, I find a 5-gallon bucket of compost per 100 square feet is perfect, but for larger areas, you can scale up proportionally. The key is working these amendments into the top 6 inches of soil where roots actively grow.
Fertilizer Application: For the 10-10-10 granular fertilizer in Step 3, I've found that using a spreader makes application even and prevents over-fertilizing in some areas. After sprinkling, lightly water the area to help the granules settle into the soil—this prevents them from blowing away and ensures even distribution. When switching to 5-10-10 for flowering plants, cut the amount in half (¼ pound per 100 square feet) since the higher phosphorus content is more potent. Always apply fertilizer when soil is moist and temperatures are mild to maximize absorption.
Mulch Maintenance: Your 2-3 inch mulch layer should look like a cozy blanket over your soil. In hot climates, check mulch every 3-4 months—it breaks down faster and may need replenishing. I like to use straw because it breaks down slowly and adds organic matter, but wood chips work well too. The 1-inch gap between mulch and plant stems prevents rot while still protecting roots. For vegetable gardens, I often add a fresh layer of mulch after harvesting to prepare for the next planting cycle.
Pro Tips for Fertilizing Garden Soil
- Building nutrient-rich soil doesn't have to be complicated—these practical tips will help you avoid common mistakes a...
- Soil Test Timing: Schedule your soil test in early spring when you can take action on the results before planting sea...
- Layering Strategy: When adding your 2-3 inch compost layer in Step 2, consider creating a "lasagna-style" soil profil...
Frequently asked questions
Got questions about fertilizing your garden soil? You’re not alone! Here are some of the most common concerns—plus straightforward answers to help you grow like a pro.
When is the best time to fertilize garden soil?
The ideal timing depends on your plants, but a general rule is to fertilize in early spring (before planting) and mid-summer (for a second boost). For organic matter like compost, apply it in fall so it breaks down over winter. Always check soil moisture—fertilizers work best in damp (not soggy) soil.
What if my plants look burned after fertilizing?
Over-fertilizing or using too much synthetic fertilizer can cause "burn," where leaves turn brown or crispy. Fix it fast: Water the soil deeply to dilute the fertilizer, and avoid feeding for 4–6 weeks. Next time, start with half the recommended dose and gradually increase.
Are homemade fertilizers as good as store-bought?
Homemade options like compost, coffee grounds, eggshells, or banana peels add nutrients naturally. Store-bought fertilizers offer convenience and precision, but organic homemade ones improve soil health long-term. Mix both for balanced results—think of it as a nutrient buffet for your plants!
How often should I fertilize my garden?
Most gardens thrive with 2–4 applications per year, spaced 6–8 weeks apart. Slow-release fertilizers (like compost or organic pellets) need less frequent feeding, while fast-acting synthetics may require monthly top-ups. Always follow package instructions—overdoing it harms more than helps!
Can I fertilize right after planting?
Not ideal! Wait 2–4 weeks after planting to let roots establish. A light dose of starter fertilizer (low in nitrogen) at planting can help, but avoid heavy feeding until new growth appears. Think of it like giving your plants a gentle handshake before a big meal.
Wrapping up and next steps
Fertilizing your garden soil is the secret ingredient to thriving plants and bountiful harvests—whether you're a seasoned gardener or just starting out!
By layering organic matter, balancing nutrients, and tailoring your approach to your soil’s needs, you’re setting the stage for healthier roots, stronger stems, and more vibrant blooms. 🌱
Now that you’re armed with the right tools, techniques, and troubleshooting tips, it’s time to roll up your sleeves and get growing! Start small—test a patch of your garden, observe how your plants respond, and refine your method. Happy gardening!