Vegetables
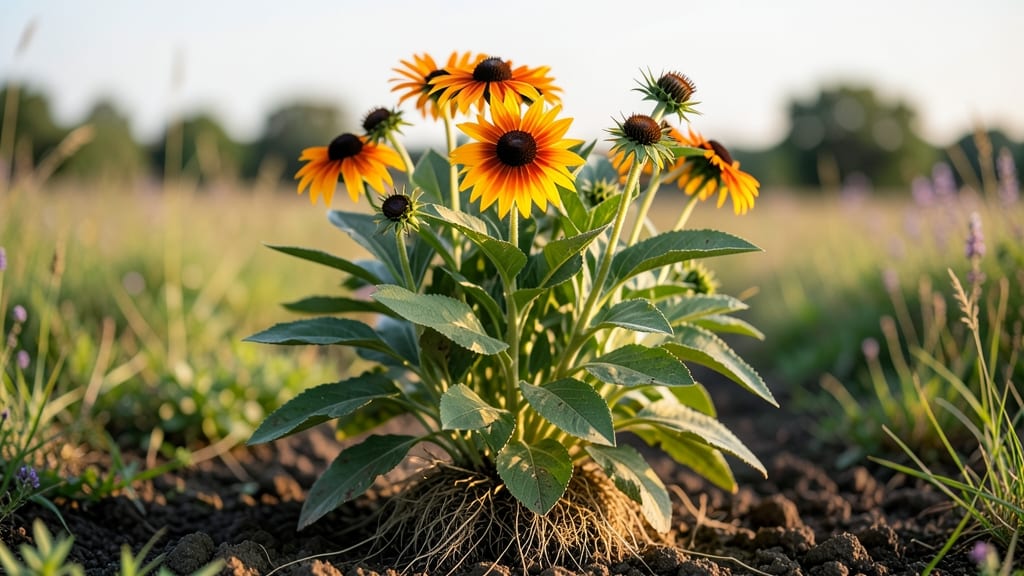
Creating a wild earth garden transforms your yard into a thriving ecosystem where pollinators, birds, and beneficial insects become your garden’s unsung heroes. 🌿 I’ve designed these gardens for years, and the results—vibrant blooms that feed wildlife while requiring minimal care—are nothing short of magical.
The key lies in selecting native plants that adapt effortlessly to local climates, forming a self-sustaining tapestry of life.
This approach isn’t about perfect rows or meticulous pruning—it’s about letting nature take the lead. You’ll need a mix of wildflowers, grasses, and shrubs that thrive in your region, along with a patch of undisturbed soil where they can establish roots.
The beauty of wild earth gardens is their resilience; once planted, they demand little from you beyond occasional watering and the joy of watching them flourish.
By summer’s end, your garden will buzz with bees, hum with butterflies, and burst with color that lasts long after commercial blooms fade. The soil stays rich, erosion slows, and you’ll find yourself spending less time maintaining and more time admiring.
This method works in backyards, urban lots, or even container setups—anywhere you’re ready to embrace a little wildness.
Regional adaptations are simple: swap out non-native species for local favorites, adjust watering based on rainfall, and let seasonal changes guide your plant choices. The result? A garden that feels alive, not just landscaped. Let’s bring this vision to life with plants that do the heavy lifting for you.
📚 In This Guide
- What you need
- Instructions
- Tips and common mistakes
- Wrapping up and next steps
What you need
- ● Native wildflowers & pollinator-friendly seeds: 2–5 lbs (varies by species; aim for a mix like coneflowers, milkweed, bee balm, and goldenrod). Pro tip: Choose seeds locally adapted to your climate!
- ● Organic potting soil or compost: 1–2 cubic yards (or enough to fill raised beds/planters to a depth of 6–12 inches). 💡 Opt for soil with 30–50% organic matter for best results.
- ● Mulch (straw, wood chips, or leaves): 2–3 inches per bed to retain moisture and suppress weeds.
- ● Drip irrigation or soaker hoses: 50–100 ft of tubing (adjust based on garden size). ✨ Water deeply 2–3x/week in dry spells!
- ● Garden stakes or trellises: 6–12 stakes (for taller perennials like sunflowers or hollyhocks).
- ● Hand trowel or transplanting spade: 1 (for precise planting).
- ● Garden gloves: 1 pair (to protect your hands from thorns or prickly plants).
- ● Pruners (bypass or felco): 1 pair (for shaping plants and deadheading).
- ● Wheelbarrow or bucket: 1 (for hauling soil, mulch, or tools).
- ○ Optional but helpful: Soil pH test kit (to ensure optimal growing conditions, ideally 6.0–7.0).
- ● Birdhouses or bat boxes (to attract natural pest controllers!).
- ● Solar-powered bug zappers (for organic pest management).
- ● Sunlight: A spot with 6+ hours of direct sun daily (most wildflowers thrive in full sun!).
- ● Well-draining soil: Amend heavy clay or sandy soil with compost before planting.
- ● Water source: Access to a hose or irrigation system nearby.
- ● Time commitment: 1–2 hours/week for maintenance (watering, weeding, and occasional pruning).
How to design a pollinator-friendly wild garden that blooms all season
Skip the high-maintenance garden—this approach mimics nature's best work.
🌱 Step 1: Choose a Sunlit, Sheltered Spot
Pollinators need warmth and protection from harsh winds. Pick an area with at least 6 hours of sun daily—morning light is ideal. Avoid low spots where cold air pools, as many native plants struggle in damp, chilly conditions. I always test locations by watching how sunlight moves across the space at different times of day.
Mark the boundaries with stakes and string to visualize your space. A 4-foot by 4-foot plot (for each of your 4 servings) gives enough room for diversity while keeping maintenance manageable. Real talk: I once planted a wildflower meadow in a windy corner, and half the seeds never germinated—don’t make that mistake.
🌿 Step 2: Prepare the Soil Lightly
Wild gardens thrive with minimal disturbance. Loosen the top 4-6 inches of soil with a broadfork or digging fork, breaking up compacted layers but leaving the roots undisturbed. This mimics natural soil conditions where wildflowers grow. Avoid tilling deeply—you’ll disrupt beneficial soil organisms that help plants establish.
Scatter a thin layer of compost or leaf mold (if available) over the surface—just enough to feed the soil without smothering native seeds. I like to rake it in lightly, creating small furrows where seeds can settle naturally. This step ensures your garden starts with healthy soil without the need for heavy amendments.
☀️ Step 3: Plant a Diverse Mix of Native Seeds
For year-round blooms, focus on native perennials and annuals that provide nectar and pollen from early spring through late fall. Mix seeds from 3-4 different families (like Asteraceae, Fabaceae, and Lamiaceae) to attract a variety of pollinators. Scatter seeds evenly by hand—no need for precision planting.
Lightly cover seeds with ¼ inch of soil or mulch, except for those labeled for surface sowing. Water gently but thoroughly to settle the seeds into the soil. You’ll see the first sprouts in 2-4 weeks, depending on the species and weather. Here’s the thing—don’t overwater after germination. Let nature take its course.
💧 Step 4: Water Sparingly and Let Nature Take Over
Once established, wild gardens need very little water. Water deeply once a week during the first growing season, aiming for 1 inch of water per week, including rainfall. After the first year, most native plants will be drought-tolerant. You’ll know your garden is thriving when you see pollinators—bees, butterflies, and hummingbirds—visiting the blooms regularly.
Mulch with straw or leaves in late fall to protect plants from freezing temperatures and suppress weeds. Avoid synthetic mulches—they can harm beneficial insects. I always leave some bare soil in patches, as ground-nesting bees rely on it for nesting.
✂️ Step 5: Maintain with Minimal Intervention
Wild gardens require almost no pruning. In late winter or early spring, cut back dead foliage to 6 inches tall to encourage new growth. Remove only the oldest stems to maintain airflow and prevent disease. Avoid tidying up too much—many pollinators rely on seed heads for winter food.
Pull out aggressive weeds like creeping charlie or bindweed, but leave native grasses and wildflowers alone. They’re part of the ecosystem! You’ll see your garden evolve naturally over time, with new species popping up each year. The goal isn’t perfection—it’s creating a thriving, self-sustaining habitat.
Tips & tricks for perfect pollinator-powered wild gardens
Creating a thriving wild garden isn't about perfection—it's about working with nature's rhythms. Here are the key insights I've learned after watching my own wildflower meadows transform over the years.
Sunlight Strategy: That 6 hours of sun requirement is non-negotiable for pollinators. I've found that morning sun (6 AM to noon) works best because it gives plants time to warm up before afternoon breezes. If your space only gets afternoon sun, choose drought-tolerant species like black-eyed Susans or coneflowers that thrive in those conditions. Trust me on this—shady spots will struggle to support diverse pollinator populations.
Soil Prep Secret: When loosening that 4-6 inches of soil in Step 2, think "gentle disturbance" rather than deep tilling. I use a broadfork to create channels for roots and water without turning the soil completely. This preserves the beneficial fungi and microbes that help native plants establish. Pro tip: If your soil is extremely compacted, add a 1-inch layer of coarse sand mixed with compost before planting—this improves drainage without smothering seeds.
Seed Diversity Hack: Mixing seeds from 3-4 different families isn't just about variety—it's about creating a food timeline. Early bloomers like violets provide food in spring, while late-season asters feed pollinators in fall. I like to include at least one legume (like clover) for nitrogen fixation and one grass species for habitat structure. Don't worry about precise spacing—nature handles the rest once established.
Watering Wisdom: That 1 inch per week guideline is perfect, but timing matters more than you'd think. Water in the early morning to prevent fungal diseases, and let the soil dry slightly between waterings after the first year. I've seen gardens fail when well-meaning gardeners kept soil constantly moist—this encourages root rot in native plants. Let the roots seek moisture naturally after establishment.
Pro Tips for Wild Earth Gardens
- Creating a thriving wild garden isn't about perfection—it's about working with nature's rhythms.
- Sunlight Strategy: That 6 hours of sun requirement is non-negotiable for pollinators.
- Soil Prep Secret: When loosening that 4-6 inches of soil in Step 2, think "gentle disturbance" rather than deep tilling.
Frequently asked questions
Got questions about creating a wild earth garden that buzzes with pollinators and blooms year-round? You’re not alone! Here are answers to the most common queries to help you get started—and keep your garden thriving.
What’s the easiest way to start a wild earth garden on a budget?
Begin with native wildflowers and perennial herbs—they’re low-cost, drought-resistant, and attract pollinators instantly. Check local conservation groups for free seed swaps or bulk discounts. Even a small patch (like a windowsill or balcony container) can make a difference!
How long does it take to see results in a wild earth garden?
Most native perennials pop up within 6–12 weeks of planting, while some wildflowers (like milkweed) may take 2–3 months to fully bloom. Annuals like cosmos or sunflowers deliver fast color (4–6 weeks), but the real magic happens in Year 2, when perennials establish roots and return stronger.
Will my wild earth garden attract pests like mosquitoes or wasps?
Not if you balance it right! Focus on native, non-invasive plants (avoid citrus or standing water). Include milkweed, coneflowers, and bee balm—they’re pollinator magnets, not pest magnets. A few predatory wasps (like mud daubers) are harmless and help control garden pests!
Can I use wild earth gardening in containers or small spaces?
Dwarf varieties
(like lobelia or alyssum) thrive in pots, and vertical gardens (hanging baskets, trellises) maximize space. Just ensure containers have drainage holes and use lightweight, well-draining soil. Even a 6-inch pot can host pollinators if planted with thyme, lavender, or borage.
How do I protect my wild earth garden in winter?
Most native perennials are hardy—they go dormant naturally! Cut back dead foliage in early spring (not fall) to protect overwintering insects. Mulch lightly with leaves or straw to insulate roots. Evergreen shrubs (like butterfly bush) add year-round structure and shelter.
What if my wild earth garden isn’t blooming as expected?
Check these fixes:
- Soil health: Test pH (most natives prefer 6.0–7.0). Amend with compost if needed.
- Watering: Deep water 1–2x/week (drought-tolerant plants hate soggy soil).
- Sunlight: Ensure 6+ hours of sun for most pollinator plants.
- Deadheading: Snip spent blooms to encourage new growth.
If problems persist, replace struggling plants with more resilient natives like black-eyed Susan or goldenrod.
Wrapping up and next steps
Creating a wild earth garden isn’t just about planting—it’s about nurturing a thriving ecosystem that blooms with life, even in cooler months. By blending native perennials, seasonal veggies, and pollinator-friendly flowers, you’re not only feeding your family but also supporting bees, butterflies, and birds.
The key? Start small, observe nature’s rhythms, and let your garden evolve with intention.
Ready to take the next step? Pick one corner of your yard or balcony this week—whether it’s a sunny patch for lavender and kale or a shady nook for ferns and microgreens—and begin your wild earth journey. Every seed planted is a promise to the planet! 🌱✨