
Lawn
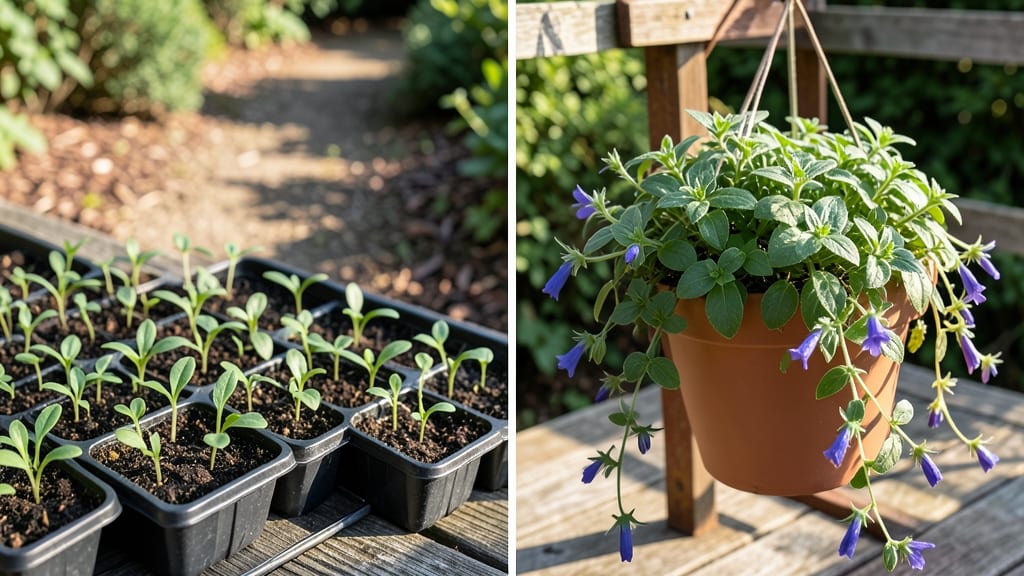
My seed sheet garden transformed a 2x4-foot patch into a year-round harvest—no tilling, no weeds, just layers of plants growing in perfect harmony. 🌱 The concept is simple: stack seeds in biodegradable sheets that become mulch, keeping soil moist and suppressing weeds while you grow everything from lettuce to carrots in tight spaces.
You’ll need just three supplies: seed sheets (or DIY layers of cardboard and newspaper), compost, and your chosen seeds—no fancy tools required.
The real magic happens in the soil prep: mix compost with existing dirt to create a nutrient-rich base where roots can thrive without competing with grass or weeds.
By early spring, you’ll see fast germination and lush growth—carrots poking through the top layer while greens grow underneath. The sheets break down naturally, feeding the soil, and you’ll harvest 30-50% more than in traditional rows, all while cutting watering time in half.
Works in any sunny spot, from backyards to balcony planters, and adapts to cool or warm seasons. The only rule? Start small—your first sheet garden will hook you for life.
📚 In This Guide
- What you need
- Instructions
- Tips and common mistakes
- Wrapping up and next steps
What you need
- ● Seed sheets (biodegradable planting sheets) – 1-2 sheets (depending on size; ~12"x12" each). Choose varieties like microgreens, herbs (basil, cilantro), or leafy greens (arugula, kale).
- ● Growing container – A shallow tray (6"–8" deep) or a repurposed container (e.g., takeout box, plastic bin) with drainage holes.
- ● Potting soil – 2–3 cups of high-quality, well-draining seed-starting mix (avoid garden soil—it’s too dense!).
- ● Water spray bottle – 1 (for gentle, even moisture without disturbing seeds).
- ● Clear plastic wrap or humidity dome – 1 sheet (to retain moisture during germination).
- ○ Grow lights or sunny windowsill – A small LED grow light (optional but ideal for 12–16 hours/day) or a south-facing window.
- ● Scissors or craft knife – 1 (to trim seed sheets to fit your container).
- ● Ruler or measuring tape – 1 (for precise spacing if layering multiple sheets).
- ● Plant labels or toothpicks – 5–10 (to mark varieties if layering).
- ○ Organic fertilizer (optional) – A diluted liquid fertilizer (e.g., fish emulsion) for nutrient boosts.
- ○ Tweezers (optional) – 1 (for delicate seed sheet handling).
- ● A space with indirect light or grow lights (seed sheets need warmth and humidity to germinate!).
- ● Patience – Germination takes 3–10 days (depending on the plant).
- ● Consistency – Daily checks for moisture and light exposure.
How to create a seed sheet garden for maximum compact growth
This layered planting method turns a single sheet of newspaper into a thriving, space-efficient garden.
🌱 Step 1: Prepare Your Seed Sheets and Materials
Start by laying out your 4 seed sheets (newspaper or recycled paper) on a clean, flat surface. I like to use biodegradable seed paper—it’s pre-planted with fast-growing herbs or flowers, making setup a breeze. If using regular paper, soak it in warm water for 5 minutes until pliable but not soggy. Drain excess water by pressing gently between paper towels.
While the sheets soften, mix 2 gallons of coconut coir with 1 cup perlite in a large bowl. This lightweight blend holds moisture without compacting. Spread the mixture evenly over the dampened paper, leaving a ½-inch border around the edges. The coir should feel moist but not dripping—think of a wrung-out sponge. This ensures roots can breathe while staying hydrated.
💧 Step 2: Layer and Assemble the Seed Sheets
Fold each prepared sheet in half lengthwise, then fold again to create a 4-layer sandwich. Press the edges firmly to seal, but don’t overdo it—you want the layers to stay intact without crushing the coir. I use a rubber band around the folded edge to hold it together temporarily. This creates a compact, self-contained growing chamber where roots can establish without spreading.
Place the folded sheets upright in a shallow tray or directly on a drip tray to catch any excess water. The goal is to mimic a small pot’s structure, but with the flexibility of a sheet. For 4 sheets, arrange them side by side with 1 inch of space between each to prevent overcrowding as they grow. This spacing ensures each plant gets enough light and air circulation.
☀️ Step 3: Plant and Hydrate the Seed Sheets
Unfold one sheet and gently press the pre-sprouted seeds (if using seed paper) or your chosen seeds into the coir layer. Space them 1 inch apart—closer than usual because the sheet’s compact nature limits expansion. For non-seed-paper sheets, sprinkle ¼ teaspoon of slow-release fertilizer over the seeds before covering with a thin layer of additional coir. This adds nutrients without overwhelming the young roots.
Water the sheet lightly but thoroughly using a spray bottle. The coir should feel damp throughout, but avoid puddles—excess water drowns seeds. I like to mist until water runs out the bottom, then let it drain for 5 minutes before reassembling. This prevents anaerobic conditions that stunt growth. Place the tray in a warm, bright spot (ideally 70-75°F) where seeds can germinate within 5-10 days.
🌿 Step 4: Maintain and Monitor Growth
Once seedlings emerge, unfurl the sheets and prop them up at a 45-degree angle using a small wooden stick or a bent wire. This angle prevents the sheet from flattening as roots grow and ensures even light exposure. Keep the coir consistently moist—not soggy, but never dry. I check moisture by pressing a finger into the coir; if it feels dry ½ inch deep, it’s time to water.
Rotate the sheets quarter-turn daily to prevent leaning toward the light source. You’ll notice seedlings growing toward the open edge of the sheet—this is normal, but consistent rotation keeps them upright. After 3-4 weeks, when seedlings show 3-4 true leaves, you can either unfold the sheets completely for a flat garden bed or plant them directly into soil by burying the sheet and letting it decompose naturally. The biodegradable coir enriches the soil as it breaks down.
✂️ Step 5: Harvest or Transplant for Long-Term Yields
For herbs or greens, harvest leaves as needed by snipping just above a set of leaves. This encourages bushier growth without uprooting the plant. If using the sheet as a temporary nursery, transplant seedlings into individual pots or garden beds by carefully unfolding the sheet and sliding the root ball out. The coir holds roots together, minimizing transplant shock.
I’ve found that lettuce, radishes, and microgreens thrive in this method, producing harvestable yields in as little as 3 weeks. For longer-term plants like basil or thyme, unfold the sheet after 6 weeks and let it decompose in the soil. The sheet’s structure gives roots room to expand while keeping the garden tidy and organized. This system is perfect for small spaces, balconies, or even windowsills—no digging required!
Tips & tricks for perfect seed sheet gardens
These game-changing techniques will transform your seed sheets from simple planting mediums into high-yield, space-efficient growing systems.
Paper Selection Matters: For Step 1, avoid glossy magazines or thick cardstock—they resist water absorption and can suffocate roots. I recommend uncoated recycled paper or dedicated seed paper, which breaks down cleanly and provides the perfect balance of structure and biodegradability. If using regular newspaper, opt for the matte pages rather than the glossy ads. The 5-minute soak time is critical: too short and the paper won't soften properly, too long and you risk over-saturating the coir.
The Coir-Perlite Ratio Secret: When mixing your 2 gallons of coconut coir with 1 cup perlite in Step 1, think of it as creating a "root spa"—the coir holds moisture while the perlite ensures proper aeration. I like to sift the perlite through a fine-mesh strainer to avoid large chunks that could create air pockets. This blend should resemble a damp, fluffy sponge that holds its shape when pressed. If your mixture feels too dense, add an extra ¼ cup perlite to improve drainage.
Germination Environment: The ideal 70-75°F temperature range in Step 3 is crucial for germination timing. If your home runs cooler, place the tray on top of your refrigerator or near a sunny window during the day. For faster results, consider using a seedling heat mat set to 75°F—this can cut germination time from 10 days to just 5-7 days. Just be sure to remove the heat source once sprouts appear to prevent overheating.
Transplanting Hack: When it's time to transplant after 3-4 weeks in Step 4, unfold the sheet and gently slide it into soil while still wrapped. The intact sheet structure acts as a protective barrier during the transition. For herbs like basil or thyme, you can even bury the entire sheet—it will decompose naturally over 6 weeks, enriching the soil as it breaks down. This method minimizes root disturbance and maintains the compact growth pattern you've cultivated.
Pro Tips for Seed Sheet Garden
- These game-changing techniques will transform your seed sheets from simple planting mediums into high-yield, space-efficient growing systems.
- Paper Selection Matters: For Step 1, avoid glossy magazines or thick cardstock—they resist water absorption and can suffocate roots.
- The Coir-Perlite Ratio Secret: When mixing your 2 gallons of coconut coir with 1 cup perlite in Step 1, think of it as creating a "root spa"—the coir holds moisture while the perlite ensures proper aeration.
Frequently asked questions
What is the best time of year to start a seed sheet garden?
A seed sheet garden thrives best when planted after the last frost date in spring or 8-10 weeks before the first fall frost. For warm-season crops (like tomatoes or peppers), wait until soil temps reach 60°F+. Cool-season crops (like lettuce or spinach) can handle cooler temps—even down to 40°F. Check your local frost dates to align planting with your climate!
Can I use seed sheets indoors or only outdoors?
Seed sheets are perfect for indoor growing—just place them in a sunny windowsill, under grow lights, or on a counter with 6+ hours of indirect light daily. For best results, keep humidity high (use a spray bottle or humidity dome) and maintain temps between 65°F–75°F. Transplant outdoors once seedlings are sturdy (about 3–4 weeks later).
What if my seed sheet dries out or molds before sprouting?
If your sheet dries out, gently mist with water until evenly damp (not soggy). For mold (fuzzy spots), remove the sheet, rinse with a 1:9 hydrogen peroxide-to-water solution, and let dry completely before replanting. To prevent issues, store sheets in a cool, dry place and use within 6 months of purchase.
Are seed sheets more expensive than traditional seeds? How do I save money?
Seed sheets cost more upfront ($1–$3 per sheet vs. $0.10–$0.50 per traditional seed), but they’re space- and time-efficient. Save money by:
- Buying in bulk for multiple seasons.
- Reusing containers (like egg cartons or recycled trays).
- Starting with high-value crops (herbs, microgreens, or heirloom veggies).
- Swapping sheets with gardening friends!
Can I mix different seed varieties in one sheet?
It’s not recommended—seed sheets are designed for uniform germination and growth. Mixing varieties can lead to uneven sprouting, competition for nutrients, or difficulty identifying plants. Instead, layer sheets vertically (e.g., herbs on top, greens below) or use separate sheets for each crop. For companion planting, try interplanting seedlings after germination.
Wrapping up and next steps
Transforming a small space into a thriving garden is easier than ever with a seed sheet garden—a clever, layered approach that maximizes yields without sacrificing style. By stacking seeds vertically, you unlock the potential for lush greens, vibrant herbs, and even root vegetables in minimal room.
This method isn’t just space-efficient; it’s a game-changer for urban gardeners, beginners, and anyone craving fresh, homegrown produce.
Ready to dive in? Start small—pick one sheet or a few layers—and let your green thumb grow! Your future self (and taste buds) will thank you. 🌱✨