
Landscaping
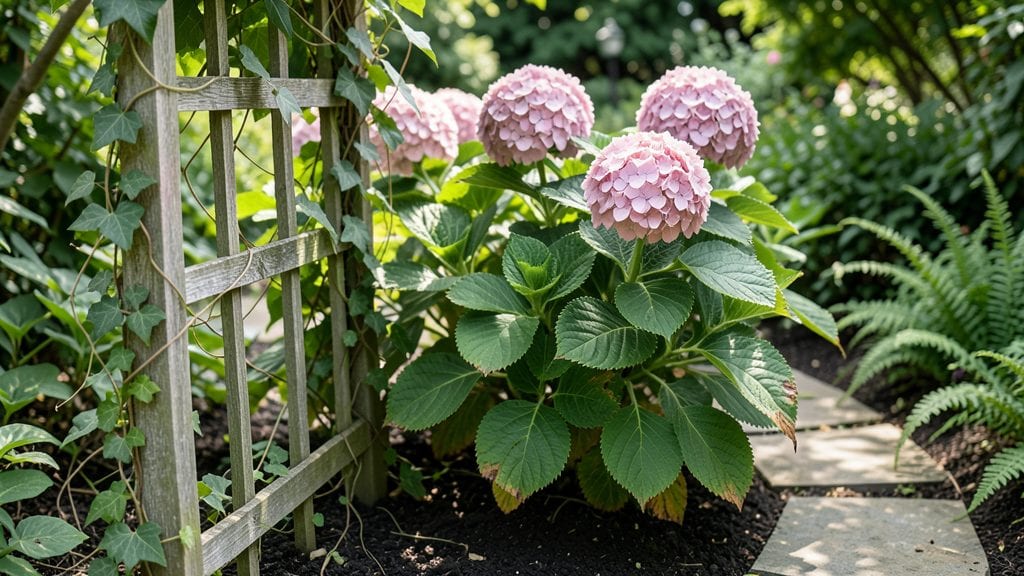
Creating a secret garden landscape feels like designing a private escape—one where every turn reveals something magical. 🌿 I stumbled upon this idea after reading about hidden gardens in English country estates, and now I’m obsessed with how you can craft your own secluded haven right in your backyard.
The key? Curving pathways that invite exploration, lush plants that create natural privacy, and little nooks that feel like they’ve been there for decades.
You don’t need acres to pull this off—just a corner of your yard, some basic materials, and a little creativity. Start with a winding path made of stepping stones or crushed gravel, then layer in tall grasses, climbing roses, and shade-loving ferns to frame the space.
Add a few whimsical touches like a vintage bench or a small water feature, and suddenly, you’ve got a garden that feels like stepping into a storybook.
The payoff is a space that feels uniquely yours—where the air smells sweeter, the light filters differently, and every visit feels like a little adventure. Imagine sipping tea under a pergola draped in ivy or discovering a hidden corner blooming with peonies.
This isn’t just landscaping; it’s creating a sanctuary that whispers secrets only you know.
Whether you’re working with a small courtyard or a sprawling backyard, the principles stay the same: prioritize layers, play with textures, and let nature do the heavy lifting. Here’s how to bring the magic to life—no fairy godmother required.
📚 In This Guide
- What you need
- Instructions
- Tips and common mistakes
- Wrapping up and next steps
What you need
- ● Native plants & shrubs: 10–20 plants (e.g., hostas, ferns, boxwoods, or ivy for climbing walls). Choose shade-tolerant varieties for hidden spots.
- ● Mulch: 2–3 bags (cedar or pine for a natural, aromatic look).
- ● Gravel or pebbles: 1–2 bags (for pathways or borders).
- ● Trellises or arbors: 2–4 (for vertical growth and privacy).
- ○ Vines (optional but magical!):strong> Clematis, jasmine, or wisteria (1–2 plants per trellis).
- ● Basic landscaping tools: Shovel, rake, pruners, gloves, and kneeling pad.
- ● Measuring tape & string: For marking hidden pathways (use stakes to outline curves!).
- ● Edging tool: To define borders neatly.
- ● Wheelbarrow or bucket: For hauling soil/mulch.
- ○ Optional but fun: Fairy lights or solar-powered path lights (for ambiance!).
- ● Small stepping stones or decomposed granite (for rustic paths).
- ● Birdhouses or benches (to blend into the scenery).
- ● Site assessment: Identify sun/shade patterns and existing obstacles (e.g., trees, fences).
- ● Permits (if needed):
- ● Budget: Estimate costs for plants, tools, and any hardscaping (e.g., stone paths).
- ● Patience & creativity! 🌱 Secret gardens thrive on layering—plan for gradual growth.
Step-by-Step instructions for designing a secret garden landscape
Turn your outdoor space into a magical retreat with this dreamy, layered approach.
🌱 Step 1: Plan Your Hidden Pathways
Start by sketching your layout on paper, marking where you want paths to wind through the space. I like to use a mix of stepping stones and gravel paths—this creates visual interest while keeping maintenance low. For a truly hidden feel, curve your paths gently so they disappear around foliage or behind shrubs.
Measure your space carefully. A 4-6 foot wide path gives enough room to walk comfortably while leaving space for planting around it. Mark the path edges with stakes and string to keep your digging straight. Here's the thing—don't worry about perfect lines. Nature thrives on organic shapes, so let your paths meander naturally.
🌿 Step 2: Create Enchanted Nooks
Choose 3-4 focal points where you'll place your "enchanted nooks." These could be cozy seating areas, small water features, or even a miniature trellis with climbing roses. I always include at least one hidden bench tucked behind a tall shrub or under a flowering tree.
For each nook, select plants that will grow to provide natural privacy. Evergreen shrubs like boxwood or holly work beautifully, as do tall ornamental grasses. Arrange seating so it faces something interesting—a small pond, a flower bed, or even a view of the garden's winding paths. The key is to make each spot feel like its own little world.
✂️ Step 3: Layer Your Plantings for Depth
Plant in three distinct layers: tall plants at the back, medium-height plants in the middle, and low-growing ground covers in front. This creates that magical "secret garden" feeling where you can't see everything at once. I like to use a mix of flowering shrubs, perennials, and climbers to keep color and texture changing throughout the seasons.
Leave some open spaces between plants so sunlight can reach the ground, encouraging wildflowers or moss to grow naturally. These little surprises make your garden feel alive and untamed. Water your new plantings deeply right after installing them—this helps them establish strong roots before summer heat arrives.
💧 Step 4: Add Water Features and Lighting
A small bubbling fountain or even a simple birdbath adds the magical "enchanted" touch. Place it near one of your nooks where you can hear the water while sitting. For lighting, I recommend solar-powered path lights or string lights draped between trees—they create a dreamy atmosphere when night falls.
Install lights along your pathways and around seating areas. The soft glow will guide you through the garden after dark while highlighting the most beautiful plants. Here's what I've found: people often forget about lighting until they try to navigate their garden at dusk, so plan this early in your design process.
☀️ Step 5: Maintain the Mystery
To keep your garden feeling secretive, incorporate elements that draw the eye deeper into the space. Use tall plants to frame views, create winding paths that disappear around corners, and place benches or seating areas where visitors naturally pause to explore further.
Regular maintenance keeps your garden looking its best. Prune plants as needed to maintain their shapes, and remove any weeds that compete with your carefully chosen plants. I like to spend 10-15 minutes each week walking through the garden, checking for anything that needs attention. This small investment keeps your secret garden looking magical all season long.
Tips & tricks for perfect secret garden layout
Creating a truly magical secret garden comes down to these thoughtful details that transform a simple outdoor space into an enchanted retreat.
Pathway Design Secret: For that authentic secret garden feel, I've found that alternating between stepping stones and gravel paths creates the most enchanting effect. Use stepping stones for the main pathways where you'll walk frequently, and save the gravel for more decorative sections that disappear into the foliage. The key is to make your paths feel like they've always been there—nature's own winding trails. If you're working with a small space, consider using flat flagstones instead of traditional pavers to maintain that organic look.
Enchanted Nook Strategy: In Step 2, when creating your nooks, I recommend placing one seating area near a water feature and another tucked behind a tall, dense shrub like boxwood. This creates a sense of discovery—visitors will naturally explore to find the hidden bench. For extra privacy, add climbing roses or clematis to the trellis behind your seating area. These plants will grow quickly and provide both fragrance and visual interest as they mature.
Planting Layering Tip: When you're layering your plantings in Step 3, think vertically as well as horizontally. Tall plants like hollyhocks or delphiniums should be placed at the back, while medium-height shrubs like hydrangeas or lavender go in the middle layer. For the front layer, use low-growing plants like ajuga or creeping thyme. Leave gaps between plants to encourage wildflowers to grow naturally—this adds to the garden's untamed charm. Don't forget to water deeply after planting to help roots establish quickly.
Lighting Placement: For the magical evening atmosphere in Step 4, I suggest placing solar-powered path lights every 3-4 feet along your pathways. This creates a soft, continuous line of light that guides visitors through the garden. For your seating areas, use string lights draped between trees or shrubs to create a canopy effect. The secret is to position lights so they highlight interesting plants or features rather than just illuminating the path. This draws the eye to the beauty of your garden after dark.
Pro Tips for Secret Garden Landscape
- Creating a truly magical secret garden comes down to these thoughtful details that transform a simple outdoor space into an enchanted retreat.
- Pathway Design Secret: For that authentic secret garden feel, I've found that alternating between stepping stones and gravel paths creates the most enchanting effect.
- Enchanted Nook Strategy: In Step 2, when creating your nooks, I recommend placing one seating area near a water feature and another tucked behind a tall, dense shrub like boxwood.
Frequently asked questions
Got questions about crafting your own secret garden landscape? You’re not alone! Here are answers to the most common queries—from hidden paths to cozy nooks—so you can dive in with confidence.
Can I build a secret garden in a small backyard?
Even tiny spaces can hide magical corners. Use vertical gardens, tiered planters, or clever fencing to create privacy. Focus on layered elements like trellises, arched gates, or a winding pebble path to maximize illusion. Think "secret" over "sprawling"—a 4’x4’ nook with twinkling lights and lush foliage feels like a fairy escape!
What’s the best time of year to start?
Spring or early fall are ideal for planting perennials and shrubs, but you can prep year-round! Start with structural elements (like trellises or arbors) in winter, then add plants when the weather cooperates. For instant drama, use evergreens or drought-tolerant plants that thrive in shade—your "secret" will stay lush no matter the season.
How do I hide a path without making it unsafe?
Safety first! Use natural materials like moss-covered stepping stones, curved wooden planks, or a gravel trail lined with low shrubs. Add subtle lighting (solar-powered path lights or LED candles) to guide your steps after dark. Avoid deep mulch or loose rocks—stick to firm, even surfaces to prevent trips.
What if my garden gets too much sunlight?
Shade-loving plants are your best friends! Opt for hostas, ferns, astilbes, or impatiens for dappled light, and add a pergola or lattice for extra cover. If sunlight is intense, try a morning-glory vine on a trellis—it blooms in the heat but retreats by afternoon, keeping your nook cool and magical.
How can I add enchantment without breaking the bank?
DIY charm wins every time! Hang wind chimes, solar-powered fairy lights, or repurposed bottles as lanterns. Paint pebbles with metallic accents for a "hidden treasure" path, or place a vintage teacup on a shelf. Even a whimsical sign (like "Beware: Garden Spirits Ahead") elevates the vibe—no budget required!
Wrapping up and next steps
Creating your own secret garden landscape is more than just a landscaping project—it’s an invitation to magic, tranquility, and personal escape. Whether you’re weaving hidden paths through lush foliage or crafting cozy nooks with fairy lights, the key is to blend creativity with intention.
Now that you’ve got the tools, tips, and answers, there’s no better time to start small and dream big.
Ready to transform your space? Sketch your vision today—grab a pencil, a notepad, and let your secret garden’s story unfold! 🌿✨