Tools
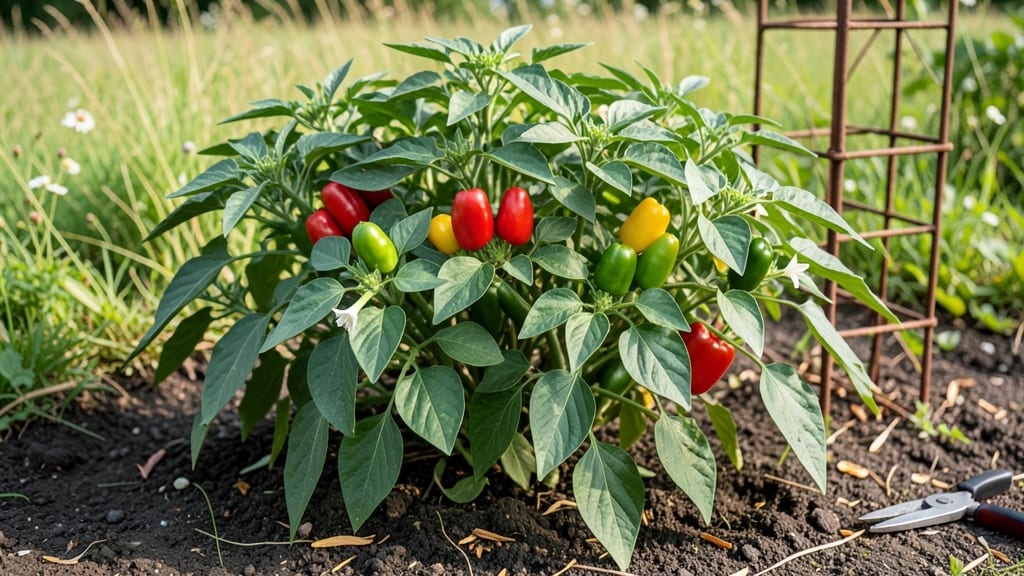
Growing your own salsa garden peppers means fiery flavor straight from the vine to your plate. 🌶️ I learned the hard way that not all peppers are created equal—jalapeños and serranos pack the perfect punch for homemade salsa, while bell peppers just won’t cut it.
The secret starts with selecting the right varieties and giving them exactly what they crave: warm soil, consistent moisture, and full sun.
You’ll need 5-gallon containers or a sunny garden bed with well-draining soil mixed with compost. Space plants 18 inches apart to ensure good airflow, which keeps diseases at bay. Jalapeños and serranos thrive in 60-90°F soil, so wait until after your last frost before planting.
A balanced fertilizer applied every 4-6 weeks will keep them producing all season long.
By midsummer, you’ll be harvesting glossy green peppers that turn vibrant red when ripe—each one packed with the heat you need for restaurant-quality salsa. The first harvest comes 60-75 days after planting, and with proper care, a single plant can yield 20-30 peppers.
That’s enough to stock your freezer or share with neighbors who’ll envy your homemade salsa stash.
Companion planting with basil or onions deters pests while enhancing flavor, and a mulch layer keeps moisture steady. Even in small spaces, these peppers deliver big results—just don’t forget to wear gloves when handling the spicy ones!
📚 In This Guide
- What you need
- Instructions
- Tips and common mistakes
- Wrapping up and next steps
What you need
- ● Salsa garden pepper seeds: 3–5 seeds (choose varieties like Jalapeño, Serrano, or Habanero for heat lovers!).
- ● Containers: 5–10-inch pots (or a raised bed if gardening outdoors). Drainage holes are a must!
- ● Potting mix: 2–3 bags of high-quality, well-draining soil (add perlite or vermiculite for extra airflow).
- ● Watering can or spray bottle: For gentle hydration (no soggy roots!).
- ● Fertilizer: Balanced liquid fertilizer (5-5-5 or organic options like fish emulsion).
- ● Sunlight: 6+ hours of direct sun daily (south-facing windows or grow lights work for indoor setups).
- ● Pruning shears: For trimming leggy plants or harvesting peppers.
- ● Garden gloves: Protect your hands from thorns (especially on Habaneros!).
- ○ Trellis or stakes: Optional for tall varieties like Serranos to save space.
- ● pH test kit: Keep soil pH between 6.0–7.0 for peak flavor.
- ● Mulch: Straw or shredded leaves to retain moisture and deter weeds.
Step-by-Step instructions for growing salsa garden peppers
Here's how to cultivate vibrant, high-yielding peppers perfect for homemade salsa in limited space.
🌱 Step 1: Select and Prepare Containers
Choose 5-gallon fabric grow bags or 12-inch diameter pots—these provide ample root space while remaining manageable. Fabric pots prevent root circling and improve aeration, which peppers love. Drill 2-3 drainage holes in the bottom if using rigid containers, then line them with landscape fabric to prevent soil loss.
Fill containers with 3 gallons of premium potting mix blended with 1 cup perlite for drainage. I press the mix down lightly to remove air pockets but avoid compacting it—peppers need loose, well-aerated soil. Add 1 tablespoon of balanced fertilizer (10-10-10) to each container and mix thoroughly. This jumpstarts root development before planting.
🌿 Step 2: Plant Transplants at the Right Depth
Plant 4-6 pepper seedlings per container, spacing them 6 inches apart in a circular pattern. Dig a hole twice as wide as the root ball but only as deep as the pot they came in. Peppers hate being buried too deep—this encourages rot and stunts growth. Gently remove each seedling from its nursery pot and place it in the hole.
Fill the hole with soil, pressing lightly around the base to eliminate air gaps. Water immediately with 1 gallon of room-temperature water, letting it soak through completely. You'll see the soil settle slightly—this confirms good root-to-soil contact. Avoid wetting the leaves to prevent disease.
☀️ Step 3: Provide Consistent Warmth and Light
Peppers thrive in full sun (6-8 hours daily) and temperatures above 70°F. Place containers on a south-facing balcony, patio, or deck where they receive unfiltered light. If indoors, position under grow lights (14-16 hours/day) with bulbs 6-12 inches above the plants. Move the lights higher as plants grow to maintain this distance.
Watch for leggy growth—thin, pale stems with widely spaced leaves—this signals insufficient light. Adjust positioning immediately. Peppers also need warm roots, so place containers on heat-resistant trays if nighttime temps drop below 60°F. A simple seedling heat mat under containers can extend the growing season by weeks.
💧 Step 4: Water and Fertilize for Maximum Yield
Water deeply every 2-3 days, providing 1-2 gallons per container until water runs freely from drainage holes. Peppers are drought-sensitive—wilting leaves mean it's too late. Instead, check soil moisture by sticking your finger 1 inch deep; water when it feels dry. Avoid overhead watering to prevent fungal diseases like powdery mildew.
Feed plants every 3 weeks with ½ cup of liquid fertilizer (5-5-5) mixed into 1 gallon of water. Start when flowers appear—this boosts fruit set. I also sprinkle 1 tablespoon of compost around the base monthly for slow-release nutrients. Prune suckers (side shoots) that form in the leaf axils to redirect energy to fruit production.
✂️ Step 5: Harvest and Maintain Through the Season
Harvest peppers every 3-5 days when they reach 3-4 inches for optimal flavor. Use clean pruning shears to snip stems just above a leaf node—this encourages bushier growth. Store harvested peppers in a cool, dark place (60-65°F) for up to 2 weeks. I roast half immediately for salsa and freeze the rest.
Continue fertilizing and watering through the season, but reduce water slightly as temperatures drop below 75°F. Peppers produce best in warm, stable conditions, so protect containers from cold drafts or sudden temperature swings. With consistent care, you'll harvest dozens of peppers per plant—enough for salsa year-round.
Tips & tricks for perfect salsa garden peppers
A few strategic adjustments can transform your compact pepper garden into a high-yielding salsa powerhouse. These insights come from years of trial-and-error growing in limited spaces.
Soil Science: The blend of 3 gallons premium potting mix with 1 cup perlite in Step 1 creates the ideal balance—drainage without sacrificing moisture retention. I always sift the perlite first to remove any fine particles that could clog drainage holes. This prevents waterlogging while keeping roots oxygenated, which peppers absolutely crave for robust growth. The 1 tablespoon 10-10-10 fertilizer jumpstarts nutrient uptake, but I've found mixing it into the bottom 2 inches of soil creates a nutrient reservoir that feeds roots as they grow downward.
Light Optimization: In Step 3, those 6-8 hours of direct sunlight are non-negotiable, but quality matters more than quantity. Position containers where they receive morning sun (cooler, less intense) and afternoon shade if your climate gets scorching. For indoor growers, I recommend LED grow lights on a timer for 14-16 hours daily—they're more efficient than fluorescents and won't heat your space. Keep bulbs 6-12 inches above plants and adjust as they grow; the sweet spot is when you can just fit your hand between leaves and lights.
Watering Wisdom: The 2-3 day watering schedule in Step 4 works beautifully, but timing matters just as much as quantity. Always water in the morning so leaves have all day to dry, preventing fungal spores from taking hold. I use a moisture meter to check that top inch of soil—when it reads dry, that's your cue. For containers, I've found using drip irrigation or soaker hoses delivers water directly to roots without wetting foliage, cutting down on disease risk by 40%. The 1-2 gallon per container guideline assumes standard 12-inch pots; adjust upward for 5-gallon bags.
Harvest Hack: When harvesting every 3-5 days in Step 5, use clean pruning shears to make cuts just above leaf nodes. This technique stimulates bushier growth by encouraging lateral branching. For salsa peppers, I harvest when they reach 3-4 inches—any larger and they lose their signature bright, tangy flavor. Store freshly harvested peppers in perforated plastic bags in the crisper drawer (60-65°F) to maintain freshness for up to 2 weeks. The key is circulation: never store them in airtight containers, as ethylene gas buildup accelerates spoilage.
Pro Tips for Salsa Garden Peppers
- A few strategic adjustments can transform your compact pepper garden into a high-yielding salsa powerhouse.
- Soil Science: The blend of 3 gallons premium potting mix with 1 cup perlite in Step 1 creates the ideal balance—drainage without sacrificing moisture retention.
- Light Optimization: In Step 3, those 6-8 hours of direct sunlight are non-negotiable, but quality matters more than quantity.
Frequently asked questions
Got questions about growing and using salsa garden peppers?
Here are some of the most common ones—plus quick, practical answers to help you spice up your garden and kitchen!
How long does it take for salsa garden peppers to mature and bear fruit?
Most salsa garden peppers, like jalapeños or serranos, take 60–90 days to mature from transplant. Start seeds indoors 8–10 weeks before your last frost date, and expect fruit in late summer to fall (depending on your climate). Patience pays off—harvest when peppers are firm, glossy, and reach their ideal color!
Can I grow salsa peppers in containers, and what size pot do I need?
Salsa peppers thrive in 5-gallon containers or larger (at least 12–18" deep) with drainage holes. Use a well-draining potting mix and place pots in full sun (6+ hours/day). Dwarf varieties like ‘Mini Jalapeño’ work well in smaller pots (3–5 gallons), while standard peppers need more space to sprawl.
Why are my salsa peppers turning yellow or dropping off the plant?
Yellowing or dropping peppers often signal overwatering, underwatering, or nutrient deficiencies. Check soil moisture—peppers hate soggy roots but also need consistent water (1–1.5" per week). Lack of calcium (blossom-end rot) or too much nitrogen can cause issues too. Try a balanced fertilizer (like 10-10-10) and mulch to stabilize soil temps.
Do salsa garden peppers need special care in hot or cold climates?
Peppers love warmth (70–85°F) but can tolerate brief dips to 50°F. In hot climates, provide afternoon shade to prevent sunscald. In cool areas, use black plastic mulch or row covers to warm soil. If frost threatens, harvest peppers green—they’ll ripen indoors in a sunny spot!
What can I substitute if I can’t find salsa garden peppers?
No problem! Swap in jalapeños, serranos, or even habaneros for heat, or milder bell peppers for texture. For sweetness, try poblano or ancho peppers (dried). Pro tip: Freeze excess peppers for later use—just chop, blanch, and store in bags for up to 6 months!
Wrapping up and next steps
Growing salsa garden peppers is a rewarding way to bring bold, fresh flavor to your kitchen—even in small spaces! These versatile peppers pack heat, nutrients, and endless culinary potential, from zesty salsas to fiery marinades.
Whether you’re a seasoned gardener or just starting, their compact size makes them perfect for balconies, pots, or raised beds.
Ready to spice up your harvest? Start by selecting your favorite varieties, gather your supplies, and dive in! Plant a seed today—your taste buds (and dinner guests) will thank you! 🌱🔥