
Landscaping
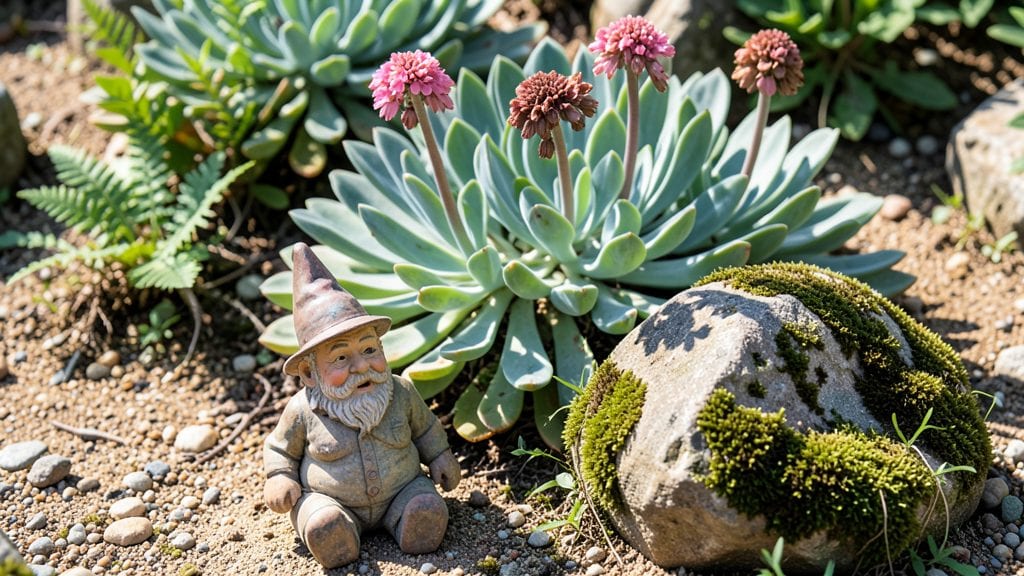
Discover these rockery garden ideas to turn your bare slopes into stunning stone terraces that stay lush and vibrant long after other plants wither away. 🌿 I spent years watching my hillside erode until I discovered how strategic rock placement and drought-tolerant plants could turn it into a thriving, low-maintenance feature that needs no summer watering once established.
The magic lies in layering stones by size—larger ones at the base for stability, smaller ones cascading upward—and pairing them with plants that love rocky conditions. Sedum, thyme, and creeping phlox spread effortlessly between the crevices, while ferns and hostas add lush contrast in shadier spots.
My favorite design uses locally sourced slate for that organic, rugged look that blends seamlessly with nature.
What you end up with is a garden that demands almost no maintenance but rewards you with year-round color and texture. The terraces prevent soil erosion while creating microclimates perfect for alpine plants, and the stone itself stays cool even in summer heat.
Best of all, you can start small with just a few square feet or go bold with a full slope transformation.
Works equally well for sunny backyards, woodland edges, or even container rockeries on patios. Here’s how to make it happen without breaking the bank or your back—using materials you might already have around the property.
📚 In This Guide
- What you need
- Instructions
- Tips and common mistakes
- Wrapping up and next steps
What you need
- ● Rocks & Stones: Flat stones (for base layers) – 10–20 per sq. ft. (varies by design)
- ● Irregular boulders (for texture) – 5–15 per sq. yard
- ● River rocks or pebbles (for drainage/fill) – 5–10 lbs per sq. ft.
- ● Soil & Growing Medium: Well-draining potting mix – 2–3 cubic feet per sq. ft. of rockery
- ● Perlite or sand (for aeration) – 1–2 cups per sq. ft.
- ● Compost (for nutrients) – 1–2 bags per project
- ● Heavy-duty gloves & safety goggles (for handling rocks)
- ● Shovel & garden trowel (for digging)
- ● Wheelbarrow (for hauling materials)
- ● Level & measuring tape (for precision)
- ● Hammer & chisel (for shaping stones, if needed)
- ● String line & stakes (to mark layout)
- ● Garden hose (for watering)
- ● Edging material (bark, metal, or plastic) – to define borders
- ● Moss or ground cover plants (for softening gaps)
- ● Solar-powered lights (for evening ambiance)
- ● Decorative mulch (for color contrast)
- ● Waterproof landscape fabric (to prevent weed growth)
Step-by-Step guide to building rustic stone terraces
Transform your yard into a striking rockery with these simple, natural stone terraces that blend beauty and function.
🪴 Step 1: Select and Prepare Your Stones
Gather flat, stable stones of varying sizes—think river rocks, flagstones, or even repurposed concrete slabs. I like to mix textures for visual interest, but avoid anything too heavy to move alone. Clear the building area of grass, weeds, and debris using a shovel and rake. A 6-inch layer of landscape fabric keeps weeds from creeping up later.
Arrange stones in your desired pattern before digging. This dry layout lets you visualize the flow and make adjustments. For a rustic look, stagger edges and leave small gaps between stones—these will later hold soil and plants. Mark the stone outlines with a garden hose or string to guide your digging.
✂️ Step 2: Dig and Level the Base
Dig trenches around each stone's perimeter, about 3-4 inches deep and 2-3 inches wider than the stone's base. Use a level to ensure each trench sits perfectly flat—uneven bases will make your terraces wobbly. Pack the soil firmly at the bottom of each trench with a tamper or the back of your shovel.
For larger stones, you might need to dig deeper or add a layer of compacted gravel for stability. I always check stability by gently rocking each stone after placement—if it shifts, dig a bit deeper or add more soil underneath. Leave about 1-inch gaps between stones for drainage and plant roots.
🌱 Step 3: Fill Gaps and Plant for Year-Round Interest
Fill the gaps between stones with a mix of topsoil and compost (about 50/50 ratio). This creates pockets for hardy plants like sedum, creeping thyme, or moss. Press the soil gently around the edges to secure stones while leaving room for roots to spread.
Choose plants that thrive in rocky conditions—succulents, ornamental grasses, and drought-tolerant perennials work best. Space them so they’ll fill in nicely without overcrowding. Water thoroughly after planting to help soil settle and roots establish. Mulch with small gravel or bark chips to keep soil moist and suppress weeds.
💧 Step 4: Add Finishing Touches for Longevity
Install a simple irrigation system if your climate is dry. Drip lines or soaker hoses tucked along the edges of the terraces deliver water directly to plants without disturbing stones. For extra stability, add a border of smaller stones or edging material around the perimeter of your rockery.
Finally, step back and admire your work! Over time, the plants will soften the look, and the stones will weather naturally. I like to add a few larger accent rocks or driftwood pieces later for extra character. This design stays low-maintenance while providing year-round texture and color.
Tips & tricks for perfect rustic stone terraces
Between us, these little details make all the difference between a good rockery and one that looks like it belongs in a magazine spread.
Stone Selection Wisdom: I can't stress enough how important it is to test your stones before committing. Pick up each one and give it a good shake—if it wobbles or feels unstable, it's not the right stone for your terraces. Also, look for flat sides that are at least 6-8 inches wide for proper stability. River rocks might be pretty, but they often don't provide enough surface area to create sturdy terraces. For that authentic rustic look, I recommend mixing in a few slightly uneven stones—they add character without sacrificing stability.
Leveling Secret: Here's what nobody tells you—the trenches in Step 2 need to be level in two directions, not just one. Use your level to check both lengthwise and widthwise of each trench. I've seen terraces look perfectly level from one side but wobble when viewed from another angle. Pro tip: Place your stones in the trenches before packing the soil—this lets you test the level with the actual stones in place, which gives you a more accurate read of how your finished terraces will sit.
Plant Placement Strategy: When you're filling those 1-inch gaps in Step 3, think about the growth patterns of your plants. Place taller varieties like ornamental grasses toward the back of your terraces and shorter ground covers like creeping thyme in the front. This creates natural layers and prevents taller plants from shading out their neighbors. I also recommend planting in clusters of 3-5 plants rather than single specimens—it creates a more natural, established look right from the start.
Optional: Weatherproofing Upgrade: For terraces in windy areas or exposed locations, consider adding a wire mesh layer under your stones before digging. This prevents stones from shifting over time and adds extra stability. I've used this trick with large concrete slabs in my backyard, and it's kept them perfectly in place through several windstorms. Just make sure to cut the mesh to fit snugly under each stone—you don't want any gaps where weeds could sneak in.
Pro Tips for Rockery Garden Ideas
- Between us, these little details make all the difference between a good rockery and one that looks like it belongs in a magazine spread.
- Stone Selection Wisdom: I can't stress enough how important it is to test your stones before committing.
- Leveling Secret: Here's what nobody tells you—the trenches in Step 2 need to be level in two directions, not just one.
Frequently asked questions
Got questions about creating your dream rockery garden?
Here are some of the most common ones—and their answers—to help you get started with confidence!
How do I keep weeds from taking over my rockery?
Weeds thrive in rocky gaps! Use landscape fabric under stones to block growth, or mulch with gravel or bark chips between rocks. For a natural look, plant ground covers like creeping thyme or sedum—they crowd out weeds while adding greenery. Pro tip: Pull weeds early (before they seed!) and water deeply but infrequently to discourage invasive species.
When is the best time to build a rockery?
The ideal time is early spring or fall when soil is workable but not frozen. Avoid summer heat (which dries soil too fast) or winter (when frost can shift stones). If you’re planting perennials, add them in spring or early fall for the best root establishment. Quick tip: Start small—even a partial build in mild weather works!
Are there budget-friendly alternatives to expensive landscaping stones?
Try:
- Recycled materials: Broken concrete, bricks, or even cleaned-up construction rubble (painted or left natural).
- Local rocks: Visit quarries, riverbanks, or farm supply stores for affordable, unique stones.
- DIY "dry-stacked" walls: Use reclaimed wood or cinder blocks as a base for a rustic vibe.
My rockery looks uneven—how do I fix it?
Uneven rocks can happen! Start by leveling the base with compacted soil or a thin layer of sand. For loose stones, gently tap them into place with a rubber mallet or shift them slightly to fill gaps. If drainage is poor, add perforated pipes or gravel layers underneath. Remember: Rocks don’t need to be perfect—natural imperfections add charm!
Can I add lighting to my rockery for a magical nighttime effect?
Yes! Solar-powered stake lights or low-voltage LED spotlights highlight textures beautifully. Bury waterproof garden lights near plants for a soft glow, or use string lights draped over stones. Safety tip: Use weatherproof cords and avoid overloading circuits. Solar options are the easiest for DIYers!
Wrapping up and next steps
Creating a rockery garden is a fantastic way to add texture, charm, and year-round greenery to your outdoor space—without the high maintenance!
Whether you’re drawn to the rustic elegance of stacked stones or the whimsical charm of cascading plants, these ideas prove that even small spaces can thrive with a little creativity and care. 🌿✨
The key takeaway? Start small, choose the right stones and plants for your climate, and let nature do the rest. Ready to transform your yard? Grab your tools, sketch a simple design, and begin layering stones and greenery one rock at a time. Your future rockery awaits—happy building! 🛠️💚
- Next step: Pick a corner of your garden and sketch your first rockery layout!