Vegetables
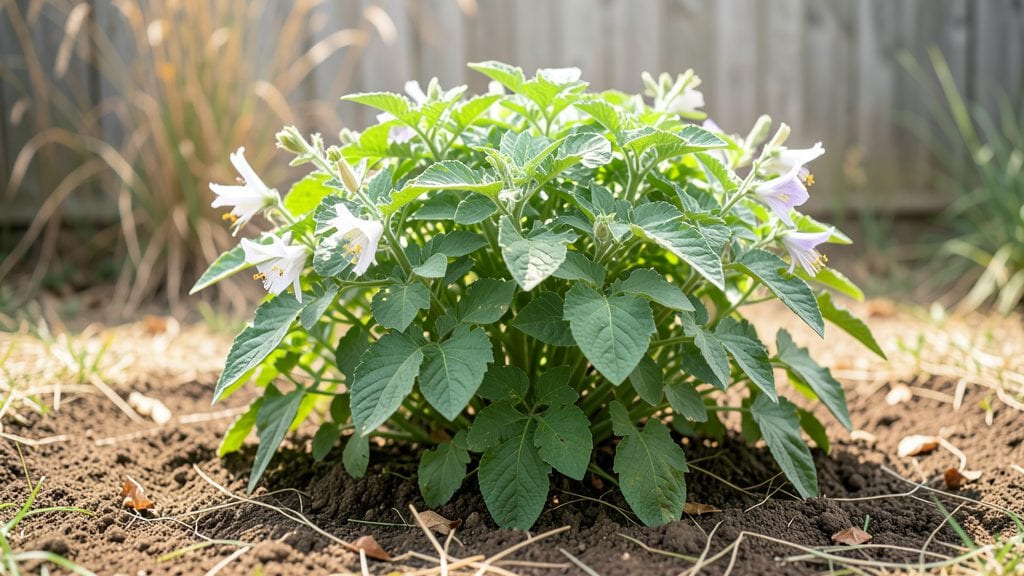
Here are some potatoes gardening tips to help you avoid the frustration of lumpy harvests—start with loose, crumbly soil that lets those knobby tubers expand without fighting for space. 🌱 I’ve dug up more misshapen potatoes than I’d like to admit—usually because the soil was too compact or... rocky.
The secret isn’t fancy amendments; it’s breaking up clay or sandy soil with compost and a fork until it feels like a pillow for roots.
Planting depth matters just as much as soil texture—too shallow, and sunlight turns tubers green (and bitter). Too deep, and they’ll struggle to reach the surface. Aim for 3-4 inches deep with seeds spaced 12 inches apart, then mound soil around them as they grow.
Water consistently, but never soggy—potatoes hate wet feet.
📚 In This Guide
- What you need
- Instructions
- Tips and common mistakes
- Wrapping up and next steps
What you need
- ● Potato Seeds: 5–10 lbs (depending on garden size) of certified disease-free seed potatoes (e.g., Yukon Gold, Red Pontiac, or Fingerlings).
- ● Garden Space: Full sun (6+ hours/day).
- ● Well-draining soil (avoid low spots where water pools).
- ● Space: 12–18 inches between rows, 12 inches between plants (or 18–24 inches for larger varieties).
- ● Soil Amendments: Compost (2–3 inches mixed into top 6–12 inches of soil).
- ● Balanced fertilizer (10-10-10 or 5-10-10, 1 lb per 100 sq ft).
- ○ Optional: Bone meal (1 tbsp per plant at planting for phosphorus).
- ● Tools: Garden fork or tiller (to loosen soil).
- ● Hoe or cultivator (for hilling).
- ● Garden gloves (to protect hands from prickly stems).
- ● Watering can or hose with adjustable nozzle.
- ● Row covers or frost cloth (to extend the growing season).
- ● Mulch (straw or grass clippings to retain moisture).
- ● Potato planter or basket (for container gardening).
- ● Soil pH test kit (ideal pH: 5.0–6.5; adjust with lime if needed).
Step-by-step guide to growing potatoes like a pro
Here's how I turn a small garden into a potato powerhouse using soil science that actually works.
🌱 Step 1: Choose the Right Variety and Start Early
Potatoes need a long growing season—90-120 days—so I always plant early varieties like 'Yukon Gold' or 'Red Pontiac' 4-6 weeks before the last frost. These types mature faster and produce reliable yields even in cooler climates. Avoid planting too early if your soil stays cold; potatoes won’t sprout until the soil reaches 40-50°F.
For a continuous harvest, stagger plantings every 2-3 weeks after the first batch. This ensures a steady supply instead of one big harvest. I label each row with the planting date so I know when to expect tubers to mature.
🪴 Step 2: Prepare the Soil for Maximum Growth
Potatoes thrive in loose, well-draining soil with a pH between 5.0 and 6.5. I avoid heavy clay by amending the bed with 2-3 inches of compost mixed into the top 12 inches of soil. This improves drainage and provides nutrients without compacting the roots. If your soil is sandy, add a little peat moss to help retain moisture.
Work the soil until it’s crumbly and free of clumps—potatoes hate tight spaces. I never till deeper than 12 inches because potatoes grow best when their roots spread horizontally. A soil test before planting tells me exactly what nutrients to add.
☀️ Step 3: Plant Seed Potatoes at the Right Depth and Spacing
Cut larger seed potatoes into 2-ounce pieces, ensuring each has at least two eyes (the little buds). Let them dry for 24 hours to prevent rot. Plant them 4-6 inches deep with the eyes facing up—this is where the sprouts will emerge. Space rows 30 inches apart and plants 12 inches apart in the row.
Don’t plant too shallow, or the tubers will turn green from sunlight (they’re still edible but bitter). If your soil is cold, wait until it’s at least 45°F before planting. I cover the rows with 2-3 inches of straw mulch right after planting to retain moisture and keep the soil warm.
💧 Step 4: Hill the Soil for Bigger Harvests
When potato plants reach 6 inches tall, mound soil around the stems up to the leaves—this is called hilling. Repeat every 2-3 weeks until the plants flower. Hilling prevents sunlight from turning tubers green and encourages more tuber formation underground. I use a hoe to pull soil from between rows and pile it around the plants.
Keep the soil moist but not soggy—potatoes need 1-1.5 inches of water per week. Too much water causes rot, while too little stunts growth. I water deeply in the morning so the foliage dries quickly, reducing disease risk. Avoid overhead sprinklers to prevent fungal issues.
✂️ Step 5: Harvest at the Right Time for Perfect Potatoes
New potatoes are ready when the plants flower—dig up a few to check for small, tender tubers. For a full harvest, wait until the foliage yellows and dies back, usually 90-120 days after planting. Use a fork to gently loosen the soil before pulling potatoes by hand to avoid bruising.
Let harvested potatoes cure in a dark, well-ventilated space for 1-2 weeks before storing. This toughens the skins and prevents spoilage. I avoid washing them until ready to use—moisture speeds up rot. Store in a cool (40-50°F), humid (85-90%) place, like a root cellar or basement.
Tips & tricks for perfect potato gardening
These soil science secrets will help you avoid common mistakes and maximize your potato harvest every season.
Soil Temperature Matters: Potatoes won't sprout until soil reaches 45°F, but they grow best between 50°F and 70°F. Use a soil thermometer to check before planting—cold soil delays germination. If your spring is slow to warm, consider using black plastic mulch to raise soil temperature faster. This is especially important in cooler climates where the growing season is short.
Seed Potato Prep is Critical: The 24-hour drying period after cutting seed potatoes prevents rot by allowing the cut surfaces to form a protective callus. Don't skip this step! Also, make sure each piece has at least two eyes—they're the growth points. I've learned this the hard way after losing entire rows to rot from skipping the drying time.
Hilling Technique Boost: When you hill your plants every 2-3 weeks as they grow, you're not just preventing green tubers—you're also creating more space for tuber formation. I like to hill up to the first set of leaves each time, which encourages the plant to send out more roots and produce more potatoes. This method can increase your yield by up to 30% compared to not hilling at all.
Watering Wisdom: The 1-1.5 inches of water per week guideline is perfect, but timing matters too. Water deeply in the morning so foliage dries quickly, reducing disease risk. I've found that using drip irrigation or soaker hoses right at the base of plants prevents water from splashing onto leaves, which helps avoid common fungal issues like blight.
Pro Tips for Potatoes Gardening Tips
- These soil science secrets will help you avoid common mistakes and maximize your potato harvest every season.
- Soil Temperature Matters: Potatoes won't sprout until soil reaches 45°F, but they grow best between 50°F and 70°F.
- Seed Potato Prep is Critical: The 24-hour drying period after cutting seed potatoes prevents rot by allowing the cut surfaces to form a protective callus.
Frequently asked questions
Got questions about growing potatoes like a pro?
You’re in the right place! Here are answers to the most common queries—from timing to troubleshooting—so you can dig into a successful harvest with confidence.
When is the best time to plant potatoes?
Plant potatoes 2 to 3 weeks before your last expected frost in spring, when soil temps hit 45–50°F (7–10°C). For a fall crop, try late summer in warmer climates. Avoid planting too early—cold soil slows sprouting, and late planting may yield small tubers before frost.
How long does it take for potatoes to grow?
Potatoes need 90–120 days to mature, depending on the variety. Early varieties (like ‘Yukon Gold’) may be ready in 60–80 days, while russets take longer. Check for readiness by gently brushing soil away—small potatoes form first, followed by larger ones.
What do I do if my potato plants have holes or wilting leaves?
Holes? Colorado potato beetles are likely! Handpick larvae and adults, or use neem oil or row covers. Wilting leaves could signal blight—remove infected plants immediately and avoid overhead watering. For aphids, spray with soapy water or introduce ladybugs!
Can I grow potatoes in containers or small spaces?
Use 5-gallon buckets, grow bags, or deep pots (12+ inches) with drainage. Plant seed potatoes 4–6 inches deep, and harvest when tubers fill the container. Bush varieties (like ‘Red Pontiac’) work best for small spaces—they grow compact and produce well.
What should I do with leftover seed potatoes after planting?
Store them in a cool, dark place (40–50°F / 4–10°C) until planting. If they sprout, place them in a sunny window to boost growth. Don’t refrigerate—it turns starches to sugar, making them taste sweet and inedible. Use any extras in recipes like potato pancakes!
Wrapping up and next steps
Growing potatoes is a rewarding journey where a little soil science know-how goes a long way! By choosing the right varieties, preparing nutrient-rich soil, and mastering planting techniques, you’ll unlock the secret to a bountiful, delicious harvest.
Remember, patience and consistency are key—your hard work will pay off with crisp, homegrown spuds in no time.
Ready to dig in? Start small—plant a few rows this season, experiment with your soil, and refine your approach. Before you know it, you’ll be sharing your potato-growing wisdom (and fresh harvests!) with friends and family. Happy gardening! 🌱✨