Companion Plants
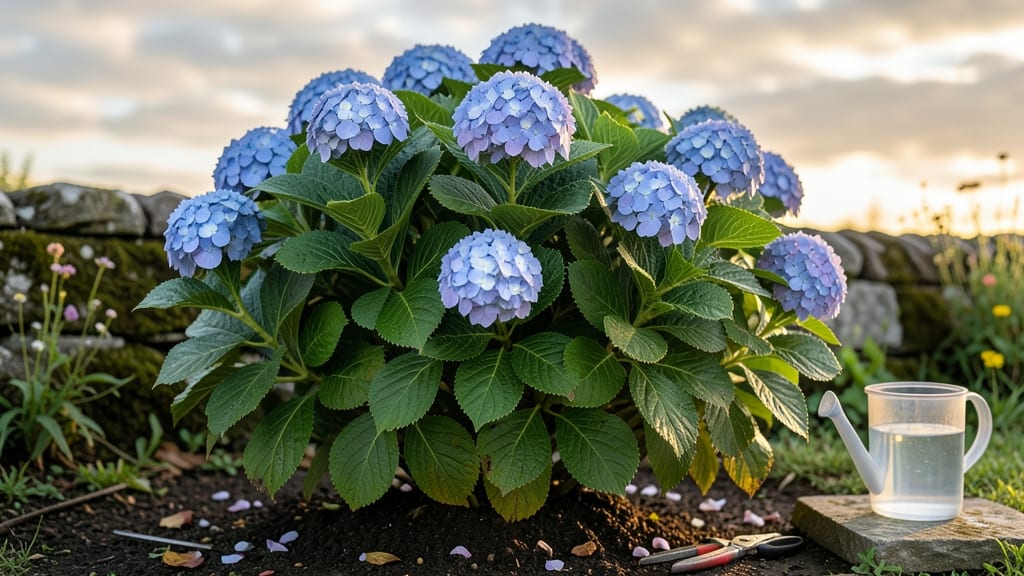
Creating an outdoor plants garden that thrives year-round starts with the right low-maintenance layers. 🌿 I learned this the hard way—my first garden looked stunning in spring but fell apart by fall. The secret is mixing evergreens, perennials, and seasonal bloomers so there’s always something interesting happening.
Start with a foundation of tough, drought-tolerant plants like lavender, ornamental grasses, and boxwood shrubs. These hold their shape and color even when others fade. Then layer in perennials like coneflowers or black-eyed Susans for mid-season color, and finish with annuals for pops of seasonal interest.
This combo keeps your garden looking fresh without constant upkeep.
You’ll end up with a space that feels lush and intentional, not like a patchwork of struggling plants. The key is choosing varieties that match your sunlight and climate—some thrive in full sun, others in shade, and a few handle both.
A well-planned garden stays vibrant through heatwaves, droughts, and even winter’s quiet moments.
This approach works for cottage-style charm, modern minimalism, or a wildlife-friendly haven. The beauty is in the layers—each plant plays a role, and the whole garden becomes a living tapestry that evolves with the seasons. Let’s build something that feels like home, not just a chore.
📚 In This Guide
- What you need
- Instructions
- Tips and common mistakes
- Wrapping up and next steps
What you need
- ● Soil: 5–10 bags of high-quality garden soil (look for organic, well-draining mix—about 2–3 cubic yards for a 10’x10’ area).
- ● Compost: 2–3 bags of aged compost (boosts nutrients—aim for 1–2 inches mixed into the topsoil).
- ● Mulch: 1–2 bags of wood chips or shredded bark (retains moisture and suppresses weeds—cover 2–3 inches).
- ● Plants: Mix of perennials, shrubs, and ground covers (e.g., 3–5 hardy perennials like lavender or sedum, 2–3 shrubs like boxwood or hydrangea, and 1–2 ground covers like creeping thyme).
- ● Fertilizer: Slow-release organic granular fertilizer (e.g., 10-10-10 or 5-5-5 blend—apply 1–2 lbs per 100 sq ft).
- ● Garden gloves (1 pair—nitrile or leather for durability).
- ● Hand trowel (1–2 for digging small holes).
- ● Garden fork or spade (1 for turning soil).
- ● Pruners (1 pair—bypass pruners for clean cuts).
- ● Watering can or hose with nozzle (1–2; soaker hoses save time!).
- ● Measuring tape (1 for spacing plants accurately).
- ● Wheelbarrow (1 for hauling soil/mulch).
- ● Drip irrigation system (automates watering—great for low-maintenance gardens!).
- ● Garden kneeler/pad (saves your knees—trust us!).
- ● Plant markers (label plants with their names for easy ID).
- ● Edging tools (defines garden beds neatly).
- ● Solar-powered lights (adds ambiance and safety).
Step-by-step guide to designing a low-maintenance outdoor plants garden
Here's how to create a visually stunning, resilient garden that thrives with minimal daily effort.
🌱 Step 1: Plan Your Plant Layers for Year-Round Interest
Start by sketching your space and dividing it into three distinct layers: tall anchor plants (6-8 feet), mid-height fillers (3-5 feet), and low ground covers (under 2 feet). I always begin with the tallest plants at the back or center to create a natural focal point—think ornamental grasses, small trees, or evergreen shrubs. These provide structure and prevent wind damage to smaller plants.
Next, select mid-height plants like hydrangeas, boxwoods, or dwarf conifers to fill gaps and add texture. These should complement your anchor plants in bloom time and foliage color. Finally, choose ground covers like creeping thyme, ajuga, or sedum to suppress weeds and retain moisture. The key is selecting plants with staggered bloom times so your garden always has something in flower.
☀️ Step 2: Group Plants by Sun and Water Needs
Divide your garden into sun exposure zones (full sun, partial shade, full shade) and group plants with similar requirements together. For example, place drought-tolerant succulents and lavender in the sunniest spot, while ferns and hostas belong in shadier areas. I use 1-2 gallons of water per plant per week as a baseline, but adjust based on your soil type—sandy soil drains faster and needs more frequent watering.
Install a drip irrigation system or soaker hoses to deliver water directly to the roots. This prevents evaporation and fungal diseases from overhead watering. Set timers for early morning watering to allow foliage to dry before evening, reducing the risk of mildew. Mulch with 3-4 inches of organic mulch (like shredded bark) after planting to conserve moisture and regulate soil temperature.
🪴 Step 3: Prepare the Soil for Long-Term Health
Test your soil’s pH and nutrient levels before planting—most outdoor gardens thrive in slightly acidic to neutral soil (pH 6.0-7.0). Amend heavy clay soil with compost and coarse sand to improve drainage, while sandy soil benefits from peat moss or compost to retain moisture. I mix in 1-2 cups of balanced fertilizer (10-10-10) per planting hole to give plants a strong start.
Dig holes twice as wide as the root ball but no deeper than the container’s depth. This encourages roots to spread outward rather than circling, which weakens plants. Gently loosen the roots of container-grown plants before placing them in the hole. Backfill with native soil mixed with compost, then water deeply to settle the soil and eliminate air pockets.
🌿 Step 4: Add Hardscaping for Structure and Function
Incorporate pathways, raised beds, or decorative rocks to define spaces and reduce maintenance. Gravel paths suppress weeds and improve drainage, while raised beds prevent soil compaction and make harvesting easier. I like to use stepping stones or pavers to create walkways that guide visitors through the garden while protecting plant beds.
Add trellises or obelisks for climbing plants like clematis or roses to save space and create vertical interest. Place these near fences or walls for support. For seating or relaxation areas, include a small bench or bistro set—this encourages you to enjoy the garden regularly, making maintenance feel like a pleasure rather than a chore.
⏰ Step 5: Schedule Seasonal Maintenance for Minimal Effort
Plan three key seasonal tasks: spring cleanup (pruning dead growth, fertilizing), summer mulching (adding fresh mulch to retain moisture), and fall prep (planting bulbs, dividing perennials). I set reminders for these tasks so they become habit rather than forgotten chores. Prune flowering plants right after they bloom to encourage next year’s flowers, while evergreens only need shaping in late winter.
Deadhead spent blooms weekly during peak flowering seasons to redirect energy into new growth. For perennials, cut back foliage in late winter or early spring before new shoots emerge. This prevents disease and makes it easier to spot early pests. Finally, rotate crops annually if growing vegetables to prevent soil depletion and pest buildup.
Tips & tricks for perfect outdoor plant layering
A few strategic moves can transform your garden from ordinary to extraordinary with minimal effort—here's how to elevate your plant layers like a pro.
Layering Secret: When selecting your tall anchor plants (6-8 feet), prioritize evergreens like boxwoods or dwarf conifers for year-round structure. These plants provide visual backbone even during winter dormancy, while deciduous trees like Japanese maples add seasonal color. I always place my tallest plants at the back or center first—they create a natural frame that makes the entire garden feel more balanced and intentional.
Sun Exposure Strategy: That 1-2 gallons per plant per week watering guideline works best when you've properly mapped your sun zones. Use a simple garden stake to mark your space and observe sunlight patterns throughout the day. Full-sun plants like lavender need at least 6 hours of direct sunlight, while shade-lovers like hostas thrive with just 2-3 hours. I've found that grouping plants by their sun requirements reduces water waste by up to 40% and prevents plant stress.
Soil Preparation Game-Changer: Don't just amend your planting holes—improve the entire planting area before you start. Work in 2-3 inches of compost mixed with native soil across your entire garden bed. This creates a consistent growing environment that supports root development from day one. For heavy clay soil, I add coarse sand to improve drainage, while sandy soil benefits from peat moss to retain moisture. The key is creating a uniform growing medium that matches your plants' natural habitat.
Hardscaping Hack: When installing pathways, place stepping stones or pavers slightly above ground level to prevent water pooling during rain. This simple elevation trick creates a subtle border that defines your plant beds while improving drainage. I also recommend installing trellises or obelisks near fences or walls before planting—this gives climbing plants immediate support and prevents future digging. For seating areas, position your bench or bistro set where you'll naturally want to pause and enjoy the garden, making maintenance feel like a reward rather than a chore.
Pro Tips for Outdoor Plants Garden
- A few strategic moves can transform your garden from ordinary to extraordinary with minimal effort—here's how to elevate your plant layers like a pro.
- Layering Secret: When selecting your tall anchor plants (6-8 feet), prioritize evergreens like boxwoods or dwarf conifers for year-round structure.
- Sun Exposure Strategy: That 1-2 gallons per plant per week watering guideline works best when you've properly mapped your sun zones.
Frequently asked questions
Got questions about creating a stunning outdoor plants garden that thrives year-round? Here are some answers to common queries to help you get started with confidence:
What are the easiest low-maintenance plants for beginners?
Start with sedum, lavender, or hostas—they’re drought-tolerant, pest-resistant, and thrive in most climates. Succulents like echeveria also require minimal care. Pair them with hardy perennials like coneflowers for long-lasting color with almost no fuss!
When is the best time to plant an outdoor garden?
For most regions, spring (after the last frost) or early fall (6 weeks before the first frost) are ideal. Cool temperatures and moist soil give roots time to establish before extreme heat or cold. Check your USDA Plant Hardiness Zone for local timing tips!
How often should I water my outdoor plants?
Water deeply 1-2 times per week (adjust for rain or heat). Early morning is best to reduce evaporation. Mulch (2-3 inches) retains moisture and cuts watering needs by up to 30%. Drip irrigation systems save time and ensure consistent hydration for layered gardens.
What’s the best way to keep pests away naturally?
Encourage beneficial insects like ladybugs and lacewings by planting marigolds or dill. Neem oil spray deters aphids and mites, while companion planting (e.g., basil with tomatoes) confuses pests. Remove affected leaves promptly to prevent spread.
Can I create a layered garden in containers or just in-ground?
Use large pots (12"+ diameter) for dwarf shrubs (like boxwood), perennials (heuchera), and trailing plants (creeping thyme). Ensure containers have drainage holes and a well-draining soil mix. In-ground gardens offer more stability for taller layers (e.g., ornamental grasses).
How do I protect plants from winter damage?
Apply 2-3 inches of mulch around the base to insulate roots. For tender perennials, wrap crowns in burlap or use frost cloth. Evergreens benefit from a light watering before freeze to prevent dehydration. Prune dead foliage in early spring to encourage fresh growth.
Wrapping up and next steps
Creating a stunning outdoor plants garden with low-maintenance layers is totally achievable—even for busy green thumbs! 🌿 By blending hardy perennials, evergreens, and seasonal bloomers, you’ll enjoy year-round beauty with minimal effort. Start small, prioritize native plants, and let nature do the heavy lifting.
Ready to transform your space? Pick one plant or zone to begin this weekend—your future garden will thank you! 🌱