Lawn
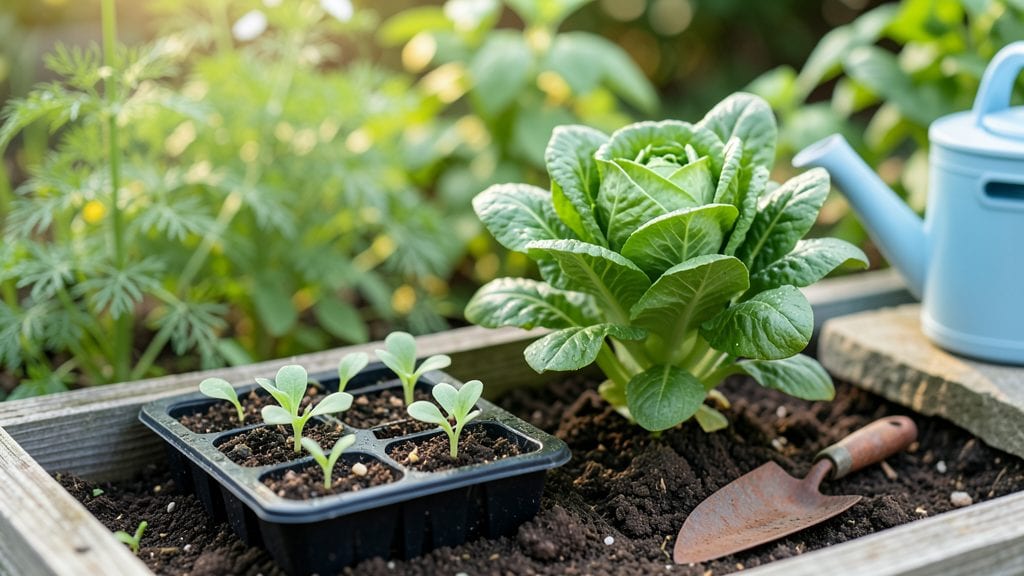
My first little seed garden in a 4-foot-by-4-foot raised bed proved that big harvests don’t need big space—just smart planning. The square-foot method turned what I thought was "too small" into a thriving patch where every inch works harder than a traditional garden.
I packed in 16 plants instead of struggling with 4, and the yield surprised even my skeptical neighbors.
This approach is perfect for balconies, patios, or even a sunny windowsill. You’ll need lightweight soil, small containers, or a raised bed—nothing fancy. The key is matching plant spacing to their mature size: lettuce gets 4 plants per square foot, while tomatoes need their own corner.
It’s like Tetris for edible plants, and the results are shockingly productive.
Imagine snipping fresh basil for pesto, harvesting cherry tomatoes for salads, and pulling carrots straight from the ground—all from a space smaller than a parking spot. The best part?
You can theme your garden: a "sunset supper" plot with tomatoes and peppers, or a "morning tea" setup with herbs and microgreens. Every bite tastes like victory.
Works in containers, raised beds, or directly in the ground—even if your "garden" is just a corner of the yard. The magic isn’t in the space; it’s in how you use it. Let’s turn that tiny patch into a powerhouse of flavor and color.
📚 In This Guide
- What you need
- Instructions
- Tips and common mistakes
- Wrapping up and next steps
What you need
- ● 1x 4’x4’ raised bed or wooden frame (or a divided container for balcony gardens)
- ● High-quality potting mix (1-2 cubic feet)—avoid garden soil; opt for a blend with compost and perlite
- ● Seeds or seedlings (choose compact varieties like lettuce, radishes, or bush beans—aim for 16-25 plants per 4’x4’ bed)
- ● Organic fertilizer (slow-release or liquid)—follow package instructions for dilution
- ● Watering can or drip irrigation system—gentle watering prevents soil erosion
- ● Garden twine or stakes (for vining plants like cucumbers or peas)
- ● Hand trowel (for planting and soil prep)
- ● Measuring tape or ruler (to mark 1-foot squares)
- ● Pruners or scissors (for harvesting and trimming)
- ● Gloves (to keep hands clean and protected)
- ● Mulch (straw or shredded leaves)—retains moisture and suppresses weeds
- ● Compost tea or worm castings—boosts soil health naturally
- ● Solar-powered lights—extends growing season in cooler months
- ● Label markers—track plant varieties and rotation schedules
Step-by-Step instructions for creating little seed gardens
Here’s how to transform even the smallest space into a thriving, space-efficient garden.
Plan Your Layout Using Square-Foot Gardening
Start by sketching your garden bed on paper, dividing it into a grid of 1-foot squares. This method ensures you maximize space by planting the right number of each crop per square. For example, a 4-foot by 4-foot bed gives you 16 squares—perfect for growing four different plants in small batches. Place taller plants like tomatoes or peppers at the north end of the bed to avoid shading shorter crops.
I like to group plants with similar needs together. Herbs, lettuce, and radishes thrive in the same conditions, so I dedicate a few squares to them. Write down which plants go where so you don’t mix them up later. A small notebook or even a phone note works—just keep it handy.
Prepare the Soil for Optimal Growth
Clear the area of weeds or debris, then loosen the soil to a depth of 6 inches using a garden fork or trowel. This helps roots spread easily. Mix in 2-3 inches of compost (from your ingredients list) into the top 6 inches of soil—this adds nutrients without overwhelming the plants. The goal is light, fluffy soil that holds moisture but drains well.
If your soil is heavy clay or sandy, blend in 1-2 inches of aged compost or coconut coir to improve texture. You’ll see the difference when water drains evenly instead of pooling or running off. Test the soil by squeezing a handful—it should crumble easily when dry but hold together when damp.
Plant Seeds or Transplants in the Right Spacing
Follow the spacing guidelines for each plant—usually printed on the seed packet or plant tag. For instance, carrots need 2 inches apart, while bush beans can handle 4 inches. Use a small ruler or measuring tape to mark rows or groups of plants. This keeps everything neat and prevents overcrowding, which leads to weak, disease-prone plants.
For seeds, press them gently into the soil at the recommended depth (often twice the seed’s diameter). Cover lightly with soil and water gently with a spray bottle. If using transplants, dig holes just deep enough to cover the roots but leave the soil line visible. Pat the soil down lightly to secure the plant.
Water and Mulch for Consistent Moisture
Water the bed deeply right after planting—about 1 inch of water—to help roots establish. Use a watering can with a fine rose or a soaker hose to avoid disturbing the soil. Water in the morning so plants dry out during the day, reducing fungal risks. You’ll know you’ve watered enough when the top 1-2 inches of soil feel moist but not soggy.
Spread 1-2 inches of mulch (like straw or shredded leaves) over the soil, leaving a small gap around stems. Mulch keeps moisture in, suppresses weeds, and regulates soil temperature. Replenish it as it breaks down—this is especially important in hot climates where soil dries out quickly.
Monitor and Maintain Your Little Garden
Check your garden daily for signs of pests or disease, especially in the first few weeks. Look for chewed leaves, yellowing, or wilting—these are early warnings. Remove any affected plants immediately and compost them away from the garden to prevent spreading issues. Healthy plants grow fast, so thin seedlings if they get too crowded.
Fertilize lightly every 4-6 weeks with a balanced, water-soluble fertilizer (like the one in your ingredients list) to keep plants strong. Avoid over-fertilizing—it leads to lush foliage but fewer fruits or veggies. Harvest regularly to encourage more production, and you’ll see your little garden thrive all season long.
Tips & tricks for perfect little seed gardens
Square-foot gardening is all about precision and planning—here are the little details that make the biggest difference in your tiny harvests.
Visualize Your Layout: Before sketching, grab a ruler or measuring tape and measure your actual space. This helps you create an accurate grid on paper. I like to use graph paper or even a digital drawing app to map out my 1-foot squares. This step prevents costly mistakes when you realize your 4-foot by 4-foot bed actually measures 3.5 feet by 3.5 feet—now you have 12 squares instead of 16. Double-check your dimensions before planting!
Soil Texture Matters: When testing your soil's texture in Step 2, pay attention to how it feels when damp. If it sticks together like clay or falls apart like sand, you'll need to amend it. For heavy clay, mix in 1-2 inches of coconut coir to improve drainage, while sandy soil benefits from extra compost to help retain moisture. The ideal soil should hold its shape when squeezed but still crumble easily when dry—this balance is key for root development.
Planting Depth Secrets: In Step 3, the "twice the seed's diameter" rule is a great starting point, but some seeds need special treatment. Tiny seeds like lettuce should only be pressed lightly into the soil, while larger seeds like beans can be planted a bit deeper. Always check the seed packet for specific recommendations—some seeds need light to germinate and shouldn't be buried at all. A simple trick is to use a toothpick to create small holes for delicate seeds.
Watering Wisdom: The 1-inch watering guideline in Step 4 is perfect for most plants, but some like lettuce need slightly more frequent watering while others like tomatoes prefer deeper, less frequent watering. A good rule of thumb is to water when the top 1-2 inches of soil feel dry to the touch. In hot climates, you might need to water twice daily—morning and late afternoon—to prevent wilting. Consider using a rain gauge to track your watering amounts accurately.
Pro Tips for Little Seed Gardens
- Square-foot gardening is all about precision and planning—here are the little details that make the biggest difference in your tiny harvests.
- Visualize Your Layout: Before sketching, grab a ruler or measuring tape and measure your actual space.
- Soil Texture Matters: When testing your soil's texture in Step 2, pay attention to how it feels when damp.
Frequently asked questions
What’s the best time to start a little seed garden?
Aim for spring after the last frost (check your USDA zone) or early fall in mild climates. For fast greens like lettuce or radishes, you can even sow late summer for a winter harvest. Just ensure soil temps are above 50°F (10°C) for most seeds—cool soil slows germination!
Can I use containers smaller than 1 square foot?
Yes! For microgreens or herbs like basil, a 6-inch pot works. Just adjust spacing: plant seeds closer together (e.g., 1 inch apart) and harvest faster. Taller plants (like tomatoes) need at least 1 sq ft, but dwarf varieties thrive in 4-inch pots with proper support.
How often should I water a square-foot garden?
Water lightly every morning to keep soil moist (not soggy). Containers dry out faster—check soil 1 inch down daily. Mulch with straw or grass clippings to lock in moisture. Overwatering causes root rot, so drainage holes are a must!
What’s the fastest fix for pests in a small garden?
Start with prevention: Use row covers for cabbage moths or neem oil spray for aphids. For slugs, set out beer traps (a shallow dish of beer) or crush eggshells near plants. Handpick larger pests (like tomato hornworms) early in the morning—they’re slow then!
Can I grow vegetables indoors with square-foot gardening?
Use a sunny windowsill (south-facing) or grow lights for 12–16 hours/day. Herbs (basil, parsley) and leafy greens (spinach, kale) thrive indoors. Place pots on a caching tray to catch excess water. Just monitor humidity—indoor air can dry out seedlings fast!
Wrapping up and next steps
Starting a little seed garden in a square-foot space proves that big dreams grow from small beginnings! 🌱 Whether you’re a busy urban dweller or a space-challenged homesteader, these tiny plots pack a punch—delivering fresh, homegrown goodness without the fuss.
The key? Plan smart, start small, and watch your green thumb flourish.
Ready to dive in? Your next step: Grab your grid, pick a few easy seeds, and let nature do the rest. Before you know it, you’ll be harvesting square-foot magic—one bite-sized plot at a time! 🌿✨