Flowers
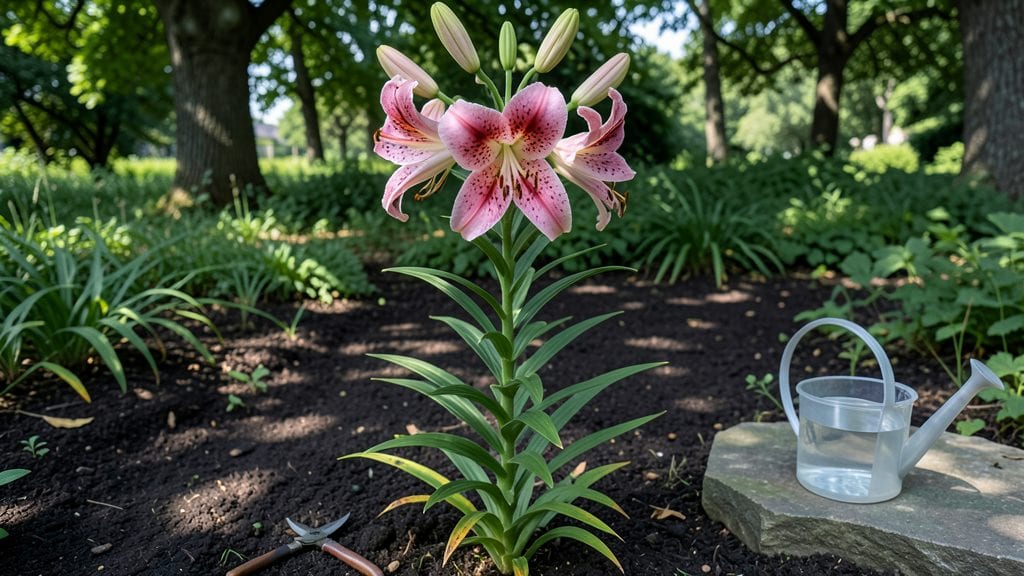
My lily garden flowers burst into life every June, and the secret lies in their bold colors and intoxicating fragrance that keeps bees buzzing until frost. 🌸 The key isn’t just planting lilies—it’s layering them with the right companions to create a show that lasts from early summer through fall.
I’ll show you how to mix Asiatics’ vibrant pops with Oriental lilies’ velvety blooms, plus the unsung heroes like daylilies that bridge the gaps between seasons.
You’ll need sunny spots (at least six hours of light), well-draining soil, and a little elbow grease for mulching—nothing fancy. The real magic happens when you pair lilies with lavender for pollinator traffic or let them spill over borders with ornamental grasses.
My front yard design uses a simple color palette of purples, golds, and whites to create drama without overwhelming the space, and it’s foolproof for zones 4-9.
By late July, your garden will hum with activity—bees on Asiatics, butterflies on daylilies, and the occasional hummingbird sipping from trumpet lilies. The fragrance alone makes it worth the effort: Oriental lilies perfume the air like a summer evening, while Asiatics offer bright, carefree blooms that bounce back after rain.
Even the soil stays healthier because lilies deter many pests naturally.
Here’s the twist: this design works in containers too. Cluster 3-5 lilies in a large pot with complementary foliage, and you’ve got instant curb appeal. Whether you’re filling a border or a balcony, the principles stay the same—just scale the spacing.
Let’s make your garden the talk of the neighborhood before the first bloom even opens.
📚 In This Guide
- What you need
- Instructions
- Tips and common mistakes
- Wrapping up and next steps
What you need
- ● Lily Bulbs: Choose 10–20 bulbs (or more, depending on garden size) of your favorite varieties, such as Stargazer lilies, Asiatic lilies, or Oriental lilies. Opt for high-quality, disease-free bulbs from a trusted nursery.
- ● Well-Draining Soil: 5–10 bags of garden soil mix amended with compost (1 part compost to 3 parts soil) for nutrient-rich planting.
- ● Fertilizer: A balanced, slow-release fertilizer (10-10-10 or 20-20-20) to promote healthy growth. Use about 1–2 pounds per 100 sq. ft.
- ● Mulch: 2–3 bags of organic mulch (e.g., shredded bark or straw) to retain moisture and suppress weeds.
- ● Garden Trowel – For digging holes (6–8 inches deep).
- ● Gloves – Heavy-duty gardening gloves to protect your hands.
- ● Watering Can or Hose – With a gentle spray nozzle for delicate watering.
- ● Measuring Tape – To space bulbs 6–12 inches apart (depending on variety).
- ● Pruners – For trimming dead foliage or shaping plants.
- ● Pollinator-Friendly Plants: Add companion flowers like lavender, bee balm, or sunflowers to attract bees and butterflies.
- ● Support Stakes: For taller lilies (e.g., Stargazer), use bamboo stakes or tomato cages.
- ● Pest Control: Neem oil or diatomaceous earth to deter pests like aphids or slugs.
- ● Decorative Elements: Garden stakes, pebbles, or solar-powered lights for a polished look.
Step-by-step guide to designing a thriving lily garden
Here's my foolproof approach to planting lilies that bloom abundantly and keep pollinators buzzing all season.
🌱 Step 1: Choose the Right Lily Varieties for Your Climate
Start by selecting 4 different lily varieties suited to your hardiness zone. Asian lilies thrive in cooler climates, while Oriental lilies prefer heat. I like mixing 1 trumpet lily (like 'Stargazer'), 1 Asiatic (like 'Red Beauty'), 1 Martagon (for fragrant blooms), and 1 daylily (Hemerocallis) for continuous color. Check each variety's bloom time to ensure staggered flowering from early summer through fall.
Look for disease-resistant varieties to avoid future headaches. I always avoid hybrids with "Lilium ×" if you have deer—those critters love them. Plant bulbs 6-8 weeks before your first frost for best root establishment. The key is spacing: 12-24 inches apart in rows or clusters, depending on the mature size of each variety.
🪴 Step 2: Prepare the Planting Site for Maximum Growth
Pick a location with 6+ hours of morning sun and afternoon shade if you live in a hot climate. Lilies need well-draining soil—amend heavy clay by mixing in 3 inches of compost per planting hole. I dig holes twice as wide as the bulb's diameter and 6-8 inches deep, placing the bulb with the pointed end up.
Add a handful of bone meal fertilizer to each hole for phosphorus, which encourages strong root development. Space your 4 bulbs in a loose circle pattern—this creates natural airflow and makes future maintenance easier. Water deeply after planting to settle the soil around the bulbs, but avoid waterlogging.
☀️ Step 3: Mulch and Water for First-Year Establishment
Spread 2-3 inches of mulch (like shredded bark) around each plant, keeping it 4 inches away from the stems to prevent rot. This conserves moisture and regulates soil temperature. Water once a week for the first month until you see new shoots emerge—usually within 4-6 weeks after planting. Overwatering now causes bulb rot, so only water when the top 2 inches of soil feel dry.
Fertilize lightly in spring with a balanced 10-10-10 fertilizer when shoots reach 4-6 inches tall. Too much nitrogen now produces leafy growth at the expense of blooms. Watch for leaf spots or rust—remove affected foliage immediately and treat with neem oil if needed.
✂️ Step 4: Support and Deadhead for Continuous Blooms
Install bamboo stakes or small cages as soon as flower stalks appear to prevent wind damage. Lilies grow 3-5 feet tall, so stakes should be at least 2 feet deep. Tie stems loosely with soft plant ties—tight knots can damage the stems as they thicken. Deadhead spent blooms regularly to encourage more flowers and prevent seed pods from draining the plant's energy.
After blooming, let the foliage die back naturally. The leaves feed the bulb for next year's flowers—never cut them until they turn completely brown. Divide clumps every 3-4 years when you see fewer blooms. Dig up the bulbs in early fall, separate the offsets, and replant immediately.
🌿 Step 5: Maintain Soil Health for Year-Round Pollinator Appeal
Add 1 inch of compost around the base each spring to replenish nutrients. Lilies are heavy feeders, so I top-dress with slow-release bulb fertilizer in early spring and again after the first bloom cycle. This keeps the soil rich without burning the roots. Plant companion flowers like bee balm or coneflowers nearby—their nectar attracts pollinators that will visit your lilies.
Watch for lily beetles (red with black spots) in summer. Handpick adults and drop them in soapy water. The grubs hide under leaves, so flip them over to find and squish them. A healthy lily garden becomes a pollinator magnet—hummingbirds, bees, and butterflies will visit daily once established.
Tips & tricks for perfect lily garden flowers
A few simple tricks will help your lily garden thrive and keep those pollinators coming back for years. Here's what I've learned from years of trial and error in my own backyard.
Variety Selection: When choosing your 4 different lily varieties, consider bloom timing as much as color. I always pick one early bloomer (like an Asiatic), one mid-season (trumpet lily), one late summer (Martagon), and one daylily for continuous color. This staggered approach ensures your garden stays vibrant from early summer through fall. Also, check each variety's hardiness zone—some Oriental lilies won't survive harsh winters, while Asian varieties might struggle in heatwaves.
Soil Preparation: The 3 inches of compost you mix into each planting hole is non-negotiable for well-draining soil. If your native soil is heavy clay, consider amending the entire planting area with compost before digging individual holes. For extra insurance against rot, I add a handful of perlite or coarse sand to each hole. And remember—lilies hate soggy roots, so if your garden has poor drainage, create a raised bed instead.
Planting Timing: That 6-8 week window before your first frost gives bulbs time to establish roots before winter. For most climates, this means planting in late summer or early fall. If you're in a warmer zone where winters aren't harsh, you can plant as late as December. The key is getting those roots down before the ground freezes—bulbs need time to anchor before dormancy.
Pest Prevention: The moment you spot those red lily beetles, act fast. I've found that a mixture of neem oil and water (1 tablespoon per quart) sprayed on the undersides of leaves every 5-7 days keeps them at bay. For grubs hiding under leaves, try wrapping the stems with aluminum foil—they can't climb it, and they'll eventually fall off. This method works better than chemical sprays and won't harm pollinators.
Pro Tips for Lily Garden Flowers
- A few simple tricks will help your lily garden thrive and keep those pollinators coming back for years. Here's what I...
- Variety Selection: When choosing your 4 different lily varieties, consider bloom timing as much as color. I always pi...
- Soil Preparation: The 3 inches of compost you mix into each planting hole is non-negotiable for well-draining soil. I...
Frequently asked questions
Got questions about creating your own fragrant lily garden? Here are some of the most common ones—plus expert answers to help you grow a thriving, pollinator-friendly space!
What’s the best time of year to plant lilies in my garden?
Most lilies thrive when planted in early spring or early fall (4–6 weeks before the first frost). This gives roots time to establish before extreme temperatures. Daylilies are more flexible and can handle spring planting, while true lilies (like Asiatics or Oriental hybrids) prefer cooler soil for root growth. Avoid planting in summer heat!
Are lilies toxic to pets or kids, and how can I keep them safe?
Yes! Many lilies—especially true lilies (Lilium and Hemerocallis species)—are highly toxic to cats, dogs, and even horses. Ingesting even small amounts can cause vomiting, drooling, or kidney failure. To keep pets safe, plant lilies in raised beds or containers out of reach, or opt for pet-friendly alternatives like daylilies (Hemerocallis) (though these are still mildly toxic). Always supervise kids near flowers!
How often should I water my lily garden, and do they need special care?
Lilies are drought-tolerant once established but need consistent moisture during their first growing season. Water deeply 1–2 times per week (more in extreme heat or sandy soil). Mulch around the base with 2–3 inches of organic matter (like shredded bark or compost) to retain moisture and regulate soil temperature. Avoid overhead watering to prevent fungal diseases like botrytis.
Can I grow lilies in containers, or do they need a garden bed?
Many lilies—including Asiatic, Oriental, and Martagon lilies—thrive in containers as long as the pot is at least 12–14 inches deep with drainage holes. Use a well-draining potting mix (add perlite or sand for heavy soils) and choose a pot with a saucer to catch excess water. Daylilies also adapt well to containers and can even be grown in hanging baskets!
Why aren’t my lilies blooming, even though the leaves look healthy?
Healthy leaves but no blooms? A few common culprits:
- Too much nitrogen: Fertilizers high in N (first number) promote leafy growth but starve flowers. Switch to a balanced or phosphorus-rich fertilizer (5-10-5) in early spring.
- Overcrowding: Lilies need space—dig up and divide clumps every 3–4 years if blooms decline.
- Improper sunlight: Most lilies need 6+ hours of sun daily. If shaded, move them to a sunnier spot.
- Stress from transplanting: Newly planted lilies may skip blooming the first year as they focus on root growth.
Give them time, and adjust care based on these tips!
Wrapping up and next steps
Creating a fragrant lily garden isn’t just about beauty—it’s about crafting a thriving ecosystem that delights your senses and supports local pollinators. From selecting the right varieties to designing a pollinator-friendly layout, every step brings you closer to a blooming paradise.
Whether you’re a seasoned gardener or just starting, the key is to start small, stay consistent, and enjoy the process.
🌸 Ready to transform your space? Grab your gardening gloves and pick just one lily variety to plant this weekend! Your future garden—and its buzzing visitors—will thank you. Happy planting! 🌿