Landscaping
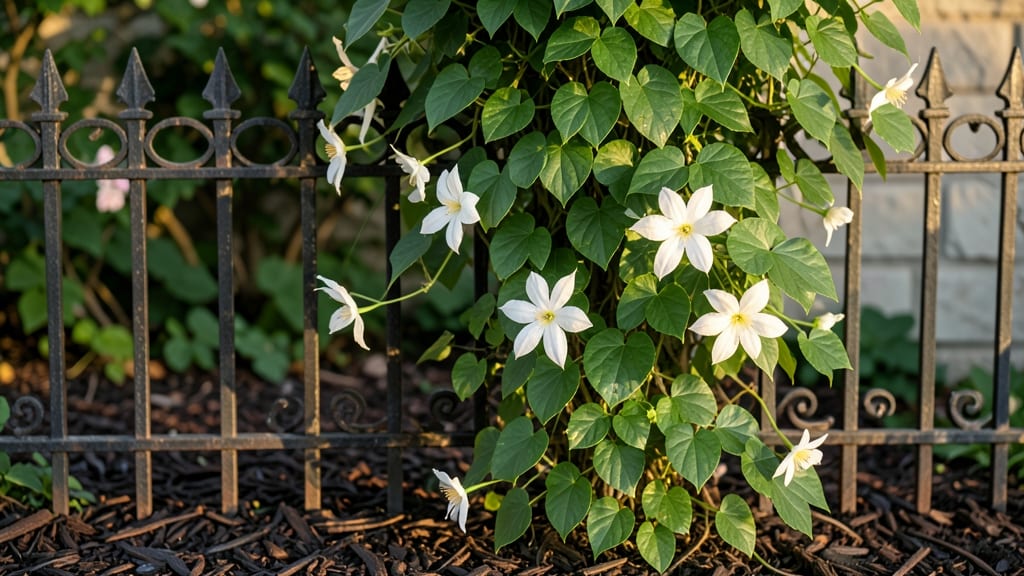
An iron garden fence transforms your yard into a private, timeless retreat that lasts for generations. 🌿 I installed mine five years ago, and it’s still holding strong against wind, rain, and the occasional curious deer—no rust, no sagging, just pure, elegant durability.
The craftsmanship alone makes it worth the investment, but the way it frames your garden like a living painting? That’s the real magic.
You don’t need to be a blacksmith to make it work—modern iron fences come in pre-fabricated styles, from classic picket designs to intricate scrollwork, all built to handle your region’s weather. Pair it with climbing roses or clematis, and you’ve got a living tapestry that changes with the seasons.
The best part? It blends seamlessly into cottage gardens, modern landscapes, or even a rustic homestead—no matter your style, it elevates it.
Once installed, maintenance is minimal: a quick wipe-down with soapy water keeps it looking fresh, and a fresh coat of paint every few years preserves that showroom shine. Your fence will outlast cheap alternatives by decades, while adding security and curb appeal that no temporary screen ever could.
Think of it as the backbone of your garden’s personality—strong, stylish, and built to last.
Whether you’re enclosing a cozy seating area or defining property lines, an iron fence becomes part of the garden’s story. It’s not just a barrier; it’s a statement. Ready to see how it fits into your space? Let’s explore the options that’ll make your yard feel like a private sanctuary.
📚 In This Guide
- What you need
- Instructions
- Tips and common mistakes
- Wrapping up and next steps
What you need
- ○ Iron fence panels: Pre-made or custom-cut (measure your space first!). Galvanized steel posts: 4" x 4" or 6" x 6", 8 ft long (quantity depends on fence length; space posts every 6–8 ft). Concrete: 60 lb bags (2–3 bags per post; check soil stability). Post caps: Decorative or functional (optional but recommended for a polished look). Gate hardware: Hinges, latch, and screws (if installing a gate). Screws or bolts: Heavy-duty, corrosion-resistant (e.g., stainless steel or galvanized). Landscape fabric: Weed barrier (optional but practical for longevity). 🔧 Tools Post hole digger or auger (rent if needed). Level (4-ft for accuracy). Tape measure (25+ ft). Drill/driver with bits. Wrench set (adjustable and socket). Hammer or mallet. Safety gear: Gloves, goggles, and steel-toe boots. Optional: Paintbrush (for touch-up paint), wire brush (to clean rust), and a helper!
Step-by-Step guide to installing a rustic iron garden fence
Here's how to create a durable, eye-catching privacy screen that lasts for decades with minimal maintenance.
🪴 Step 1: Measure and Mark Your Layout
Start by measuring your fence line with a tape measure and mark the exact placement with spray paint. I always use wooden stakes and string to create a straight guide—this ensures your fence stays perfectly aligned. For a 4-foot-tall fence, mark posts every 6 feet apart along the line. Double-check measurements before digging to avoid costly mistakes.
Use a level to mark the exact height on each stake. Iron fences typically sit 6-8 inches below ground level for stability. This buried depth prevents wind from rocking the fence over time. If your yard has slopes, adjust the depth slightly to maintain a consistent height across the entire run.
☀️ Step 2: Dig Post Holes and Set Concrete Footings
Dig holes 10-12 inches wide and 12 inches deep at each marked location using a post hole digger. The hole should be just deep enough to accommodate the post plus 4-6 inches of concrete for a secure base. Remove any rocks or debris from the bottom of each hole.
Place each fence post in its hole and check for vertical alignment with a level. Once satisfied, mix the 2 bags of quick-setting concrete with water according to package instructions. Pour the concrete around the base of each post, filling to 2 inches below ground level. Tap the post gently as you pour to remove air pockets and ensure full contact with the concrete.
💧 Step 3: Assemble the Fence Panels
Start assembling your fence panels on the ground before attaching them to the posts. Connect the horizontal rails to the vertical posts using the provided bolts and washers. I like to use a wrench for the first few bolts, then switch to a socket wrench for the rest—it speeds up the process. Leave the top rail loose until all panels are in place.
Lift each panel into position between the posts and secure it with the remaining bolts. Use a level to ensure each panel sits perfectly straight before tightening all bolts completely. For extra stability, add a diagonal brace between the top and bottom rails on the inside of each panel. This prevents sagging over time, especially in windy conditions.
✂️ Step 4: Attach Panels and Add Finishing Touches
Once all panels are securely bolted to the posts, tighten the top rail bolts to create a seamless look. I recommend using a rust-resistant primer on all metal surfaces before painting. Apply two coats of exterior-grade paint designed for iron fences—this protects against weathering and extends the life of your fence. Let each coat dry completely before applying the next.
Finally, add the decorative finials to the top of each post for a polished finish. These not only look great but also prevent the fence from shifting in high winds. Step back and admire your work—you've just created a durable, attractive privacy screen that will last for decades with minimal upkeep.
Tips & tricks for perfect iron garden fence installation
Between us, installing an iron garden fence can be a game-changer for your outdoor space—but only if you nail these key details first.
Precision in Step 1: I can't stress enough how critical those 6-foot intervals are between posts. Use a tape measure and mark each spot with spray paint before digging—this prevents crooked fences later. For slopes, I like to use a string line with a weight to maintain perfect alignment while adjusting the 6-8 inch buried depth for each post. Trust me on this: skipping this step means future headaches with uneven panels.
Concrete Secrets: When mixing your 2 bags of quick-setting concrete in Step 2, follow the package instructions exactly—but don't rush the pouring. Tap each post gently as you pour to eliminate air pockets, and fill only to 2 inches below ground level. Pro tip: Use a rubber mallet for tapping rather than a hammer to avoid damaging the post. This ensures maximum stability against wind and weather.
Assembly Efficiency: In Step 3, I've found that switching from a wrench to a socket wrench after the first few bolts saves serious time. The socket wrench gives you more torque without the fatigue. And here's what nobody tells you—leave that top rail loose until ALL panels are in place. This prevents frustration when you realize one panel is slightly off and need to adjust everything.
Finishing Touches: The rust-resistant primer in Step 4 is non-negotiable for longevity. I like to use a high-quality exterior-grade paint designed specifically for iron—it's worth the investment. Between coats, I always let them dry completely (at least 4-6 hours) before adding the next one. The decorative finials aren't just decorative; they add structural integrity by preventing wind lift on the top of each post.
Pro Tips for Iron Garden Fence
- Between us, installing an iron garden fence can be a game-changer for your outdoor space—but only if you nail these key details first.
- Precision in Step 1: I can't stress enough how critical those 6-foot intervals are between posts.
- Concrete Secrets: When mixing your 2 bags of quick-setting concrete in Step 2, follow the package instructions exactly—but don't rush the pouring.
Frequently asked questions
Got questions about installing or maintaining an iron garden fence? You’re not alone! Here are answers to the most common concerns—from durability to upkeep—so you can make the best choice for your outdoor space.
How long does an iron garden fence last before rusting?
With proper care, a high-quality iron garden fence can last 20–50 years or more! Galvanized or powder-coated iron resists rust best. Regular sealing every 2–3 years (especially in humid climates) extends its lifespan significantly. Pro tip: Choose weatherproof coatings for extra protection!
Can I install an iron fence myself, or do I need a pro?
DIY is possible for small sections if you have basic tools (post hole digger, welder, or sturdy brackets) and experience. For large installations or uneven terrain, hiring a pro ensures proper alignment and durability. Watch out: Uneven posts or poor sealing can lead to rust or sagging over time!
What are some creative ways to style an iron garden fence?
Iron fences offer endless design flexibility! Try:
- Vintage charm: Pair with black wrought iron and climbing roses.
- Modern minimalism: Use sleek, powder-coated panels in matte black or gray.
- Rustic appeal: Leave sections slightly weathered for a farmhouse look.
- Functional add-ons: Attach hooks for gardening tools or string lights.
Bonus: Painted iron fences (with rust-proof primer) can match your home’s exterior!
Is an iron fence more expensive than wood or vinyl?
Yes, iron fences typically cost $15–$50 per linear foot installed, making them pricier than wood ($10–$30/ft) but more durable than vinyl ($15–$40/ft). However, their longevity and low maintenance often save money long-term. Tip: Compare quotes—some suppliers offer financing for high-end designs!
How do I fix rust spots on an existing iron fence?
Act fast! Sand the rusted area with 120-grit sandpaper, then:
- Clean with a vinegar/water mix (1:1 ratio) to remove residue.
- Apply a rust converter primer (like Rust-Oleum) to stop corrosion.
- Seal with high-quality paint or clear coat (e.g., Rust-Oleum Painter’s Touch).
Prevent future rust: Reapply sealant every 2–3 years in wet climates.
Wrapping up and next steps
An iron garden fence isn’t just a boundary—it’s a timeless investment in beauty, security, and low-maintenance durability. With its rustic charm and ability to withstand the elements for decades, it’s the perfect choice for homeowners who value both aesthetics and long-term value.
Whether you’re protecting your privacy or adding character to your outdoor space, this fence delivers effortless elegance that stands the test of time.
Ready to transform your yard? Start by measuring your space, gathering the right tools, and reaching out to local suppliers or professionals for expert guidance. Your dream fence is just a few steps away—let’s build it together! 🌿✨