Tools
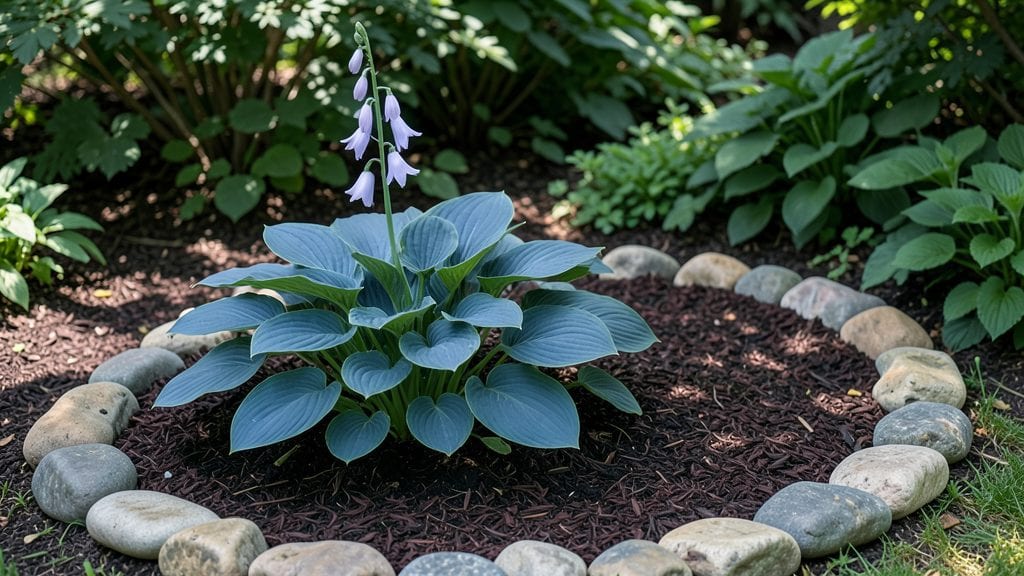
A hosta garden plan transforms shady corners into lush, low-maintenance paradises where every leaf feels like a velvet masterpiece. 🌿 I’ve designed hosta gardens that make neighbors pause and ask, “What’s that plant?”—and the secret isn’t just the foliage, but how you layer it.
Start with the giants at the back, then cascade mediums and dwarfs toward the front, creating depth that feels like a living tapestry.
The magic happens in the details: pairing chartreuse ‘Blue Angel’ with deep purple ‘Halcyon’ for a striking contrast, or tucking fragrant ‘Guacamole’ near seating areas so you can brush leaves and smell mint.
Most people overlook spacing—hostas spread slowly but steadily—so give them room to mature without crowding. A 2-foot gap between medium hostas now prevents a tangled mess in five years.
By summer, you’ll have a garden that thrives when others wilt, with blooms in June and foliage that stays stunning through frost. The key is mixing textures—some hostas are broad and bold, others narrow and spiky—and letting their natural colors pop without competing with flowers.
This isn’t just a garden; it’s a mood booster that works year-round.
Works in woodland gardens, city courtyards, or even container setups on patios. Let’s build yours—step by step, leaf by leaf.
📚 In This Guide
- What you need
- Instructions
- Tips and common mistakes
- Wrapping up and next steps
What you need
- ● Hosta plants: 10–20+ (mix of sizes and varieties for texture; e.g., 5 large, 5 medium, 5 small or trailing types). Choose disease-resistant cultivars like 'Blue Angel' or 'Francee'.
- ● High-quality garden soil: 2–3 cubic yards (amend with 50% native soil + 50% compost or peat moss for drainage).
- ● Organic mulch: 2–3 bags (cedar or hardwood chips, 2–3 inches deep) to retain moisture and suppress weeds.
- ● Garden gloves: 1 pair (nitrile-coated for durability).
- ● Hand trowel: 1 (5–7 inch blade for precision planting).
- ● Watering can or hose: 1 (with adjustable nozzle for gentle watering).
- ● Measuring tape: 1 (10–25 feet for spacing plants accurately).
- ● Pruners: 1 (bypass pruners for clean cuts on mature foliage).
- ● Garden stakes or labels: 10–20 (to track varieties and spacing).
- ● Slow-release fertilizer: 1–2 bags (10–12 lb, 12–14% nitrogen for foliage growth).
- ● Epsom salt: 1 small bag (for magnesium boost; mix 1 tbsp per gallon of water monthly).
- ● Shade cloth: 1 roll (30–50% block for seedlings if starting from seed).
- ● Decorative rocks or edging: 1–2 bags (for borders or accent layers).
- ● Garden kneeler: 1 (for comfort during long planting sessions).
- ● pH test kit: 1 (to ensure soil pH is 6.5–7.5, ideal for hostas).
Step-by-Step instructions for designing a stunning hosta garden
Here’s how to create a lush, layered shade garden that thrives year-round—no guesswork, just foliage drama.
🌿 Step 1: Choose Hostas for Height, Texture, and Color
Start by selecting 4 hosta varieties with varying heights and foliage colors. I like a mix of blue, green, and variegated types to create visual interest. For example, pair a tall blue hosta like ‘Blue Angel’ (24-36 inches) with a compact green like ‘Francee’ (12-18 inches) and a bold variegated like ‘Guacamole’ (15-20 inches). This ensures layers and contrast.
Check each hosta’s mature size before planting—crowding leads to competition and weak growth. Space larger varieties 2-3 feet apart and smaller ones 12-18 inches apart. Sketch a rough layout first; hostas grow slowly, so their final positions matter.
🪴 Step 2: Prepare the Soil for Moisture-Loving Roots
Hostas thrive in rich, well-draining soil that stays consistently moist but never soggy. Amend your garden bed with 3 inches of compost mixed into the top 6 inches of soil using the 1 bag of organic compost. This improves drainage and provides nutrients without overwhelming roots.
Test the soil’s moisture by squeezing a handful—it should hold together but not drip water. If your soil drains too fast (like sandy loam), add 1 cubic foot of peat moss to retain moisture. Avoid heavy clay; hostas hate waterlogged roots and will yellow or rot if planted too deep.
☀️ Step 3: Plant Hostas in Layers for Depth and Drama
Dig holes twice as wide as the root ball but only as deep as the crown (where roots meet stems). Gently loosen the roots if they’re circling and place the hosta so the crown sits just above soil level. This prevents rot and ensures healthy regrowth each spring.
Plant the tallest hostas at the back, medium-height varieties in the middle, and the smallest or trailing types (like ‘Halcyon’) along the front or edges. Space them 12-24 inches apart depending on size—closer for dwarf varieties, wider for giants. Water deeply right after planting to settle the soil.
💧 Step 4: Mulch and Water for Year-Round Care
Spread 2 inches of shredded bark mulch over the soil surface, keeping it 2 inches away from plant stems to prevent rot. This mulch conserves moisture, suppresses weeds, and regulates soil temperature. Replenish it annually in early spring before new growth appears.
Water deeply once a week (or more in extreme heat) until the top 2 inches of soil feel moist. Hostas wilt dramatically when thirsty—drooping leaves are your signal to water immediately. Avoid overhead sprinkling; it can spread fungal diseases. Instead, water at the base in the early morning.
✂️ Step 5: Divide and Maintain for Long-Term Beauty
Every 3-5 years, hostas form dense clumps that benefit from division. In early spring or fall, dig up the plant, separate the crowns with a sharp knife, and replant the strongest divisions. This rejuvenates growth and prevents overcrowding. Discard any mushy or diseased sections.
Remove spent flower stalks in late summer to redirect energy into foliage. Fertilize lightly in early spring with a balanced 10-10-10 fertilizer (use ½ cup per 10 square feet) to encourage vibrant new growth. Avoid high-nitrogen fertilizers—they promote leaf overgrowth at the expense of hardiness.
Tips & tricks for perfect hosta garden layers
Here's what I've learned after years of designing hosta gardens that stay stunning through every season—these tricks make all the difference.
Layering Secret: In Step 3, when you're arranging your hostas, think of it like a painting—place the tallest varieties at the back (like your 'Blue Angel' at 24-36 inches) as your "background," then work forward with medium heights in the middle, and the smallest or trailing types (like 'Halcyon') along the front. This creates that magical depth that makes your garden look professionally designed.
Soil Test Hack: Before amending your soil in Step 2, do this quick test: Grab a handful of your native soil and squeeze it tightly. If water drips out immediately, you've got sandy soil that needs the 1 cubic foot of peat moss. If it holds together like a brick, you're dealing with clay that needs extra compost mixed deeper. Hostas hate both extremes—they want soil that feels like a damp sponge.
Crown Placement Tip: When planting in Step 3, remember this golden rule: the crown (where roots meet stems) should sit just above soil level, never buried. I've buried crowns by accident and watched hostas rot within weeks. Use a small stick as a marker while digging to ensure you're at the right depth—this small detail prevents years of frustration.
Watering Wisdom: In Step 4, don't just water when the soil feels dry—hostas actually tell you when they're thirsty. Look for drooping leaves in the morning; that's their way of saying "water me now!" Water deeply at the base (not overhead) until the top 2 inches of soil feel moist. This method prevents fungal diseases that can ruin your hard work.
Pro Tips for Hosta Garden Plan
- Here's what I've learned after years of designing hosta gardens that stay stunning through every season—these tricks make all the difference.
- This creates that magical depth that makes your garden look professionally designed.
- Soil Test Hack: Before amending your soil in Step 2, do this quick test: Grab a handful of your native soil and squeeze it tightly.
Frequently asked questions
Got questions about creating your dream hosta garden plan? You’re not alone—shade gardens can feel tricky, but with the right approach, they’re low-maintenance and stunning! Here are answers to the most common queries to help you plan with confidence.
What’s the best time of year to plant hostas?
Plant hostas in early spring or early fall when soil is workable but not scorching. This gives roots time to establish before extreme heat or cold. Avoid planting in summer—hostas hate soggy soil and intense sun, even briefly. Pro tip: If you must plant in summer, water deeply 2–3 times a week and mulch heavily to retain moisture.
How do I choose hosta varieties for different shade levels?
Hostas thrive in partial to full shade, but varieties vary:
- Deep shade (0–3 hours of light): ‘Francee,’ ‘Halcyon,’ or ‘Patriot’ (tolerate no direct sun).
- Partial shade (3–6 hours of light): ‘Blue Angel,’ ‘Guacamole,’ or ‘June’ (classic crowd-pleasers).
- Dappled shade (filtered light): ‘Royal Standard’ or ‘Sum and Substance’ (handle brighter spots).
Test your spot: If leaves scorch in summer, it’s too sunny for most hostas.
Why are my hostas getting eaten by slugs/snails?
Hostas are a slug and snail buffet—their tender leaves are irresistible! Combat pests with:
- Physical barriers: Copper tape around pots or crushed eggshells.
- Beer traps: Bury a shallow dish of beer near plants (slugs drown in it).
- Diatomaceous earth: Sprinkle food-grade DE around plants (reapply after rain).
Prevention tip: Plant slug-resistant companions like ferns, heucheras, or astilbes nearby to distract pests.
How far apart should I space hostas in a garden bed?
Spacing depends on mature size—check plant tags! As a rule:
| Variety Type | Spacing (inches) |
|---|---|
| Small (e.g., ‘Tiny Tears’) | 12–18" |
| Medium (e.g., ‘June’) | 24–30" |
| Large (e.g., ‘Sum and Substance’) | 36–48" |
Design hack: Mix sizes for a natural, layered look—tall hostas in back, medium in middle, and small along edges.
Can I grow hostas in containers instead of a garden bed?
Containers work great for hostas, especially in urban spaces or rentals. Use:
- Well-draining pots: At least 12" deep (bigger for large varieties).
- Moisture-retentive soil: Mix potting soil with compost or perlite.
- Watering routine: Containers dry faster—check soil daily in summer.
Bonus: Move pots to bright indirect light in winter for extra growth.
Wrapping up and next steps
Creating a hosta garden plan is your ticket to lush, low-maintenance beauty that thrives in shade—no green thumb required! 🌿 With the right layers, colors, and placement, you’ll craft a year-round foliage masterpiece that feels like a hug for your outdoor space.
Whether you’re a beginner or a seasoned gardener, this plan makes it easy to mix textures, heights, and hues for drama that lasts.
Ready to dive in? Start by sketching your space, then pick your star hostas and complementary plants. Grab your tools, and get planting—your future shady oasis is waiting! 🌱