Companion Plants
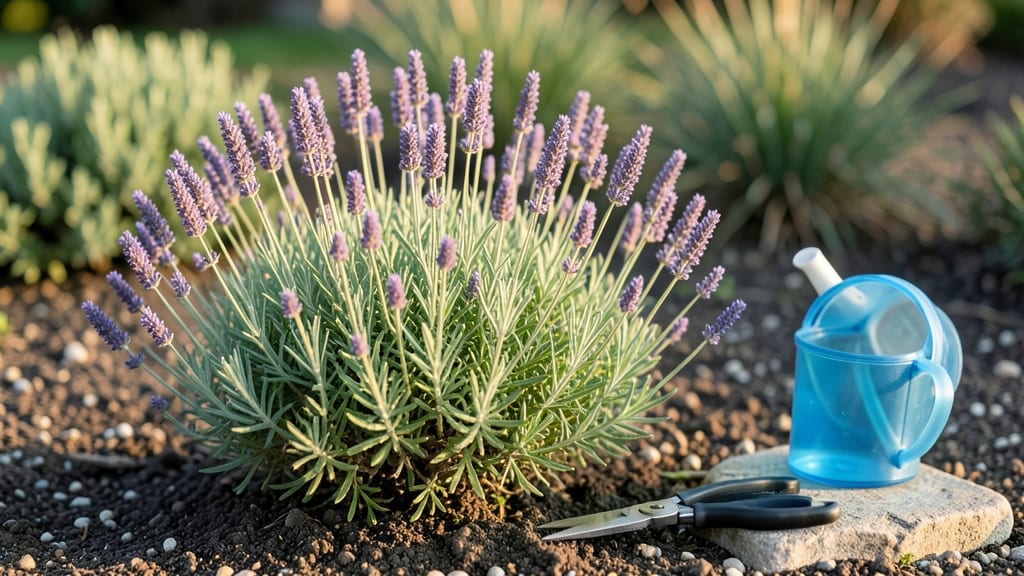
Transforming my small home garden plants into a year-round pollinator haven changed how I garden—now my balcony buzzes with bees even in winter. 🌿 The secret isn't having acres but choosing the right plants that thrive in tight spots and keep pollinators fed. through every season.
Start with a mix of native perennials like milkweed for monarchs and coneflowers for bees, plus annuals like alyssum for early spring blooms. Containers and vertical planters maximize space, and most of these plants need just 3-6 hours of sun daily.
The key is layering plants by bloom time so food is always available.
By summer, you'll see hummingbirds darting between salvia and bee balm, while butterflies sip from lavender and cosmos. Even in winter, hellebores and winter jasmine provide nectar when little else blooms. The best part? Your garden becomes a lifeline for pollinators while looking stunning.
Works for balconies, windowsills, or small yards—just match plants to your light conditions. Once established, these gardens need minimal care beyond regular watering and deadheading. Let's get those pollinators visiting!
📚 In This Guide
- What you need
- Instructions
- Tips and common mistakes
- Wrapping up and next steps
What you need
- ● Pollinator-friendly plants (5–10 varieties): Native wildflowers (e.g., Echinacea, Rudbeckia, Coneflower) – 3–5 plants per type
- ● Herbs (e.g., Lavender, Thyme, Basil) – 2–3 pots or in-ground plants
- ● Shrubs (e.g., Butterfly Bush, Dwarf Lilac) – 1–2 per garden bed
- ● Perennials (e.g., Black-Eyed Susan, Aster) – 3–4 plants
- ● Annuals (e.g., Marigold, Zinnia) – 5–10 seeds or seedlings
- ● Soil amendments: Compost (1–2 bags or homemade) – improves drainage and nutrients
- ● Organic fertilizer (e.g., fish emulsion or worm castings) – 1–2 applications per season
- ● Watering supplies: Watering can (5-gallon capacity) or hose with adjustable nozzle
- ○ Drip irrigation kit (optional but ideal for small spaces)
- ● Basic gardening tools: Trowel (for transplanting seedlings)
- ● Hand pruners (bypass type for clean cuts)
- ● Garden gloves (1 pair, breathable material)
- ● Small shovel or spade (for digging)
- ● Containers (if gardening in pots): 5–10 pots (10–12" diameter) with drainage holes
- ● Potting mix (2–3 bags, moisture-retentive blend)
- ○ Optional but helpful: Mulch (straw or shredded bark) – 1–2 bags to retain moisture
- ● Pollinator hotel (for solitary bees) – 1–2 units
- ● Stakes or trellis (for climbing plants like Clematis)
- ● Sunlight assessment: Identify areas with at least 6 hours of sunlight daily (most pollinators thrive here).
- ● Space planning: Small spaces? Use vertical gardening (hanging pots, wall planters).
- ● Group plants by water needs (e.g., drought-tolerant Lavender near sunny edges).
- ● Local climate knowledge: Check your USDA Hardiness Zone to pick cold-hardy plants.
- ● Research native plants—they’re low-maintenance and pollinator magnets! 🌿
Instructions for designing a year-round pollinator haven
Let’s create a thriving, small-space garden that keeps bees, butterflies, and hummingbirds visiting all year.
🌱 Step 1: Plan for Seasonal Blooms and Pollinator Needs
Start by selecting plants that provide nectar and pollen in every season. Early bloomers like crocus and hellebore kick off the year, while late-season asters and goldenrod keep visitors coming as temperatures drop. I like to group plants by their bloom times—spring, summer, and fall—so there’s always something in flower.
Consider the pollinators themselves: bees need flat or shallow flowers they can land on, while butterflies prefer open blooms with landing pads. Hummingbirds are drawn to tubular flowers like bee balm or cardinal flower. Sketch a simple layout with these preferences in mind—this ensures your garden stays vibrant and functional.
🪴 Step 2: Choose the Right Containers and Plant Spacing
For small spaces, containers are your best friend. Use a mix of hanging baskets, window boxes, and raised beds to maximize vertical and horizontal real estate. I prefer containers with drainage holes to prevent root rot, and I always pair them with saucers to catch excess water.
Spacing is key—crowding plants stresses them and reduces airflow, which invites pests. Follow the plant tags for mature size, but leave an extra inch or two between plants in containers. If you’re planting perennials, give them room to spread over time. Group similar plants together for easier maintenance.
☀️ Step 3: Position Plants for Sunlight and Shelter
Most pollinator plants thrive in full sun (6+ hours daily), but a few, like astilbe or ferns, tolerate partial shade. Observe your space throughout the day to map sunlight patterns—morning sun is gentler, while afternoon rays can be intense. Place heat-loving plants like lavender or Russian sage in the sunniest spots.
Wind and harsh weather can stress plants, especially in containers. Place taller plants like coneflowers or catmint toward the back of raised beds or the center of containers. Add a windbreak, like a lattice or trellis, if your garden is exposed. Mulch around the base of plants to regulate soil temperature and retain moisture.
💧 Step 4: Water and Feed for Continuous Blooms
Water deeply but infrequently—aim for 1 inch of water per week, delivered at the soil level to avoid wetting foliage (which can attract fungal diseases). I water in the early morning so the plants dry quickly. Containers dry out faster, so check them daily in hot weather. Let the top inch of soil feel dry before watering again.
Feed plants with a balanced, slow-release fertilizer at planting time, then top-dress with compost in early spring. For container plants, I mix in a handful of worm castings or a granular fertilizer every few months. Deadhead spent blooms regularly to encourage new flowers—this keeps your garden looking fresh and extends the blooming season.
✂️ Step 5: Maintain and Refresh for Year-Round Success
Prune back perennials in late winter or early spring to remove dead growth and encourage new shoots. Divide crowded plants like coneflowers or black-eyed Susans every few years to keep them healthy. I also add a few new plants each season to replace any that fade or to introduce new pollinator favorites.
Keep an eye out for pests like aphids or spider mites, which can weaken plants. A strong blast of water often dislodges them, but I also use insecticidal soap if needed. Finally, add a small water source—a shallow dish with pebbles or a tiny fountain—to give pollinators a place to drink. Your garden will become a buzzing, fluttering oasis in no time!
Tips & tricks for perfect year-round pollinator gardens
Creating a pollinator-friendly garden that thrives year-round takes a few strategic moves. Here are the game-changers that'll make your small space buzz with life all season long.
Seasonal Layering: In Step 1, when planning your seasonal blooms, think about vertical layering too. Plant early spring bloomers like crocus at the front, then add taller summer favorites like coneflowers behind them, and top with late-season asters. This creates a cascading effect that attracts pollinators at every height as they move through your garden. I've seen hummingbirds hover at different levels depending on the season!
Container Hack: For Step 2, when choosing containers, opt for self-watering planters if you tend to forget watering. They'll help maintain that critical 1 inch per week watering goal mentioned in Step 4, especially during hot summer months. Just remember to empty the reservoir before winter to prevent freezing. I keep a small watering can with me while gardening to top off containers between deep waterings.
Sunlight Mapping: Before positioning plants in Step 3, spend a full day observing your space. Use chalk or stakes to mark where sunlight hits at different times—morning sun is gentler, while afternoon sun can scorch delicate blooms. I've found that moving heat-loving plants like lavender to the western side often gives them the perfect balance of intense afternoon sun without overheating.
Pollinator-Friendly Additions: While maintaining your garden in Step 5, consider adding a few extra elements that aren't plants but make a huge difference. Place flat stones or pieces of bark near water sources—pollinators use these as resting spots. I've also seen dramatic increases in butterfly visits when I add a simple mud puddle (just a shallow dish of damp sand) where they can gather minerals.
Pro Tips for Home Garden Plants
- Creating a pollinator-friendly garden that thrives year-round takes a few strategic moves.
- Seasonal Layering: In Step 1, when planning your seasonal blooms, think about vertical layering too.
- Container Hack: For Step 2, when choosing containers, opt for self-watering planters if you tend to forget watering.
Frequently asked questions
Got questions about creating a pollinator-friendly home garden?
Here are some of the most common concerns—plus quick, actionable answers to help you grow a thriving, bee- and butterfly-loving space, no matter your yard’s size.
What are the easiest pollinator-friendly plants for beginners?
Start with low-maintenance favorites like lavender, bee balm, or coneflowers. These perennials attract pollinators with minimal fuss and thrive in small spaces. Annuals like marigolds or bachelor’s buttons also offer instant color and buzzing activity. Pro tip: Choose native plants—locals know best!
When is the best time to plant for year-round pollinator support?
For spring, plant early (March–April) to give pollinators a head start. Fall (September–October) is ideal for perennials—they’ll establish roots before winter. Succession planting (e.g., swapping out spring bulbs for fall-blooming asters) ensures continuous food sources. Troubleshoot: If your area has harsh winters, opt for hardy varieties like Russian sage or sedum.
Can I grow pollinator plants in containers or small balconies?
Window boxes
, hanging baskets, and deep pots work great for compact pollinator gardens. Try thyme, dwarf sunflowers, or calendula—they’re shallow-rooted and packed with nectar. Just ensure pots have drainage holes and use lightweight soil. Space hack: Stack containers vertically to maximize square footage!
How do I keep pests away without harming pollinators?
Avoid chemical pesticides—they’re deadly to bees and butterflies. Instead, use neem oil (targeted sprays), row covers, or introduce beneficial insects like ladybugs. Healthy plants resist pests better, so focus on well-draining soil and proper spacing. Quick fix: Plant garlic or marigolds nearby—they naturally deter aphids and other pests.
What if my garden attracts too many pests instead of pollinators?
Balance is key! If you’re seeing more pests than pollinators, add diverse plantings (e.g., herbs like dill or fennel for wasps, which prey on caterpillars). Remove only the most damaged leaves (not whole plants) to avoid starving pollinators. Reset tip: A small water feature can attract beneficial dragonflies, which hunt mosquitoes and flies.
Wrapping up and next steps
Creating a year-round pollinator haven in your home garden is easier—and more rewarding—than you think! 🌸 Even small spaces can buzz with life when you choose the right companion plants, prioritize native species, and embrace seasonal variety.
Whether you’re a beginner or a seasoned gardener, every step you take helps sustain local ecosystems while adding beauty to your backyard.
Ready to take the next step? Start small—pick one or two pollinator-friendly plants for your space, research local varieties, and observe what thrives. Over time, expand your garden, experiment with companion pairings, and watch your little slice of nature flourish! 🌿