Blooming
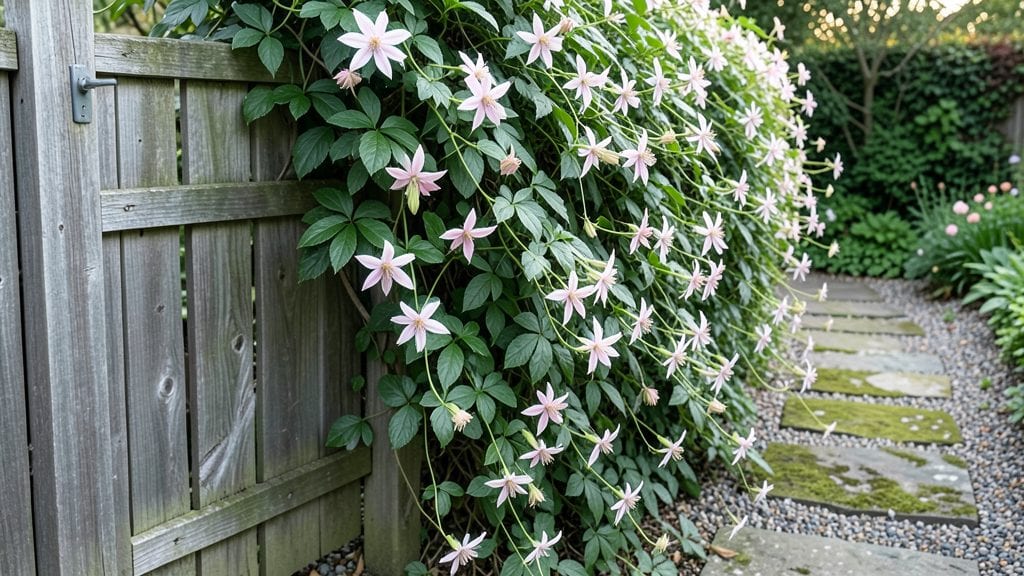
Your garden gate isn’t just an entrance—it’s the first splash of color that greets visitors all year. 🌸 I’ve transformed mine from a plain wooden barrier into a blooming statement piece using perennials that thrive with minimal fuss, and the results are shockingly lush even in winter.
The key? Choosing plants that love sunlight, spread gently, and bloom in waves so there’s never a dull moment.
Start with three easy-to-grow perennials: clematis for vertical drama, lavender for fragrance and pollinators, and catmint for long-lasting purple blooms that butterflies adore. Add a 5-gallon hanging basket of trailing nasturtiums near the latch for instant pop, and you’ve got a gate that feels like a cottage garden postcard.
Most of these plants need 6+ hours of sun and only occasional deadheading to keep them flourishing.
By late spring, your gate will be a riot of color—pink clematis, lavender spikes, and catmint’s fuzzy blooms—while the nasturtiums spill over like confetti. The fragrance alone makes every walk through the yard feel like a stroll through a storybook.
Best part? These perennials return year after year, so the charm just keeps growing without extra work.
Works for any gate style—wooden, metal, or even a simple picket fence—and adapts to most climates. Whether you’re framing a path or marking the edge of your property, this is the foolproof way to make your garden’s welcome mat unforgettable. Let’s get planting!
📚 In This Guide
- What you need
- Instructions
- Tips and common mistakes
- Wrapping up and next steps
What you need
- ● Perennial Plants: 10–15 Peony plants (varieties like 'Sarah Bernhardt' or 'Bowl of Beauty')
- ● 8–10 Daylilies (e.g., 'Stella de Oro' or 'Happy Returns')
- ● 6–8 Coneflowers (e.g., 'Magnus' or 'White Swan')
- ● 5–7 Black-Eyed Susans (e.g., 'Goldsturm')
- ● 4–6 Roses (disease-resistant varieties like 'Knock Out' or 'Dr. Huey')
- ● 3–5 Salvias (e.g., 'May Night' or 'Indigo Spires')
- ● 2–3 Lavender bushes (e.g., 'Munstead' or 'Grosso')
- ● Soil Amendments: 50 lbs. Compost (for enriching soil)
- ○ 20 lbs. Bone meal (optional, for phosphorus boost)
- ● Mulch: 2–3 bags Wood chips or straw mulch (for moisture retention)
- ● Essential Tools: 1 Garden trowel (for planting)
- ● 1 Pruning shears (for shaping)
- ● 1 Garden fork (for aerating soil)
- ● 1 Wheelbarrow (for transporting materials)
- ● 1 Watering can or hose (with adjustable nozzle)
- ● 1 Measuring tape (for spacing plants)
- ○ Optional (But Helpful!): 1 Soil pH tester (to ensure optimal growing conditions)
- ● 1 Garden kneeler (for comfort)
- ● 1 Garden gate or trellis (for climbing plants like roses)
- ● Garden gloves (to protect your hands)
- ● Prerequisites: Full sun to partial shade location (6+ hours of sunlight daily)
- ● Well-draining soil (amend if clay-heavy)
- ● Access to water source
Step-by-Step instructions for designing a cottage-style perennial border
Here’s how I create a lush, low-maintenance perennial border that bursts with color from spring through fall.
🌱 Step 1: Select and Arrange Your Perennial Plants
Start by choosing a mix of 4-6 perennial varieties that thrive in your hardiness zone and complement each other’s bloom times. I like to pair early bloomers like lungwort or heuchera with mid-season stars like coneflowers and late-season performers like sedum or Russian sage. Arrange them in odd-numbered groupings—threes or fives—so the design feels natural and balanced.
Place taller plants toward the back of the border and shorter ones toward the front. Watch for how each plant’s foliage and flowers will fill out over the season—some, like black-eyed Susans, grow wide and bushy, while others, like catmint, spread horizontally. Space them 18-24 inches apart to allow room for growth without overcrowding.
🪴 Step 2: Prepare the Soil and Plant with Care
Dig a trench 12-18 inches wide and 12 inches deep along your chosen border line. Amend the soil with 2-3 inches of compost and mix it thoroughly to loosen the earth and improve drainage. Perennials hate soggy roots, so if your soil is heavy clay, add a handful of sand or perlite to each planting hole.
When planting, dig holes just deep enough to accommodate the root ball without burying the crown too deeply. Gently tease out any circling roots and place the plant in the hole, then backfill with soil, pressing lightly to remove air pockets. Water deeply right after planting to settle the soil and encourage root establishment.
☀️ Step 3: Mulch and Water for Establishment
Spread a 2-3 inch layer of organic mulch—like shredded bark or straw—over the soil surface, keeping it 3-4 inches away from plant stems to prevent rot. Mulch helps retain moisture, suppress weeds, and regulate soil temperature. In the first few weeks, water deeply 2-3 times per week until the plants show signs of new growth, which usually happens within 3-4 weeks.
You’ll know your perennials are settling in when you see fresh leaves emerging from the center of the plant. At this stage, reduce watering to once a week unless your area experiences extreme heat or drought. Overwatering at this point can lead to root rot, so always check the soil’s moisture level by sticking your finger 1-2 inches deep—if it feels dry, it’s time to water.
✂️ Step 4: Maintain and Deadhead for Continuous Blooms
Once your perennials are established, focus on deadheading spent flowers to encourage more blooms. I like to trim back faded blooms to the nearest set of healthy leaves using clean, sharp pruners. This not only keeps the garden looking tidy but also redirects the plant’s energy into producing more flowers rather than setting seed.
In early spring, cut back any dead or damaged foliage to make room for new growth. Avoid heavy pruning in late summer or fall, as this can stimulate tender new growth that won’t survive winter. Instead, wait until early spring to give your perennials a fresh start.
🌿 Step 5: Plan for Seasonal Interest and Layering
To keep your border vibrant all season, incorporate plants with varying heights, textures, and bloom times. Add ornamental grasses like feather reed grass for movement and winter interest, and include foliage plants like hostas or heucheras for year-round color. These plants fill gaps when others are dormant and add depth to your design.
Every few years, divide and replant any perennials that have outgrown their space or become overcrowded. This rejuvenates the plants and keeps your border looking fresh. I like to do this in early spring or fall when the weather is mild, and the plants are either just waking up or settling in for winter.
Tips & tricks for perfect cottage-style perennial borders
These garden-tested strategies will help you create a perennial border that thrives with minimal effort and maximum charm.
Plant Selection Strategy: When choosing your 4-6 perennial varieties in Step 1, consider both bloom times and mature sizes. I always include at least one plant with vertical interest like Russian sage to create height, and one with cascading foliage like catmint to soften the edges. This creates natural layers that catch the eye from different angles. The key is balancing early, mid, and late-season bloomers so you never have a colorless period.
Soil Preparation Secret: In Step 2, don't skimp on the 2-3 inches of compost—this is where the magic happens for perennials. I like to mix in a handful of worm castings with the compost for extra nutrients. For heavy clay soil, blend in sand or perlite until the mixture has the texture of a well-drained cake batter. This prevents the dreaded "soggy roots" that can kill perennials by suffocating their roots.
Watering Wisdom: The 2-3 times per week watering schedule in Step 3 works best when done deeply—aim for about 1 inch of water per session. I use a rain gauge to measure, and always water in the morning so foliage has time to dry before evening. Once established, that once-a-week maintenance becomes much easier, but remember to check that 1-2 inch soil depth with your finger before watering.
Layering Technique: For Step 5's seasonal interest, think vertically as well as horizontally. Place feather reed grass at the very back to create movement and winter texture, then layer hostas or heucheras in front for their colorful foliage. I like to tuck black-eyed Susans near the middle where they'll get good airflow but still contribute to the height. This creates a living tapestry that changes with each season while maintaining that cottage-style charm.
Pro Tips for Garden Gate Blooms
- These garden-tested strategies will help you create a perennial border that thrives with minimal effort and maximum charm.
- Plant Selection Strategy: When choosing your 4-6 perennial varieties in Step 1, consider both bloom times and mature sizes.
- Soil Preparation Secret: In Step 2, don't skimp on the 2-3 inches of compost—this is where the magic happens for perennials.
Frequently asked questions
Got questions about bringing garden gate blooms to life?
You’re not alone! Here are answers to the most common queries to help you create a cottage-style garden that bursts with perennial color—no fuss, just beauty.
What’s the best time of year to plant garden gate blooms?
For most perennials, spring (after the last frost) or early fall are ideal. This gives roots time to establish before extreme heat or cold. If you’re planting in zones with mild winters, fall planting can even encourage earlier blooms next year!
How long does it take for garden gate blooms to fully establish?
Patience pays off! Most perennials take 1–3 years to reach their peak. The first year focuses on root growth, so don’t fret if blooms are sparse. By year two, you’ll see a lush, full display—worth the wait!
Can I mix annuals with perennials for instant color?
Annuals like pansies, sweet alyssum, or marigolds fill gaps quickly, while perennials build a long-term foundation. Plant annuals in front of perennials for a layered, ever-changing look that keeps your garden gate blooming year-round.
What’s the easiest way to keep pests away from my garden gate blooms?
Prevention is key! Neem oil or companion planting (like marigolds repelling aphids) works wonders. For heavy infestations, handpick pests early in the morning when they’re sluggish. Healthy soil = stronger plants that resist pests naturally!
How do I choose a color palette for my garden gate blooms?
Cottage gardens thrive on soft, harmonious blends. Stick to 3–4 colors (e.g., blues, whites, and pinks) with varying shades for depth. Add one bold accent color (like deep purple or rust) for drama. Pro tip: Mimic nature’s palette—think lavender, sage, and cream!
Wrapping up and next steps
Transforming your garden into a whimsical cottage retreat with garden gate blooms is simpler—and more rewarding—than you think! 🌸 From sun-loving lavender to shade-loving asters, these perennials bring color, texture, and charm year after year with minimal fuss.
Whether you’re a seasoned gardener or just starting, every bloom you plant is a step toward creating a space that feels like a cozy hug from nature.
Ready to dive in? Start small! Pick one or two perennials to begin, sketch a simple layout, and let your garden evolve naturally. Before you know it, your garden gate blooms will be the talk of the neighborhood—and your happy place to unwind. 🌿✨