Fertilization
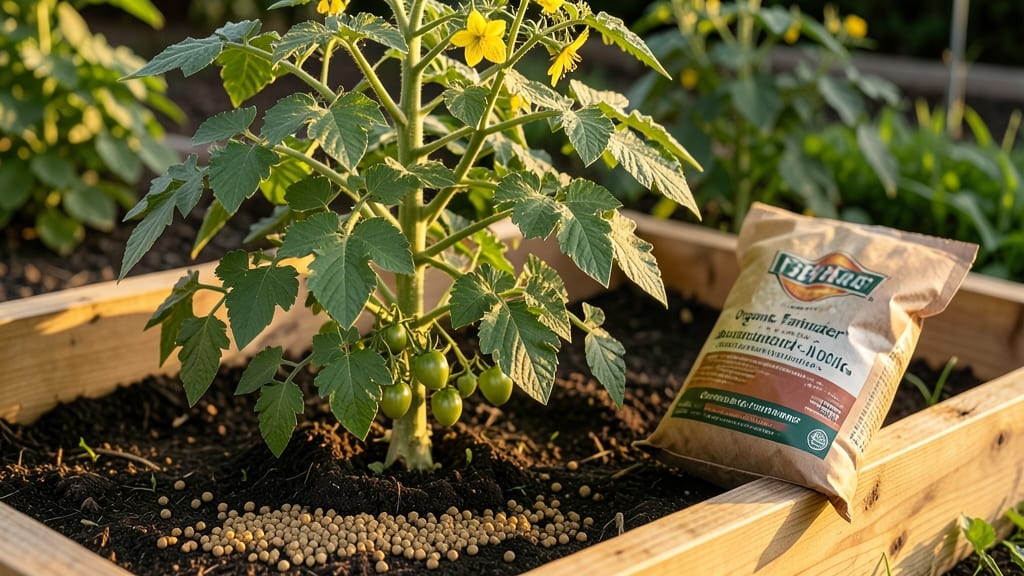
Master these garden fertilizing tips—precision feeding transforms your garden from struggling to shockingly lush. 🌱 I learned the hard way that throwing fertilizer on plants doesn't work—it's about matching nutrients to what each plant actually needs at every growth stage.
My tomatoes now produce 30% more fruit because I stopped guessing and started testing.
The secret starts with your soil. A simple test kit reveals what's missing—often it's not what you'd expect. Organic options like compost or fish emulsion build soil health long-term, while synthetic fertilizers give quick fixes for hungry plants.
I use both, but I time them carefully: pre-planting for roots, mid-season for blooms, and late summer for storage crops.
You'll see stronger stems, deeper green leaves, and plants that bounce back from pests better. The key is consistency—feeding too much burns roots, too little starves growth. By the end of summer, your garden will look like it belongs in a nursery display instead of your backyard.
Works for vegetables, flowers, and even lawns—just adjust the ratios. Here's how to get it right the first time without wasting a single dollar on over-fertilizing.
📚 In This Guide
- What you need
- Instructions
- Tips and common mistakes
- Wrapping up and next steps
What you need
- ● Fertilizer: Choose based on your plants’ needs—organic (compost, worm castings, bone meal) or synthetic (granular, liquid, or slow-release). Pro tip: Check the NPK ratio (e.g., 10-10-10) for balanced growth.
- ○ Soil Test Kit: Optional but highly recommended—test pH and nutrient levels before fertilizing. (DIY kits or lab services available.)
- ● Gloves & Mask: Protect your hands (nitrogen-heavy fertilizers can irritate skin) and lungs (organic matter like manure may contain dust).
- ● Watering Can or Hose: For liquid fertilizers or rinsing after application. Tip: A spray nozzle helps with even distribution.
- ● Measuring Tools: Measuring cups/spoons (for granular/slow-release fertilizers).
- ● Gallon jug or marked container (for liquid fertilizers—dilute as per label!).
- ● Garden Fork or Tiller: Loosen soil before fertilizing (especially for granular types) to help roots absorb nutrients.
- ● Hand Trowel or Broadcast Spreader: Granular fertilizers spread evenly = happier plants! Pro tip: Calibrate your spreader for precise coverage.
- ● Pruners or Shears: Trim dead foliage before fertilizing to reduce waste and improve nutrient uptake.
- ● Calendar or Reminder App: Track application dates—most plants need feeding every 4–6 weeks during growing seasons.
- ● Weather Check: Fertilize on a cloudy day or early morning to avoid burning plants in direct sunlight.
- ● Plant Readiness: Avoid fertilizing stressed, wilting, or newly transplanted plants—wait until they’re established.
- ● Pet & Kid Safety: Store fertilizers in locked cabinets and keep pets/kids away until rinsed (some chemicals are toxic if ingested).
- ● Local Regulations: Check if your area restricts certain fertilizers (e.g., phosphorus bans in some states).
- ● Soil Amendments: Add compost, peat moss, or perlite to improve soil structure before fertilizing.
- ● Slow-Release Fertilizer Tablets: Great for container gardens—just drop one into the soil and water!
- ● pH Adjusters: Lime (to raise pH) or sulfur (to lower pH) if your soil test reveals imbalances.
- ● Organic Accelerators: Seaweed extract or fish emulsion to boost growth alongside fertilizers.
Step-by-Step guide to precision garden fertilizing
Here's how to feed your plants the right way—no guesswork, just lush results.
🌱 Step 1: Test Your Soil First
Before adding any fertilizer, grab a soil test kit to check pH and nutrient levels. I always test in early spring because soil composition changes seasonally. Most garden centers sell affordable kits that take just 10 minutes to process. If your pH is off, adjust it first—acid-loving plants like blueberries need 4.5-5.5, while veggies thrive at 6.0-7.0.
Don't skip this step. Over-fertilizing because you assumed your soil was "hungry" can burn roots and waste money. If your test shows balanced nutrients, you can move straight to feeding. But if phosphorus or potassium is low, focus on those first—roots and blooms depend on them.
🌿 Step 2: Choose the Right Fertilizer Type
Match your fertilizer to your plants' needs. For leafy greens like lettuce, use a high-nitrogen formula (like 5-1-1). Flowering plants need more phosphorus (look for 1-2-2). Slow-release granules work best for established gardens, while liquid fertilizers give quick boosts to struggling plants.
I avoid synthetic fertilizers for delicate perennials—they can stress roots. Instead, I use compost tea or fish emulsion for organic feeding. Always read the label: numbers like 10-10-10 mean nitrogen-phosphorus-potassium percentages. For most gardens, a balanced 10-10-10 is a safe starting point.
💧 Step 3: Apply Fertilizer at the Right Time
Feed plants in the morning when temperatures are cooler. For newly planted annuals, wait 2-3 weeks before applying fertilizer—roots need time to establish. Spread granules evenly over the soil surface, then water deeply to activate them. Never let fertilizer touch plant leaves, or you'll risk chemical burns.
Follow the recommended rate on the package. I halve the dose for container plants because they have less soil volume. For example, if a bag says "1 pound per 100 sq ft," I use half that amount for potted herbs. Watch for signs of overfeeding: yellowing leaves or white crust on soil mean you've gone too heavy.
⏰ Step 4: Schedule Regular Feedings
Feed every 4-6 weeks during the growing season (spring through fall). Perennials and shrubs need less frequent feeding—once in early spring and again after flowering. For vegetables, I use a liquid fertilizer every 2 weeks during their active growth phase to keep them producing.
Stop fertilizing 6 weeks before harvest for edible crops. You want the plant to focus on producing food, not new leaves. In fall, reduce feeding entirely unless you're growing winter crops. Plants need time to harden off before dormancy. If you see new growth late in the season, it won't survive frost.
☀️ Step 5: Monitor and Adjust
Check plants weekly for signs of deficiency. Yellow lower leaves mean nitrogen deficiency—apply a nitrogen boost. Purple stems indicate phosphorus shortage. Adjust your feeding schedule based on what you observe. I keep a small notebook by my garden to track which fertilizers work best for each plant type.
Don't fertilize if the soil is dry. Always water first, then feed. This prevents root burn and ensures nutrients reach the root zone. In hot weather, I water deeply the night before feeding to give the soil time to absorb moisture. Overhead watering can wash away granules before they dissolve, wasting your investment.
Tips & tricks for precision garden fertilizing
Mastering the art of garden fertilizing means paying attention to details that make all the difference between thriving plants and struggling ones.
Soil Test Timing: Those 10 minutes you spend testing your soil in Step 1 are critical. I like to test in early spring, but if you're dealing with a new garden bed or suspect nutrient depletion, test again in late summer. The results tell you exactly where to focus—whether it's nitrogen for leafy growth or phosphorus for blooms. Don't guess; let the test guide you.
Fertilizer Application Precision: When applying fertilizer in Step 3, use a spreader for granules to ensure even distribution. I find that measuring out the recommended dose first (like that 1 pound per 100 sq ft) and dividing it into smaller portions prevents overapplication. For container plants, remember to halve the dose—they have limited soil volume and can't handle as much fertilizer.
Organic Fertilizer Boost: For delicate perennials, I always reach for organic options like compost tea or fish emulsion. These break down slowly and feed the soil ecosystem, not just the plants. Mix a small amount into your watering can and apply it directly to the soil—never the leaves—to avoid burning. The soil microbes will thank you by making nutrients more available to your plants.
Seasonal Feeding Schedule: The 4-6 week feeding schedule in Step 4 works wonders, but adjust for your plants' needs. Vegetables in active growth can handle the 2-week liquid feeding, while established perennials might only need that once in spring. Always stop feeding 6 weeks before harvest—this ensures your plants focus on producing food rather than new leaves.
Pro Tips for Garden Fertilizing Tips
- Mastering the art of garden fertilizing means paying attention to details that make all the difference between thrivi...
- Soil Test Timing: Those 10 minutes you spend testing your soil in Step 1 are critical. I like to test in early spring...
- Fertilizer Application Precision: When applying fertilizer in Step 3, use a spreader for granules to ensure even dist...
Frequently asked questions
Got questions about keeping your garden thriving with the perfect fertilizer boost? Here are some of the most common concerns—plus expert answers to help you grow like a pro!
How often should I fertilize my garden?
Most gardens benefit from fertilizing every 4–6 weeks during the growing season (spring through fall). For slow-release fertilizers, follow the label instructions—usually once per season is enough. Over-fertilizing can burn plants, so always check soil moisture and plant needs first!
When is the best time of day to apply fertilizer?
Apply fertilizer in the early morning or late afternoon to avoid burning plants under hot sun. This gives roots time to absorb nutrients before evaporation or heat stress occurs. Water thoroughly after application to help nutrients penetrate the soil.
Are organic fertilizers better than synthetic ones?
It depends on your goals! Organic fertilizers (like compost or manure) improve soil health long-term and attract beneficial microbes. Synthetic fertilizers provide quick, precise nutrient boosts. Many gardeners mix both for balanced results—start with a soil test to decide!
What do I do if my plants look fertilized but are still struggling?
Yellow leaves, weak stems, or stunted growth could mean over-fertilization (flush with water) or nutrient imbalance (test soil pH). Check for pests/diseases too. If roots look brown/black, you’ve likely overdone it—cut back and let soil recover before reapplying.
Can I use coffee grounds or eggshells as fertilizer?
Coffee grounds add nitrogen (great for acid-loving plants like blueberries) and improve soil texture. Crushed eggshells provide calcium—just bake and grind them first. Mix these into compost or top-dress soil lightly (¼ inch max) to avoid clumping.
Does weather affect when I should fertilize?
Yes! Avoid fertilizing before heavy rain (nutrients will wash away) or during drought (roots can’t absorb well). Wait until soil is moist but not soggy. In cold climates, hold off until soil temps hit 50°F+—cooler soil slows nutrient uptake.
Wrapping up and next steps
Mastering the art of garden fertilizing is all about precision, patience, and passion—and you’re already on the right track! 🌱 By understanding your soil’s needs, choosing the right fertilizers, and applying them thoughtfully, you’ll nurture a thriving garden that rewards you with vibrant blooms and bumper harvests all year. Start small, observe closely, and let your green thumb grow stronger with each season.
Ready to put your new knowledge into action? Pick one plant or section of your garden this week and give it the tailored care it deserves. Happy gardening—your future lush landscape starts with a single, well-placed shovel of fertilizer! 🌿✨