Picking
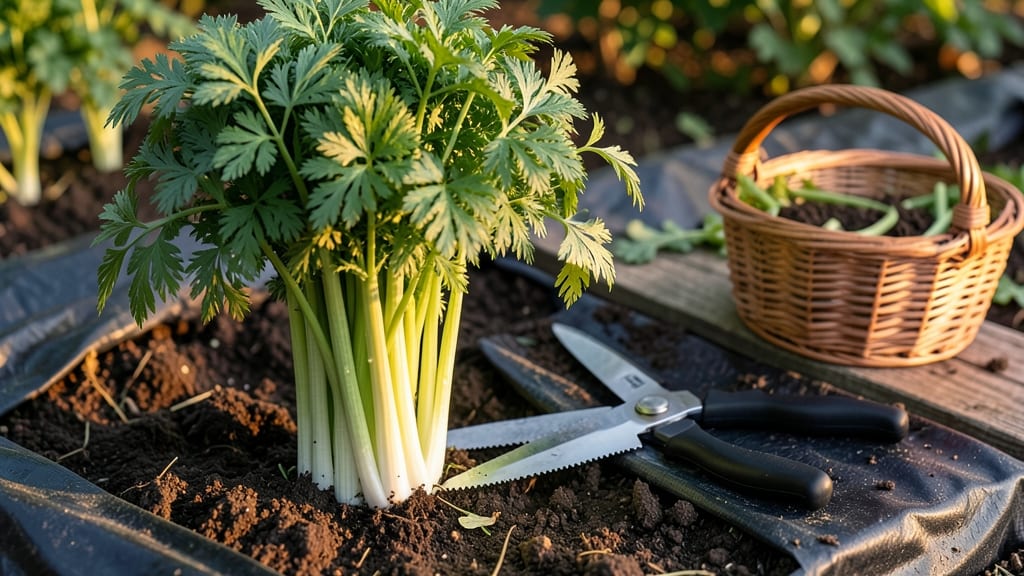
Harvesting garden celery at the right time turns your 🥬 plants into crisp, flavorful stalks that last all season.
Ever pulled a stalk only to find it woody and bitter? Or watched your celery bolt before it matured? Timing is everything—cut too early, and you lose yield; wait too long, and the texture turns rubbery. The secret lies in stalk thickness, leaf color, and a little patience.
In USDA Zone 6a, your spring-planted celery will be ready between July and September, but knowing the exact signs—like firm, white bases and dark green leaves—keeps your harvest at its peak.
Below, I’ll walk you through the best cutting techniques and storage tricks to keep your celery fresh for weeks.
You’ll learn how to avoid common mistakes, maximize your yield, and even revive slightly wilted stalks. No more sad, limp celery—just crisp, homegrown perfection.
Optimal harvest timing for garden celery: when to cut for peak flavor and yield
Celery thrives when harvested at the right moment—120 to 160 days after planting—but knowing the exact signs of readiness can transform your yield from mediocre to extraordinary.
The key lies in balancing stalk thickness, leaf vitality, and soil moisture, all while accounting for your local climate's quirks. In USDA Zone 6a, for example, early July through September offers the ideal window, but cooler regions may extend harvests into October if frost threatens.
Start by checking the base of the stalks—they should be thick and white, measuring about 1 to 1.5 inches in diameter. Thin stalks indicate the celery isn’t mature enough, while overly thick ones may have woody centers and bitter flavors.
Pair this with dark green, lush leaves that show no signs of yellowing or wilting, as these are clear indicators of a healthy, ready-to-harvest plant.
Now, let’s dive into the specifics with this quick-reference table to help you gauge maturity at a glance.
| Maturity Sign | Ideal Specification | What to Avoid |
|---|---|---|
| Stalk Height | 12–16 inches tall | Under 10 inches (not mature) |
| Stalk Thickness | 1–1.5 inches at base | Thinner than 1 inch (woody later) |
| Leaf Color | Dark green and vibrant | Yellowing or pale leaves |
| Stalk Texture | Firm and crisp | Soft or rubbery stalks |
| Base Color | White and thick | Brown or hollow centers |
| Soil Moisture | Consistently moist | Dry or waterlogged soil |
| Seasonal Timing | July–September (Zone 6a) | Harvesting before 120 days or after frost |
Climate plays a surprising role in harvest timing. In warmer southern regions, like Zone 8b or 9a, celery can be harvested as early as June, while cooler northern zones, such as Zone 5a, may need to wait until late August or early September.
Pay attention to nighttime temperatures: celery prefers cooler evenings (around 60–70°F) to develop its signature crispness. If summer heat spikes above 85°F, stalks may bolt or develop bitter flavors, so prioritize harvesting during these periods.
One of the biggest mistakes gardeners make is over-maturity. While it might seem logical to wait for the largest stalks, celery past its prime becomes woody, tough, and less flavorful.
The 120–140 day mark is your sweet spot—harvesting earlier ensures tender, sweet stalks, while waiting too long risks a disappointing texture. To test readiness, gently squeeze a stalk near the base; it should feel firm and slightly springy, not mushy or hollow.
Another common pitfall is premature cutting, often driven by impatience. Young celery plants may look promising but lack the crispness and nutrient density of fully mature stalks.
If you’re unsure, wait an extra week—celery won’t improve after harvest, but it can only get worse if left too long in the ground.
Pro tip: Use a small knife or pruners to cut stalks at the base, leaving about 1 inch of stem to encourage regrowth for a second harvest.
Soil conditions also influence harvest quality. Celery thrives in rich, well-draining soil with a pH between 6.0 and 6.8. If your soil is too sandy or clay-heavy, amend it with compost or aged manure before planting.
During the growing season, maintain consistent moisture—celery is drought-sensitive, and fluctuating water levels can lead to bitter or split stalks. Mulch around the base to retain moisture and suppress weeds, which can compete for nutrients.
For gardeners in container gardens, timing adjustments are minimal, but monitor soil moisture more closely since pots dry out faster. If you’re growing celery in a greenhouse, you might harvest slightly earlier due to controlled conditions, but still aim for the same maturity signs.
Always prioritize early morning harvests when temperatures are cooler, as this preserves crispness and extends post-harvest shelf life.
Finally, don’t overlook the regrowth potential of celery. After your first harvest, the plant may produce smaller but still edible stalks if given proper care. To encourage this, trim the outer stalks first, leaving the inner ones to mature.
With the right timing and techniques, you can enjoy multiple harvests from a single plant—maximizing your garden’s yield without extra effort.
Step-by-step celery harvesting techniques to preserve freshness and extend storage life
Harvesting garden celery at the right time and with the right technique ensures your stalks stay crisp and flavorful for weeks. Unlike many vegetables, celery’s harvesting method directly impacts its post-harvest lifespan—so cutting too early or too late can turn your bounty into a sad, limp pile.
The key lies in understanding proper stalk angles, whether you’re harvesting in a field or greenhouse, and how to handle the roots to maximize freshness.
Field-grown celery often requires gentler handling due to loose soil, while greenhouse celery might need sharper cutting tools to avoid tearing. Both methods demand clean cuts to prevent moisture loss and bacterial entry.
I’ve found that using a sharp knife or pruning shears at a 45-degree angle just above the soil line preserves the most nutrients and keeps the plant healthy for future regrowth. Let’s break down the exact steps to ensure your celery stays fresh longer.
How to Harvest Garden Celery for Maximum Freshness
- Step 1: Choose the Right Time Harvest when stalks reach 12-16 inches tall with thick, white bases and dark green leaves. Squeeze a stalk—it should feel firm and crisp, not soft or hollow.
- Step 2: Select Your Tools Use a sharp knife or pruning shears to make clean cuts. Avoid dull tools that crush stalks, accelerating spoilage. For greenhouse celery, sterilize blades with rubbing alcohol to prevent disease.
- Step 3: Cut at the Base Hold the stalk firmly and cut at a 45-degree angle, 1-2 inches above the soil line. This angle increases surface area for slower drying. Leave the root system intact if you plan to harvest again—celery can regrow from the base!
- Step 4: Handle with Care Gently twist or pull stalks (don’t yank!) to avoid damaging neighboring plants. Place harvested celery in a bucket of water immediately to hydrate and cool. Field-grown celery may need extra rinsing to remove soil.
- Step 5: Trim and Store Remove any yellowed leaves and trim the base to expose fresh white stalk. Bundle stalks and store in a plastic bag with a damp paper towel in the fridge for up to 3 weeks. For long-term storage, see my tips on freezing or dehydrating below.
One common mistake I see is cutting celery too close to the soil, which exposes the root crown to air and speeds up spoilage. Always leave that 1-2 inch buffer—it’s the difference between celery that lasts 2 weeks and celery that wilts in 4 days.
Field-grown celery also benefits from a light rinsing post-harvest to remove dirt, while greenhouse celery might just need a wipe-down with a damp cloth.
If you’re harvesting multiple times from the same plant, space cuts 2-3 weeks apart to allow regrowth. I’ve had success with 3 harvests per season from a single celery plant when using this method.
For greenhouse-grown celery, the controlled environment lets you harvest slightly earlier—aim for 10-12 inches tall—since the plants mature faster without weather stress.
Pro tip: Never wash celery before storage—moisture speeds up rot. Instead, store it dry in the fridge and rinse just before use. For extended storage beyond 3 weeks, try blanching and freezing or drying the stalks into crunchy chips.
These methods preserve flavor and texture far better than letting celery sit in the crisper drawer until it turns to mush.
With these techniques, your homegrown celery will stay crisp longer, and you’ll avoid the heartbreak of a wilted harvest. Happy harvesting—your future soups and salads will thank you!