Tools
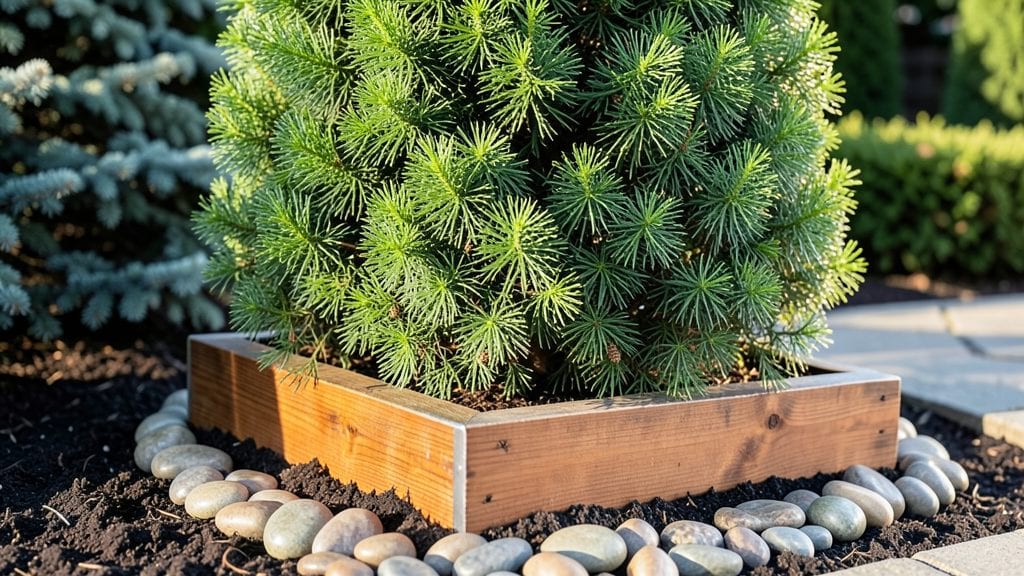
Crafting cedar garden planters transforms your outdoor space into a timeless retreat with natural elegance and lasting durability. The rich, weathered look of cedar adds warmth to any garden—whether you’re framing a cozy seating area or lining a rustic pathway.
Its natural resistance to rot and insects means these planters won’t just look beautiful but will stand strong for decades with minimal care.
Start by choosing planters that complement your garden’s theme—whether it’s sleek modern lines or classic farmhouse charm. Cedar’s aromatic wood also deters pests naturally, making it a practical choice for herb gardens or vegetable planters.
Arrange them at varying heights to create visual interest, or group them symmetrically for a polished, curated look.
Fill them with lush greenery like boxwood, fragrant lavender, or trailing ivy to soften the planters’ edges and enhance their rustic appeal. The contrast between the wood’s natural grain and vibrant foliage creates a striking focal point. For added texture, mix in ornamental grasses or seasonal blooms like coneflowers.
To maintain their beauty, seal the cedar annually with a clear, non-toxic finish to preserve its color and protect it from moisture. Place them in partial shade to prevent fading, and avoid direct contact with soil to extend their lifespan.
With these simple steps, your cedar planters will remain the heart of your garden for years to come.
📚 In This Guide
- What you need
- Instructions
- Tips and common mistakes
- Wrapping up and next steps
What you need
- ● Cedar lumber: 1" x 6" or 1" x 8" boards (weather-resistant, rot-free) – quantity depends on planter size (e.g., 4 boards for a small planter, 6+ for larger ones).
- ● Exterior wood screws: 1.5" to 2" long (stainless steel or galvanized) – ~50-100 screws total.
- ● Wood glue: Waterproof, exterior-grade (e.g., Titebond III) – small bottle (~8 oz).
- ● Sandpaper: 80-grit and 120-grit (for smoothing rough edges).
- ○ Wood stain or sealant: Exterior-grade (optional but recommended for longevity).
- ● Drill & drill bits: 1/8" and 1/4" for pilot holes and screws.
- ● Carpenter’s square: For precise 90-degree angles.
- ● Measuring tape: 12" or longer for accurate cuts.
- ● Clamps: At least 2 (to hold boards while assembling).
- ● Safety gear: Gloves, safety glasses, and ear protection (if using power tools).
- ● Wood filler: For smoothing screw holes or imperfections.
- ● Paintbrush or foam brush: For applying stain/sealant evenly.
- ● Corner braces: Reinforces joints (great for larger planters).
- ● Decorative hardware: Copper nails or rustic screws for extra charm.
- ● Waterproofing membrane: Lays inside the planter to protect roots (e.g., landscape fabric).
Step-by-Step instructions for building cedar garden planters
Here's how to create durable, weather-resistant cedar planters that'll hold up beautifully for years.
Gather Materials and Prep Workspace
Start by collecting all your materials: 4 cedar boards (1x6 inches, 8 feet long), 4 corner brackets, wood screws (1¼-inch), outdoor wood glue, sandpaper (80 and 120 grit), stain or sealant (optional), and a drill with pilot bit. Clear a flat workspace with at least 4 feet of clearance on all sides—cedar dust is fine but messy. I like to work outside or in a garage with good ventilation.
Measure and mark each board to your desired planter dimensions. A standard 12-inch square planter works well for most herbs and small flowers. Use a pencil and straightedge to draw lines for cuts. Double-check measurements before cutting—cedar expands slightly when wet, so plan for ½-inch extra on all sides if you want a snug fit.
Cut and Sand the Boards
Cut the cedar boards to size using a circular saw or miter saw. Wear safety goggles and a dust mask—cedar releases fine particles that can irritate lungs. For clean edges, clamp a straight board as a guide when cutting. After cutting, round the corners slightly with the saw or a jigsaw for a softer, more natural look.
Sand each board starting with 80-grit sandpaper to smooth rough edges and remove splinters. Switch to 120-grit for a final pass, focusing on the inside surfaces where soil will contact the wood. Wipe away dust with a damp cloth before assembly—leftover grit can scratch your hands or damage the finish later.
Assemble the Planter Frame
Lay out two boards to form the planter's base. Apply a thin bead of outdoor wood glue along the inside edges where they’ll meet. Position a corner bracket at each end, aligning the screws with pre-drilled pilot holes to prevent splitting. Drive in 1¼-inch screws at a 45-degree angle through the bracket into the board—this creates a strong, hidden joint.
Repeat for the opposite side, then attach the remaining two boards vertically to complete the box. Pre-drill pilot holes for all screws to avoid cracking the cedar. Use a clamp to hold corners tight while screwing—cedar is soft and can shift easily. Wipe away any glue squeeze-out with a damp rag immediately to keep your workspace clean.
Reinforce and Add Drainage
Flip the planter upside down and attach ¼-inch hardware cloth to the bottom with staples or small screws. This prevents soil from washing out while allowing excess water to drain freely. For extra stability, add a horizontal support board inside, 2 inches from the bottom, screwed into the sides. This keeps the planter from warping under heavy soil loads.
Turn the planter right-side up and inspect all seams. Fill any gaps with wood filler if needed, then sand lightly again with 120-grit to smooth rough spots. Test the fit by placing it on a flat surface—it should sit level. If one side feels uneven, adjust the screws or add shims until balanced.
Finish and Weatherproof
Apply a clear outdoor sealant or stain to protect the cedar from moisture and UV damage. Brush on two thin coats, letting each dry for 4-6 hours between applications. Avoid over-saturating the wood—cedar absorbs quickly, and excess finish can pool in corners. For a natural look, use a matte finish; for durability, choose a semi-gloss option.
Let the planter cure for 24 hours before adding soil. Place it in your garden, ensuring it sits on level ground or a raised stand to improve drainage. Fill with well-draining potting mix and plant your favorite herbs or flowers. With proper care, your cedar planter will resist rot and insects for decades—far longer than plastic or treated wood alternatives.
Tips & tricks for perfect cedar garden planters
A few simple tricks will help you build cedar planters that look beautiful and last for years. These details make all the difference between a planter that fades quickly and one that becomes a garden staple.
Precision in Step 1: When measuring your cedar boards in Step 1, use a tape measure for accuracy rather than eyeballing. Cedar expands about 1% when exposed to moisture, so those extra ½-inch allowances on all sides are crucial. I've learned this the hard way—tight corners trap water and lead to rot over time. Mark your cuts with a pencil and straightedge, then verify measurements twice before cutting.
Safety First in Step 2: Cedar dust is more than just annoying—it can irritate your lungs and eyes. In Step 2, when cutting and sanding, always wear a dust mask and safety goggles. I recommend using a shop vacuum with a HEPA filter to clean up dust after sanding. The 80-grit sandpaper removes rough edges, while the 120-grit gives that smooth finish that's perfect for soil contact. Don't skip wiping away dust before assembly—leftover grit will scratch your hands and ruin the finish.
Assembly Trick in Step 3: The 45-degree angle for screwing in corner brackets in Step 3 creates a nearly invisible joint that's surprisingly strong. I've found that pre-drilling pilot holes is absolutely essential—cedar is soft and can split easily. Use a clamp to hold everything tight while screwing, and wipe away glue squeeze-out immediately. This hidden joint technique makes your planters look more professional and prevents water from seeping into the seams over time.
Finishing Wisdom in Step 5: The 24-hour cure time in Step 5 is non-negotiable. Cedar absorbs finishes quickly, so two thin coats with 4-6 hours drying time between applications work better than one thick coat. For a natural look, matte finishes let the wood's grain show through beautifully, while semi-gloss options provide better protection against moisture. Let the planter cure fully before adding soil—rushing this step can lead to uneven drying and potential warping.
Pro Tips for Cedar Garden Planters
- A few simple tricks will help you build cedar planters that look beautiful and last for years. These details make all...
- Precision in Step 1: When measuring your cedar boards in Step 1, use a tape measure for accuracy rather than eyeballi...
- Safety First in Step 2: Cedar dust is more than just annoying—it can irritate your lungs and eyes. In Step 2, when cu...
Frequently asked questions
Got questions about cedar garden planters?
Here are some common ones—plus quick answers to help you craft the perfect rustic planter for your garden!
What’s the best way to prep cedar wood for outdoor planters?
Start by sanding the wood smooth (120-grit is ideal) to remove splinters. Seal the cedar with outdoor wood sealant or linseed oil to protect it from moisture and pests. Avoid paint—it can trap moisture and cause rot. Let it dry fully (24+ hours) before planting!
How deep should cedar garden planters be for different plants?
Depth matters! For herbs and shallow-rooted plants (like basil or thyme), 6–8 inches works. Vegetables (tomatoes, peppers) need 10–12 inches, while deep-rooted shrubs (rosemary, lavender) thrive in 14+ inch planters. Always add drainage holes—cedar’s natural resistance to rot helps, but waterlogged soil is a no-go!
How long do cedar planters last before needing replacement?
With proper care, cedar planters can last 10–20 years! Cedar’s natural oils repel insects and decay, but exposure to extreme sun or moisture can shorten their lifespan. Reapply sealant every 1–2 years and store empty planters in a dry place during harsh winters to extend their life.
Can I use cedar planters for edible plants like vegetables?
Yes! Cedar is non-toxic and safe for growing edible plants. However, avoid treated cedar (like pressure-treated wood)—it contains chemicals harmful to plants and soil. Stick to untreated, natural cedar for a chemical-free, organic garden. Just ensure the sealant you use is also food-safe!
What’s the easiest fix for warped or cracked cedar planters?
Minor warping? Sand it smooth and reapply sealant. For small cracks, use wood filler (outdoor-rated) or hot glue, then sand and reseal. If the damage is severe (large splits or rot), it’s time to replace the planter. Prevention tip: Build planters with slightly wider bases (3–4 inches) to reduce warping from soil weight!
Wrapping up and next steps
Transforming your outdoor space with cedar garden planters isn’t just a DIY project—it’s an investment in timeless, rustic charm that will elevate your garden for decades. From selecting the right cedar to sealing and styling, every step ensures durability and beauty. 🌿✨
Ready to dive in? Grab your tools, gather your materials, and start crafting planters that will stand the test of time—and compliments! Your garden’s new centerpiece is just a few cuts away.