Tools
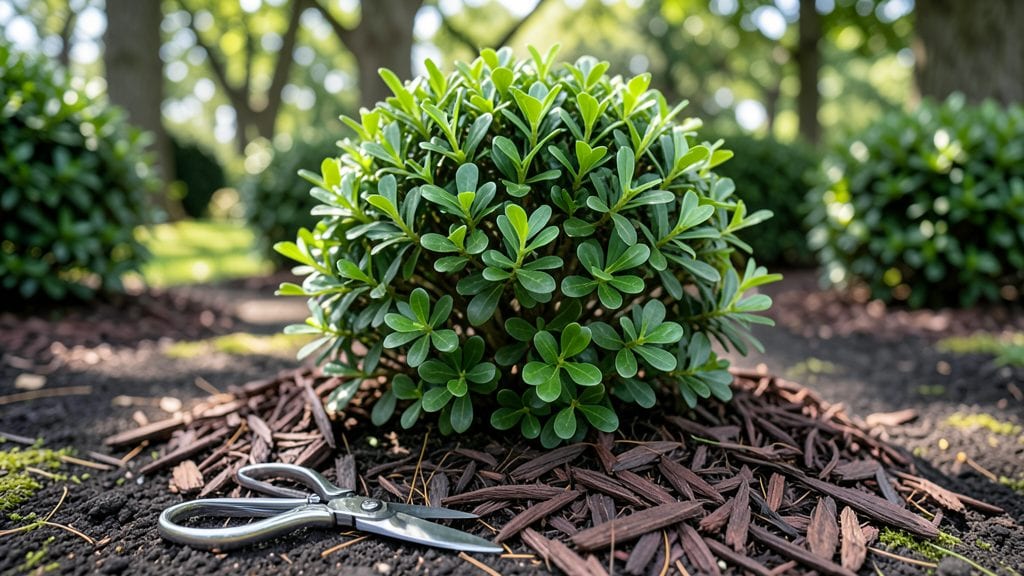
Creating a boxwood topiary garden turns your yard into a living work of art. ✨ I fell in love with topiaries after my first carefully shaped boxwood—now my front yard feels like a classic European estate.
The secret isn't just pruning; it's choosing the right varieties, spacing them properly, and understanding how light and seasons affect their shape over time.
Start with boxwoods that match your climate—dwarf varieties like 'Green Mountain' or 'Winter Gem' handle pruning beautifully. You'll need sharp pruners, a sturdy ladder for taller shapes, and a clear vision of your design: formal hedges, whimsical animals, or geometric patterns.
The key is patience—boxwoods respond best to gradual shaping over several seasons rather than drastic cuts.
By summer's end, your topiary will stand out with its glossy green foliage and crisp lines. The best part? These evergreens stay lush year-round, providing structure even in winter.
Just remember to feed them in spring and protect young plants from deer—your investment will pay off with a garden that feels like a masterpiece.
Works for any yard size, from small urban gardens to sprawling estates. The same principles apply whether you're shaping a single specimen or creating a full hedge. Let's get those shears ready!
📚 In This Guide
- What you need
- Instructions
- Tips and common mistakes
- Wrapping up and next steps
What you need
- ● Boxwood plants: 10–20 mature boxwood shrubs (depending on design size), preferably Buxus sempervirens (common boxwood) or Buxus microphylla (dwarf boxwood). Choose uniform-sized plants for a polished look.
- ● Potting soil: 5–10 bags of high-quality, well-draining potting mix (e.g., Miracle-Gro Premium Potting Mix or a 60/40 blend of peat moss and perlite).
- ● Mulch: 1–2 bags of organic mulch (e.g., shredded bark or pine straw) to retain moisture and suppress weeds.
- ● Fertilizer: Slow-release granular fertilizer (e.g., Osmocote Smart-Release Plant Food) or a balanced liquid fertilizer (10-10-10 ratio).
- ● Pruning paste: 1 small tube (e.g., Dynamat Pruning Sealer) to protect cuts and prevent disease.
- ● Hand pruners: 1 pair of sharp, bypass pruners (e.g., Felco F-2 Classic) for clean cuts.
- ● Hedge shears: 1 pair of sturdy shears (e.g., Fiskars Steel Garden Shears) for shaping.
- ● Topiary shears: 1 pair of precision shears (e.g., Gonicc Topiary Shears) for intricate designs.
- ● Measuring tape: 1 (25-foot tape) for spacing and symmetry.
- ● Gloves: 1 pair of heavy-duty gardening gloves (e.g., Workrite by WorkPro) for protection.
- ● Spray bottle: 1 (for misting plants during hot days).
- ● Wire frame or armature (for sculptural topiaries, e.g., spirals or animals).
- ● Stakes and twine (to support young plants while training).
- ● Topiary wire or copper wire (for shaping large designs).
- ● Decorative edging (e.g., metal or stone borders for a polished look).
- ● Watering can with a rose attachment (for gentle, even watering).
Step-by-step guide to designing a boxwood topiary garden
Here’s how to craft a classic, structured boxwood garden that brings refined beauty to your landscape.
🪴 Step 1: Plan Your Layout and Select Planting Spots
Start by sketching your design on paper or digitally. Boxwoods thrive in full sun to partial shade and need well-draining soil. Choose spots that receive at least 6 hours of sunlight daily—this ensures healthy growth and sharp, defined shapes. I like to place taller topiaries along fences or walls to create vertical interest, while lower forms work well as borders or accents.
Space plants 3-5 feet apart, depending on the mature size of your boxwood varieties. This gives you room to prune without overcrowding. For a symmetrical look, use a string line or measuring tape to mark even spacing. If your garden has uneven terrain, adjust plant placement to follow natural contours while keeping visual balance.
✂️ Step 2: Plant Boxwoods Properly for Stability
Dig holes twice as wide as the root ball but only as deep as the container. This prevents burying the trunk too deeply, which can suffocate the plant. Gently remove each boxwood from its pot and loosen the roots if they’re circling. Place the plant in the hole so the top of the root ball sits 1 inch below the soil line—this allows for slight settling.
Fill the hole with the 4 bags of topsoil, tamping lightly as you go to remove air pockets. Water deeply right after planting to help soil settle around the roots. I always add a 1-inch layer of mulch (using the 2 bags of pine straw) around the base, keeping it 3 inches away from the trunk to prevent rot. Mulch helps retain moisture and regulates soil temperature.
☀️ Step 3: Establish a Pruning Schedule for Shape and Health
Wait 4-6 weeks after planting before pruning to let the boxwoods establish roots. Once established, prune twice a year: early spring (just as new growth begins) and late summer (after the worst heat). Use sharp, clean pruners (the 1 pair of bypass pruners) to make cuts at a 45-degree angle just above a leaf node or bud. This encourages bushier growth.
For topiary shapes, start with a basic form—like a globe, spiral, or tiered design—and refine it gradually. I like to use a wire frame (the 1 roll of floral wire) for new shapes to guide growth until the boxwood hardens into place. Prune 1/3 of the new growth at each session to maintain shape without stressing the plant. Always step back and check your work—symmetry is key!
💧 Step 4: Maintain Soil Moisture and Fertility
Water deeply once a week during the first growing season, ensuring the soil is moist 6 inches down. Mature boxwoods are drought-tolerant but still need 1 inch of water weekly during dry spells. I use a soaker hose (the 1 soaker hose) to water slowly at the base, avoiding wetting the foliage to prevent fungal diseases.
Feed your boxwoods once in early spring with the 1 bag of slow-release fertilizer, following the package instructions. Over-fertilizing can lead to weak, leggy growth, so less is often more. After feeding, water again to help nutrients absorb into the soil. Keep an eye out for yellowing leaves—this usually means overwatering or poor drainage, while brown, crispy edges signal underwatering.
⏰ Step 5: Refine and Refresh Seasonally
In early spring, remove any dead or damaged branches and shape up the topiaries for the season. This is also the time to divide any overgrown plants if needed—boxwoods can handle this well if done carefully. For fall cleanup, trim back any leggy growth and add a thin layer of compost (using the 1 bag of compost) to enrich the soil for next year.
Every 2-3 years, give your topiaries a hard prune to rejuvenate their shape. This involves cutting back up to 1/3 of the oldest growth to encourage fresh, vibrant new shoots. I’ve found that boxwoods respond beautifully to this—just be patient, as it may take a season or two for them to fill back out. With consistent care, your topiary garden will stay lush and elegant for decades.
Tips & tricks for perfect boxwood topiary garden
A few key strategies will help you create a flawless topiary garden that stays elegant year after year.
Design Tip: Before digging, walk your garden path and visualize the final look from different angles. I always sketch my design to scale—this helps me avoid common mistakes like placing taller topiaries where they'll block walkways later. For symmetrical designs, use a garden hose or string line to mark the center point of your layout. This ensures perfect balance right from the start.
Planting Precision: When planting, don't just eyeball the depth—use a level to ensure the top of the root ball sits exactly 1 inch below the soil line. I've made the mistake of planting too deep, which can suffocate the roots. After filling the hole with the 4 bags of topsoil, press down firmly with your hands to eliminate air pockets, then water immediately to help the soil settle properly.
Pruning Technique: The 4-6 week waiting period before first pruning is crucial—it gives your boxwoods time to establish roots. When you do prune, always make cuts at a 45-degree angle just above a leaf node. I like to use the wire frame technique for new shapes: wrap the floral wire around the branches before they harden, then prune to follow the wire's shape. This creates clean lines without guessing.
Watering Wisdom: The 6 hours of sunlight requirement means your boxwoods will need consistent moisture, especially during their first growing season. I've found that watering deeply once a week (ensuring moisture 6 inches down) is better than frequent light watering. For mature plants, the 1 inch weekly rule works well, but always check soil moisture—boxwoods can handle some drought once established, but they won't forgive soggy soil.
Pro Tips for Boxwood Topiary Garden
- A few key strategies will help you create a flawless topiary garden that stays elegant year after year.
- Design Tip: Before digging, walk your garden path and visualize the final look from different angles. I always sketch...
- Planting Precision: When planting, don't just eyeball the depth—use a level to ensure the top of the root ball sits e...
Frequently asked questions
Got questions about crafting your dream boxwood topiary garden? You’re not alone! Here are answers to the most common queries—from pruning basics to troubleshooting—so you can create a lush, sculpted masterpiece with confidence.
What’s the best time of year to prune boxwood topiaries?
Prune boxwood topiaries twice a year: late spring (after new growth appears) and early summer (to shape and encourage denser foliage). Avoid heavy pruning in fall or winter, as it can stress the plant. Light trimming to remove dead branches is fine in late winter, but save major shaping for spring!
How often should I trim boxwood topiaries to keep them neat?
For maintenance shape, trim every 4–6 weeks during the growing season (spring to fall). Use sharp shears for clean cuts, and focus on gradual shaping—never remove more than ⅓ of the plant’s foliage at once. Regular trims prevent overgrowth and keep your topiaries looking polished year-round.
What are common pests or diseases in boxwood topiaries, and how do I treat them?
Boxwoods are tough, but they can fall prey to boxwood blight (a fungal disease) or pests like boxwood leafminers or spider mites. Prevent blight with proper spacing (3–4 feet apart) and watering at the base. Treat infestations with neem oil (for mites) or fungicides (for blight). Prune affected areas immediately and dispose of clippings.
Can I use other plants besides boxwood for topiaries?
While boxwood is classic, try yew (hardy and dense), holly (spiny, great for wildlife), privet (fast-growing), or rosemary (herbaceous and fragrant). Each has unique needs—yew tolerates shade, while rosemary thrives in full sun. Match your plant to your climate and sunlight for best results!
Why are my boxwood topiaries turning brown or crispy?
Brown or crispy edges usually signal over-pruning, drought stress, or winter burn. Fix it fast: Water deeply (1–2 inches per week), mulch to retain moisture, and avoid trimming in late summer or fall. For winter burn, prune back dead branches in early spring—new growth will fill in. If issues persist, check for pests or fungal issues (see above).
Wrapping up and next steps
A boxwood topiary garden isn’t just about shaping greenery—it’s about crafting a living work of art that brings timeless elegance to your outdoor space. 🌿 Whether you’re a seasoned gardener or a beginner eager to try, the key is patience, precision, and a touch of creativity.
With the right tools, techniques, and a little practice, you’ll transform your yard into a refined sanctuary that turns heads and sparks joy.
Ready to take the next step? Start small—pick one design, gather your supplies, and let your green thumb guide you. Before you know it, your boxwood topiary garden will be the envy of the neighborhood! 🌟