Watering
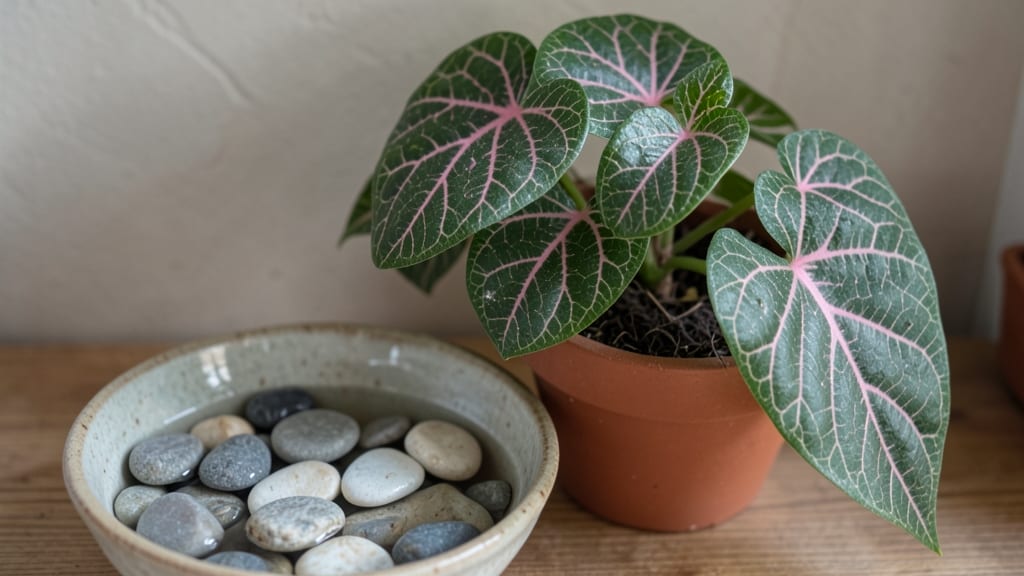
A bowl water garden turns any space into a tiny, thriving ecosystem where water, plants, and life collide in perfect harmony. 🌿 I stumbled upon this idea after watching bees sip from a shallow dish of water in my backyard—suddenly, I realized how little it takes to create a self-sustaining oasis that blooms all year.
The magic isn’t in complexity but in the quiet balance of water, light, and the right plants working together.
You’ll need just a few things: a wide, shallow bowl (ceramic, stone, or even repurposed containers work), aquatic plants like water hyacinth or miniature marsh plants, and a handful of pebbles to anchor them.
The setup takes less than 30 minutes, and once balanced, it requires almost no maintenance—just occasional top-offs and the occasional trim. This isn’t just a pretty centerpiece; it’s a lifeline for pollinators and a year-round display of delicate blooms.
The result is a living sculpture that hums with life: dragonflies skimming the surface, butterflies pausing to drink, and tiny flowers pushing through the water’s edge. In my own bowl, I’ve seen water lilies unfurl over summer and hardy moss stay vibrant through winter.
It’s the kind of garden that feels alive, even when you’re not tending it. The best part? It works indoors or out, on a patio table or a windowsill.
Here’s the twist—this isn’t just about aesthetics. A bowl water garden becomes a microhabitat, a quiet corner where nature thrives without needing a backyard. Whether you’re drawn to Zen simplicity or vibrant pollinator support, this project delivers both. Let’s get yours growing!
📚 In This Guide
- What you need
- Instructions
- Tips and common mistakes
- Wrapping up and next steps
What you need
- ● Large, shallow bowl or basin: 12–18 inches in diameter (ceramic, stone, or plastic with drainage holes).
- ● Small pebbles or gravel: 2–3 lbs (for drainage layer).
- ● Water plants: 1–2 Water lettuce (Pistia stratiotes) or Frogbit (Limnobium spongia).
- ○ 1–2 Water hyacinth (Eichhornia crassipes) (optional, if legal in your area).
- ● Pollinator-friendly flowers: 1–2 Moss balls (Marimo) or Java moss (for texture).
- ● 1–2 Miniature water lilies (e.g., Nymphaea 'Pygmaea Helvola') or Pondweed (Potamogeton).
- ● Slow-release fertilizer: 1–2 tablets (e.g., Aquarium plant tabs).
- ○ Small pump (optional but helpful): 1–2 watts (for circulation).
- ● Decorative elements: Miniature gnomes, smooth stones, or tiny bridges.
- ● LED solar lights: 1–2 (for evening ambiance).
- ● Fine mesh net: 1 (to keep critters out if needed).
- ● Algae control: 1–2 Hornwort (Ceratophyllum demersum) stems (natural cleaner).
- ● A sunny spot (4+ hours of direct light daily).
- ● Access to water (tap or rainwater; avoid chlorinated water—let it sit 24 hours if treated).
- ● Basic gardening tools: Tweezers (for plant placement), small scoop (for gravel), and a spray bottle (for misting).
- ● Patience! 🌱 Your garden will thrive in 2–4 weeks with minimal upkeep.
Step-by-Step instructions for creating a bowl water garden
Here's how to transform a simple bowl into a thriving, self-sustaining ecosystem that blooms all year.
🪴 Step 1: Choose and Prepare Your Bowl
Select a shallow, wide bowl with a diameter of at least 12 inches—something like a ceramic or plastic planter works perfectly. The key is drainage, so if your bowl doesn't have holes, drill 3-4 small holes in the bottom using a nail or drill bit. Line the bowl with a layer of pebbles or small gravel, filling about 1 inch of the base. This layer prevents soil from clogging the drainage holes while keeping roots oxygenated.
I like to use smooth river rocks because they look natural and stay in place better than irregular stones. Cover the pebbles with a piece of landscape fabric or an old coffee filter—this keeps soil from washing down while still allowing water to drain freely. Press it gently against the sides so it doesn't float up when you add water later.
🌱 Step 2: Layer Soil and Plant Your Water-Loving Plants
Fill the bowl with 2-3 inches of lightweight potting mix, leaving about 1 inch of space between the soil and the rim. For a self-sustaining bowl garden, choose plants that thrive in moist conditions like water hyacinth, miniature water lilies, or floating heart. I always plant a mix of submerged and floating plants to create different levels of interest.
Plant your water hyacinth first by gently placing the roots into the soil, then tuck in your other plants around the edges. Press lightly to secure them, but don't pack the soil too firmly—you want it loose enough for roots to spread easily. Water the soil thoroughly until it's evenly moist but not soggy. This initial watering helps settle the plants and removes any air pockets around the roots.
💧 Step 3: Add Water and Create a Mini Ecosystem
Fill the bowl with water until it reaches just below the rim, leaving about ½ inch of space at the top. Use dechlorinated water if possible—tap water can harm delicate plants, so let it sit out for 24 hours before using or add a water conditioner. Add a small handful of aquarium gravel or smooth stones to the water's surface. These create resting spots for beneficial insects and help break surface tension for better oxygen exchange.
Place your bowl in a spot that gets 4-6 hours of indirect sunlight daily. Too much direct sun can cause algae blooms, while too little light will stunt plant growth. You'll know your light balance is right when the water stays clear and plants grow steadily without yellowing leaves. Watch for tiny bubbles forming around the roots—this is a sign your plants are thriving and actively absorbing nutrients.
☀️ Step 4: Maintain and Encourage Year-Round Blooms
Check the water level weekly and top off with dechlorinated water as needed. Your plants will naturally filter the water, keeping it clean and oxygenated. Remove any yellowed or dead leaves promptly—they can decay and cloud the water. I like to use a small net or my fingers to gently pluck them away, being careful not to disturb the roots.
Every 4-6 weeks, add a pinch of balanced aquatic plant fertilizer to the water. This gives your plants the nutrients they need to keep blooming. You'll see the difference in just a few days—the leaves will darken slightly, and new buds will form. In cooler months, reduce sunlight exposure slightly to prevent stress, but keep the water temperature above 50°F for best results.
🌿 Step 5: Invite Pollinators and Enjoy Your Oasis
Once your plants are established and blooming, place your bowl garden where you can enjoy it daily. The movement of water and the scent of blooms will naturally attract bees, butterflies, and other pollinators. I often place mine near a patio or window so I can watch the visitors while sipping morning coffee.
To keep your garden thriving, rotate the bowl every 2-3 weeks so all sides get even light exposure. This prevents plants from leaning toward one direction. With proper care, your bowl water garden will continue to bloom and attract wildlife for years—creating a tiny, self-sustaining oasis right on your countertop or patio.
Tips & tricks for perfect bowl water gardens
A few simple tricks will help you create a thriving, low-maintenance water garden that keeps blooming all year.
Drainage is Everything: In Step 1, don't skip the drainage layer—this is what keeps your soil from turning into mud and your roots from rotting. If your bowl has no holes, drill them carefully using a nail or drill bit, but make sure they're small enough to hold the pebbles. I've learned the hard way that skipping this step leads to soggy soil and unhappy plants. The 1-inch layer of pebbles should feel firm but not packed down—think of it like a natural filter system for your garden.
The Right Soil Mix Matters: When you add your 2-3 inches of potting mix in Step 2, choose a lightweight mix specifically formulated for aquatic plants. Regular garden soil gets too dense and compacted when wet. I like to press the soil gently around the roots but avoid packing it down—this prevents air pockets that could suffocate your plants. The goal is to create a loose, airy environment where roots can spread easily without resistance.
Water Quality is Non-Negotiable: The 24-hour dechlorination process in Step 3 is crucial—tap water contains chlorine that can harm delicate aquatic plants. If you forget to let it sit, add a water conditioner designed for aquariums. I've seen gardens fail within days when chlorine-burned plants turn brown and wilt. Also, that ½-inch space at the top prevents spills while allowing oxygen exchange—don't fill it completely, even if it looks tempting!
Light Balance is Key: Finding that perfect 4-6 hours of indirect sunlight in Step 3 can be tricky. Too much direct sun causes algae blooms that cloud your water, while too little makes plants grow leggy. I recommend starting with 4 hours and adjusting based on your plants' response. Watch for tiny bubbles around the roots—this is your sign that photosynthesis is working properly and your plants are happy. In cooler months, keep the water temperature above 50°F to prevent stress, especially if your garden is indoors.
Pro Tips for Bowl Water Garden
- A few simple tricks will help you create a thriving, low-maintenance water garden that keeps blooming all year.
- Drainage is Everything: In Step 1, don't skip the drainage layer—this is what keeps your soil from turning into mud and your roots from rotting.
- The Right Soil Mix Matters: When you add your 2-3 inches of potting mix in Step 2, choose a lightweight mix specifically formulated for aquatic plants.
Frequently asked questions
Got questions about creating your own bowl water garden?
You’re not alone! Here are answers to the most common queries to help you get started with confidence.
How deep should the water bowl be for a bowl water garden?
Aim for 3–5 inches of water depth. This depth keeps roots hydrated while preventing stagnation. Shallower bowls (2–3 inches) work for delicate plants like Lemna minor (duckweed), while deeper bowls (4–5 inches) support rooted plants like Hydrocotyle or Water Hyacinth. Always ensure the bowl has drainage holes or a spillway to avoid over-saturation.
How often do I need to add water to a bowl water garden?
Check water levels every 2–3 days, especially in hot or dry climates. Evaporation and plant uptake can reduce water quickly. Top off with dechlorinated water (let tap water sit 24 hours or use a water conditioner) to avoid harming aquatic life. Rainwater is ideal if untreated by chemicals!
Will a bowl water garden attract mosquitoes?
Not if maintained properly! Mosquitoes need stagnant, still water to breed. To prevent them:
- Add floating plants (like water lettuce or frogbit) to shade the water and block egg-laying.
- Install a small solar-powered fountain or air stone to create movement.
- Empty and scrub the bowl weekly during peak mosquito season (spring/summer).
Can I use a bowl water garden indoors?
Indoor bowl gardens thrive near bright, indirect sunlight (east or north-facing windows are ideal). Use a shallow, wide bowl (like a ceramic or glass dish) for compact plants such as Java Moss or Water Sprite. Ensure proper ventilation and avoid drafts. Just avoid direct sunlight, which can overheat the water.
What do I do if my bowl water garden turns cloudy or smells bad?
Cloudiness or odors usually signal algae overgrowth or decaying matter. Fix it with these steps:
- Reduce sunlight by moving the bowl to a shadier spot or adding a floating cover.
- Add beneficial bacteria (like Bacillus subtilis) or a pinch of barley straw to inhibit algae.
- Prune dead plants and remove debris immediately.
- If needed, drain and refresh 50% of the water with dechlorinated water.
Pro Tip:
Start small! A 12–16 inch bowl is perfect for beginners. It’s easier to manage water levels, temperature, and plant growth. Once you’ve mastered the basics, expand to larger setups for bigger blooms and biodiversity. Happy gardening!
Wrapping up and next steps
A bowl water garden isn’t just a stunning addition to your outdoor space—it’s a self-sustaining ecosystem that nourishes pollinators, conserves water, and brings year-round beauty to your doorstep. 🌸 With the right materials, a little creativity, and ongoing care, you’ve got everything you need to cultivate a thriving, low-maintenance oasis that even beginners can master.
Ready to transform your yard into a pollinator paradise? Start small—pick a sunny spot, gather your supplies, and dive in!
Whether you’re a gardening pro or a curious newbie, every drop of water and every planted bloom makes a difference. Your future garden (and its tiny visitors) will thank you! 🐝✨