
Tools
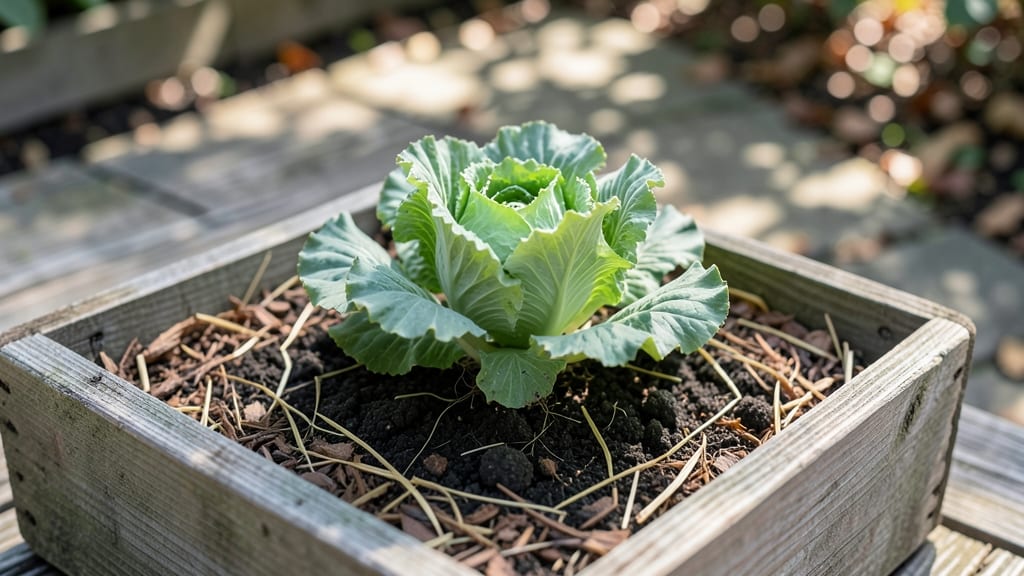
A basic garden box transforms even the smallest yard into a thriving growing space—no digging, no back pain, just rows of plants at perfect height. ✨ I built my first one after watching my neighbor’s herbs grow twice as fast in their elevated beds, and now I swear by them for everything from lettuce to strawberries.
Start with untreated wood (cedar lasts longest) or sturdy plastic, keeping dimensions simple: 4 feet long by 2 feet wide fits most gardening tasks perfectly while saving space.
Add 2-inch drainage holes at the bottom to prevent soggy roots, and line the base with landscape fabric if your soil is heavy. The key is 12–18 inches deep—enough for root crops but light enough to move if needed.
Fill it with a mix of 60% topsoil, 30% compost, and 10% perlite for fluffy, fertile soil that holds moisture without drowning plants.
Place it where it gets 6+ hours of sun daily, and you’ll harvest tomatoes, peppers, and greens all season long—no weeding, no bending, just easy access to fresh food.
Pro tip: Add a trellis to one side for vining plants like cucumbers, and keep the box 2–3 feet from the house for airflow. Whether you’re growing flowers, herbs, or veggies, this setup works for balconies, patios, or backyard corners—no fancy tools required.
📚 In This Guide
- What you need
- Instructions
- Tips and common mistakes
- Wrapping up and next steps
What you need
- ● Lumber or pre-cut boards: 2x6 or 2x8 (cedar or redwood recommended for durability). You’ll need 4 pieces, each 8–12 feet long (adjust based on your box dimensions).
- ● Corner brackets or screws: Galvanized or stainless steel (16–20 pieces, depending on box size).
- ● Landscape fabric or hardware cloth: A roll to line the bottom and prevent weeds/rodents (cut to fit your box dimensions).
- ● Soil mix: High-quality garden soil or a blend of topsoil, compost, and perlite (about 2–3 cubic feet per square foot of bed).
- ○ Optional liner: Heavy-duty plastic sheeting (if avoiding direct soil contact with wood).
- ● Tape measure
- ● Circular saw or handsaw
- ● Drill/driver with screws or nails
- ● Level (to ensure your box stays straight!)
- ● Staple gun (for securing landscape fabric)
- ● Work gloves and safety glasses
- ● Wood preservative: To extend the life of your lumber.
- ● Drainage holes: Pre-drill if using a liner or in wet climates.
- ● Edging stones or pavers: For a polished look around the base.
- ● Drip irrigation kit: For hassle-free watering.
Step-by-step instructions for building a basic garden box
Here's how to create a simple, functional raised bed that fits any compact space.
🪴 Step 1: Choose and Prepare Your Location
Pick a flat, level spot with at least 6 hours of sunlight daily. Avoid low-lying areas where water pools—raised beds need good drainage. I like to place mine near a water source so I can easily fill containers without hauling heavy watering cans. Clear the area of weeds, rocks, or debris, and mark the dimensions with stakes and string.
For a 4-foot by 8-foot bed (the ideal size for easy reach from all sides), use the string to create a perfect rectangle. This size works perfectly for four gardeners working from opposite sides. If space is tighter, a 4-foot by 4-foot square is still manageable and reduces waste.
🪴 Step 2: Build the Frame Using Untreated Lumber
Cut 2-by-6 boards into lengths of 4 feet, 4 feet, 8 feet, and 8 feet (or adjust for your chosen dimensions). Assemble the frame by screwing the corners together with 3-inch deck screws, pre-drilling holes to prevent splitting. I like to use galvanized screws—they resist rust and last longer in outdoor conditions.
For extra stability, add corner braces or a diagonal support between opposite corners. This keeps the bed square and prevents wobbling when filled. Once assembled, lay the frame in your marked location and check for level using a carpenter’s level. Adjust the legs or add small shims under the frame if needed to ensure it sits perfectly flat.
🌱 Step 3: Line the Bottom for Drainage and Weed Control
Lay down a layer of landscape fabric inside the frame to block weeds from creeping up through the soil. This step is non-negotiable—weeds will invade your bed if you skip it. Cut the fabric slightly larger than the bed’s interior and secure it with staples or rocks to keep it in place.
Next, add a 2-inch layer of gravel or small rocks over the fabric. This creates drainage and prevents soil from washing out the bottom. I use crushed gravel because it’s cheap and easy to find. Avoid using large rocks—they can create air pockets and uneven moisture distribution.
🌿 Step 4: Fill With the Right Soil Mix
Fill the bed with a mix of equal parts topsoil, compost, and perlite or coarse sand. This blend ensures good drainage while retaining moisture. I like to add a 1-inch layer of compost at the bottom to kickstart nutrient-rich growth. Avoid garden soil from your yard—it’s often too dense and may contain weeds or pests.
Fill the bed to within 1-2 inches of the top edge. This gives you room to add more soil or mulch later without spilling over the sides. After filling, water the soil thoroughly to settle it. You’ll see the mix compact slightly—this is normal. If the soil shrinks significantly, add a little more to bring it back up to the desired level.
✂️ Step 5: Plant and Maintain Your Garden Box
Start by planting your chosen vegetables, herbs, or flowers. Follow spacing guidelines on seed packets or plant tags—crowding leads to competition for nutrients and light. I like to plant taller crops like tomatoes or peppers on the north side of the bed so they don’t shade smaller plants.
Once planted, add a 1-2 inch layer of mulch around plants to retain moisture and suppress weeds. Water deeply in the morning to encourage strong root growth. Avoid overwatering—your bed should drain within a few hours. Check the soil moisture by sticking your finger 1 inch deep; if it feels dry, it’s time to water again.
Tips & tricks for building a basic garden box
Here's what I've learned after building—and fixing—several raised beds over the years.
Location is Everything: That 6 hours of sunlight is non-negotiable for most vegetables. I once placed a bed in partial shade and struggled with leggy tomatoes. Test your spot by observing sunlight patterns for a full day before building. Morning sun is especially important for moisture retention in the soil.
Frame Stability Secret: When assembling your 4-foot by 8-foot frame, don't skip the diagonal support between corners. I've seen many beds wobble when filled, especially on uneven ground. Use a carpenter's level to check all four corners before adding soil—this ensures your bed stays perfectly level for even water distribution.
Soil Mix Pro Tip: For that equal parts topsoil, compost, and perlite mix, I recommend screening your topsoil first to remove rocks and debris. The 1-inch layer of compost at the bottom creates a nutrient-rich foundation that roots will love. If you're using perlite, add it last—it's lightweight and can get blown away in windy conditions.
Planting Strategy: When arranging your plants in Step 5, think vertically! Use trellises for vining plants like cucumbers or beans to maximize growing space. I place my trellises along the north side so they don't block sunlight for shorter plants. This technique lets you grow more in your compact space without sacrificing yield.
Pro Tips for Basic Garden Box
- Here's what I've learned after building—and fixing—several raised beds over the years.
- Location is Everything: That 6 hours of sunlight is non-negotiable for most vegetables.
- Frame Stability Secret: When assembling your 4-foot by 8-foot frame, don't skip the diagonal support between corners.
Frequently asked questions
Got questions about setting up and maintaining your basic garden box? You’re not alone!
Here are answers to the most common queries to help you grow with confidence—whether you're a first-timer or a seasoned gardener refining your setup.
What’s the best soil mix for a basic garden box?
A balanced mix of 60% topsoil, 30% compost, and 10% perlite or vermiculite works wonders. Avoid heavy clay or pure garden soil—it drains poorly and compacts over time. For veggies, add a handful of worm castings for extra nutrients!
How long does it take for a garden box to be ready for planting?
If you’re starting from scratch, allow 2–4 weeks for soil prep. Fill the box, water it thoroughly, and let it settle. For faster results, pre-mix soil components in a wheelbarrow before filling. Pro tip: Test soil pH (aim for 6.0–7.0) and amend if needed—lime raises pH, sulfur lowers it.
Can I reuse a basic garden box year after year?
With proper care, a wooden box can last 5–10+ years. Line the bottom with landscape fabric to block weeds and critters, and refresh soil every 1–2 years. Rotate crops annually to prevent disease. For longevity, treat wood with non-toxic sealant (like linseed oil) to ward off rot.
What are some easy-to-grow plants for beginners in a garden box?
Start with low-maintenance champions like:
- Leafy greens (lettuce, spinach, kale)—harvest in weeks!
- Herbs (basil, parsley, chives)—thrive in partial shade.
- Radishes (ready in 30 days)—great for quick wins.
- Cherry tomatoes (compact varieties like ‘Tiny Tim’).
How do I keep pests out of my garden box without chemicals?
Prevention is key! Use row covers for early planting, plant marigolds or nasturtiums as pest deterrents, and handpick bugs like aphids. For slugs, set up beer traps (bury a cup filled with beer—slugs crawl in and drown). Healthy soil = happy plants = fewer pests!
Wrapping up and next steps
Building a basic garden box is your gateway to fresh, homegrown produce—no sprawling yard required! Whether you’re a beginner or tightening your green thumb, this raised bed blueprint proves that small spaces can yield big harvests.
Start with your new garden box, experiment with easy crops, and watch your confidence (and herbs!) grow.
Ready to dive deeper? Next steps:
- 🌱 Pick your first plants—herbs, lettuce, or cherry tomatoes are foolproof starters!
- 📖 Grab a seed-starting guide to master timing and care.
- 🤝 Join a local gardening group for tips and inspiration.